Machine knitting a round shape with a short row

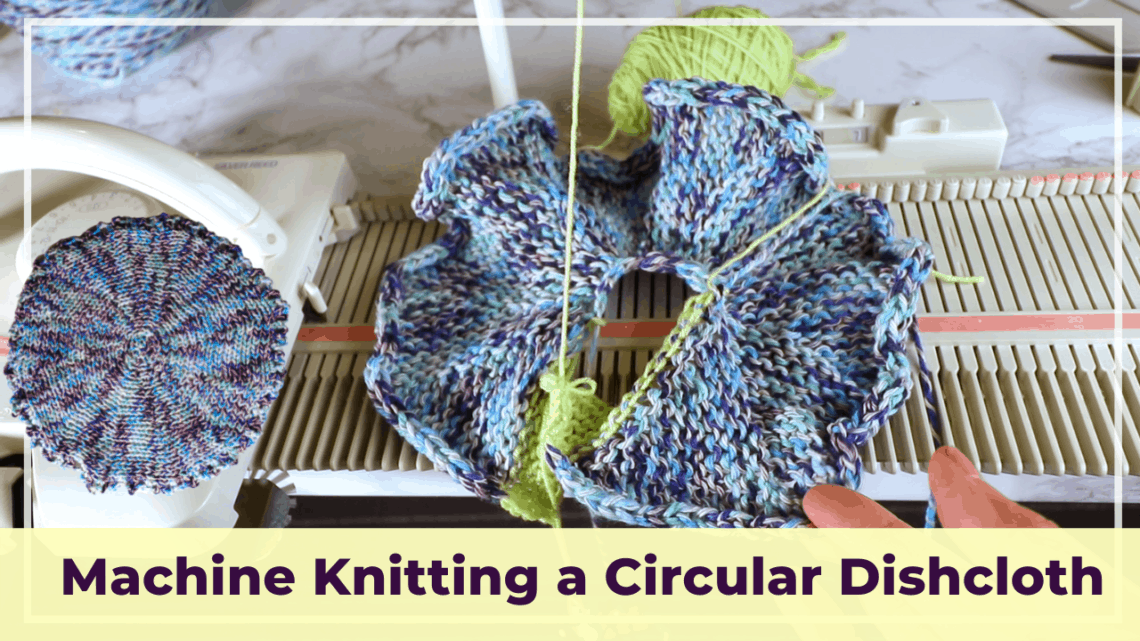
Machine knitting a circular or round shape can be simple with a short row. A small circle can be a coaster, dishcloth, or potholder. A larger circle can be a baby or throw blanket. With a simple short row, it can be done easily on an LK150 knitting machine (or any metal bed machine).
Watch our YouTube video below for the tutorial of machine knitting a circle (dishcloth) on an LK150 machine.
Video tutorial for machine knitting a circle with short row
How to machine knit a circular or round shape
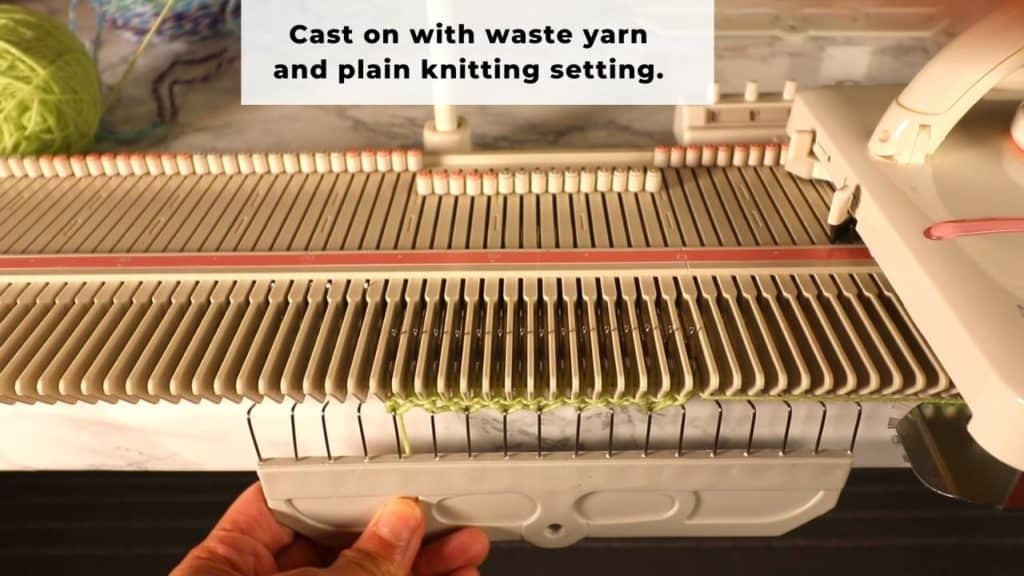
We are using an LK150 knitting machine for this sample. Select yarn and proper tension.
I pick 15 stitches. This will be the radius of the circle. You can change the number based on how big you want your circle to be.
Cast on with a waste yarn first. Hang some weight, and knit a few rows of plain stockinette stitches.
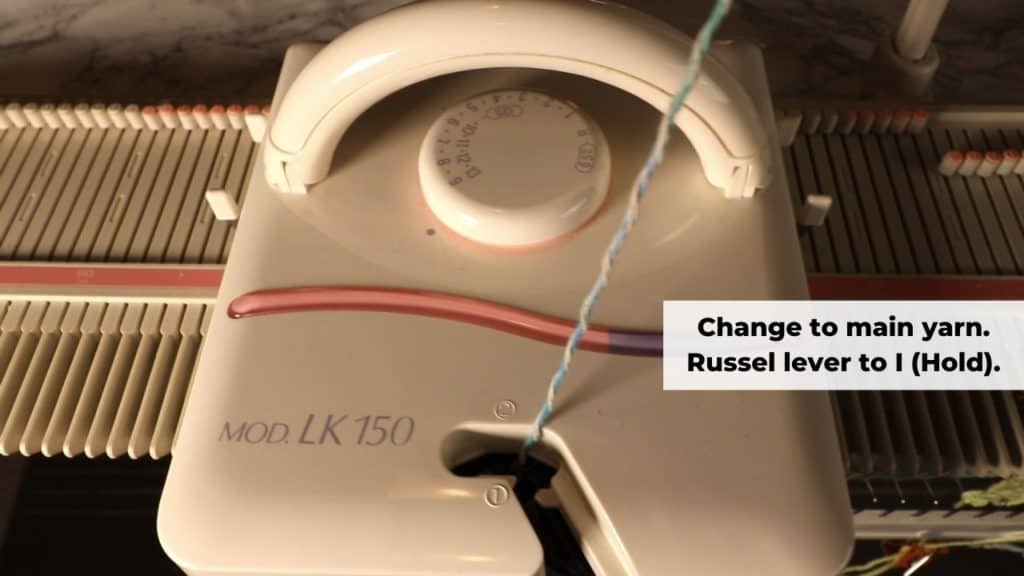
Change to main yarn. Change the Russell lever to 1 for the short row. That means the needles in the holding position will not be knitted back.
Starting the first section of the short row
Now we are ready to short row. I pick the right side for increased rows, so I always start with the right side for short rows. You can pick the left side too. Then, every section will start with the left side needles.
Start by pulling the needle all the way out to the holding position. Russell lever is on 1 now.
Knit one row.
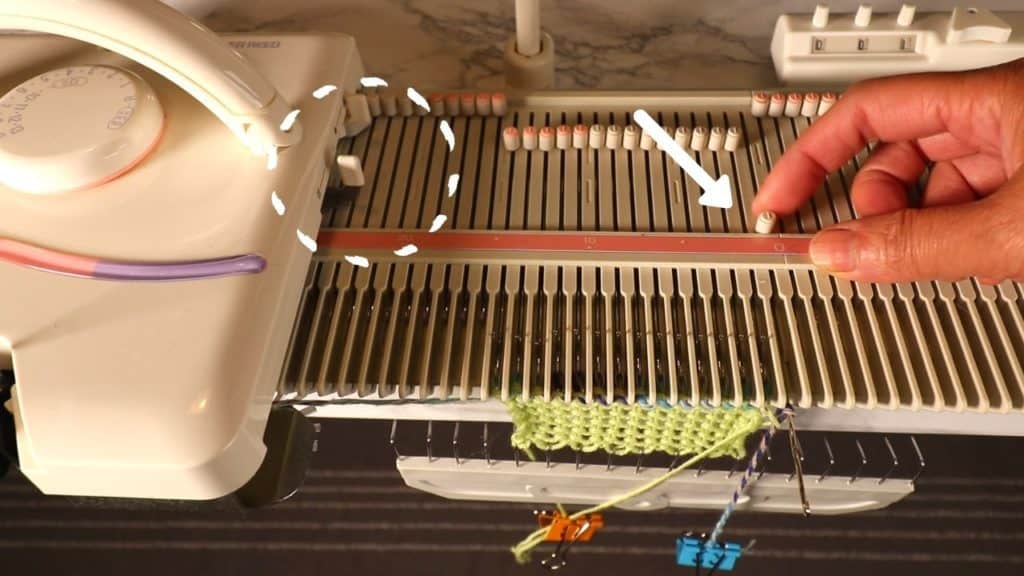
Now pull the second needle on the right all the way out, knit one row.
Pull the third needle from the right out, knit one row.
Continue this way until the last needle.
Make sure there is enough weight between the holding needles and the working needles. A short row creates a lot of extra fabric, so we need extra weight. I like to hold down the fabric, so there is more control of the weight.

When there is only one needle left, change the Russell lever back to II for plain knitting, and knit 1 row.
Now the first section is done, we can repeat the whole short row process for a total of 12 sections.
For each section, remember to change the Russell lever to I and start pulling out needles from the right side.
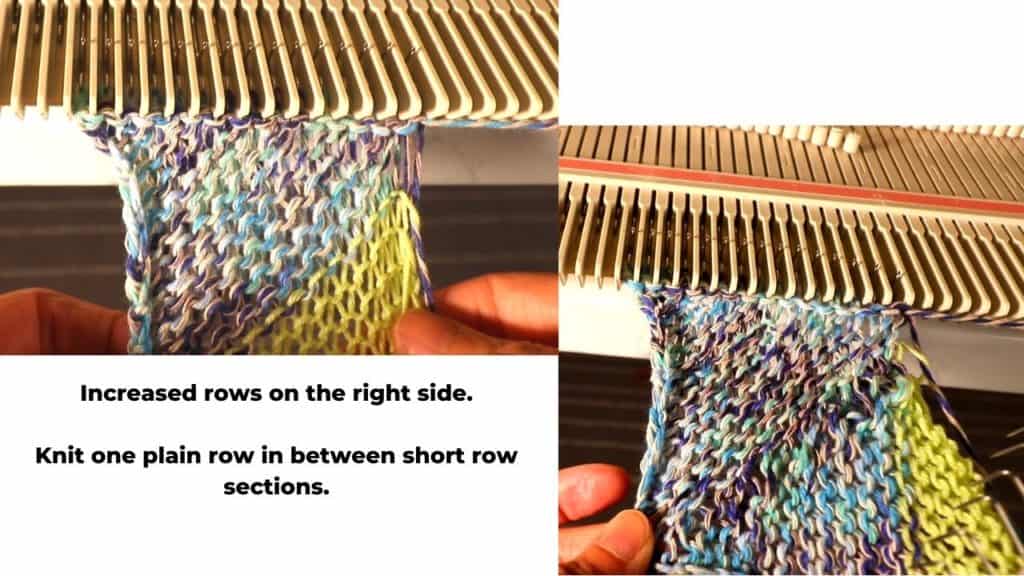
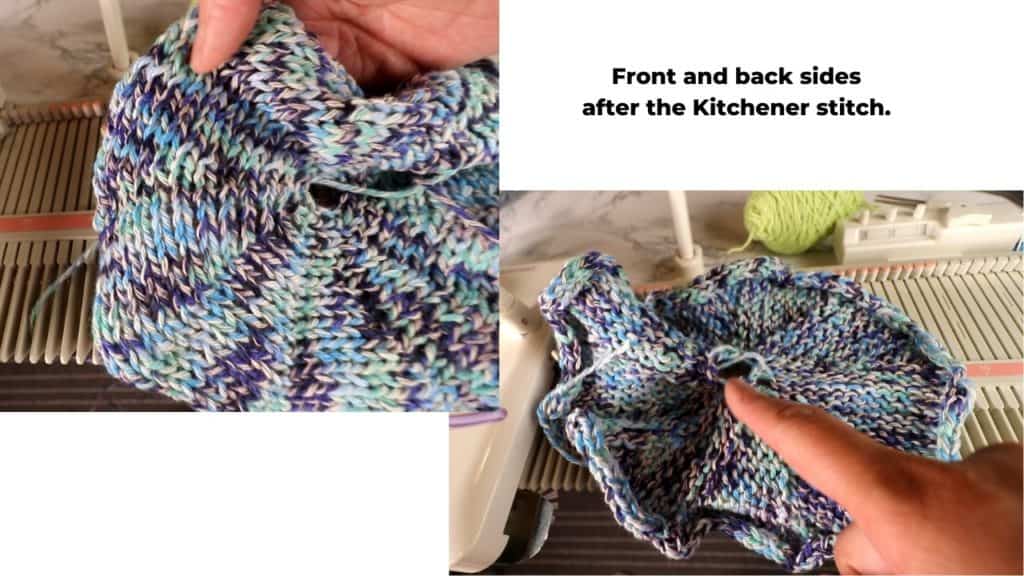
The below right picture is what it looks like after the 12 sections of the short row.

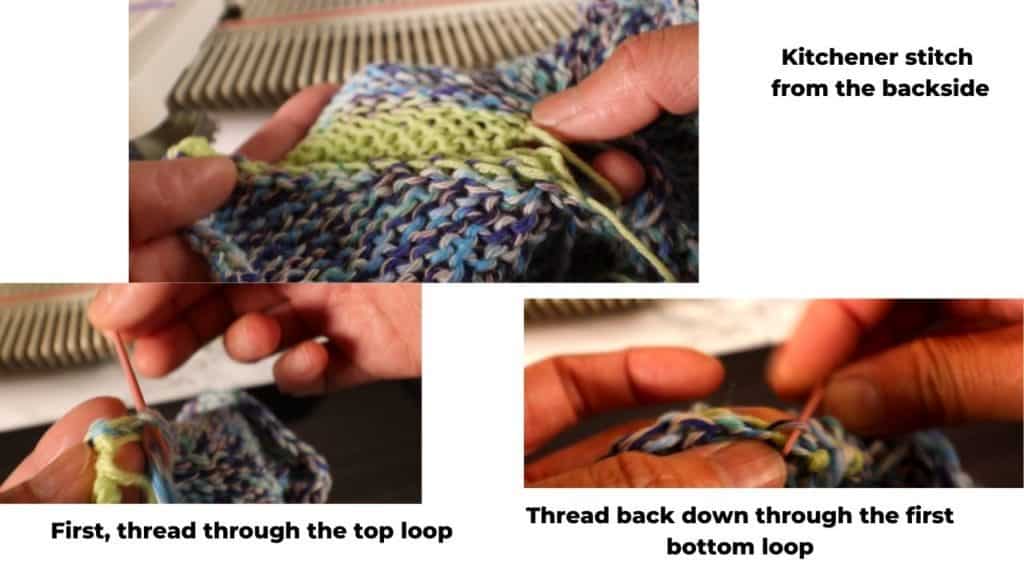
Kitchener stitch
Now we just need to seam up the ends to complete the circle. The best way is to do a Kitchener stitch.
An easier way to do the Kitchener stitch is through the backside.
I have a yarn tail coming from the lower side near the center of the circle. First, thread the yarn up through the first stitch on the top right.
Then, thread down back to the first stitch on the bottom right.
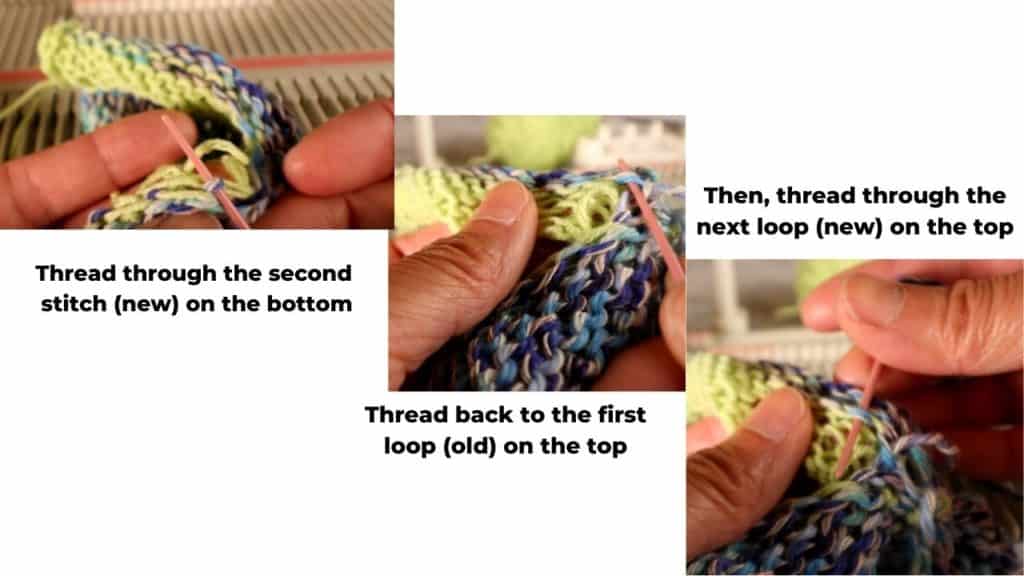
Now thread up the second stitch (new stitch) from the bottom right.
Back to the first stitch on the top right. (old stitch)
Next, start threading the second stitch on the top right. (new stitch)
Keep repeating the old stitch and new stitch on both sides. Each stitch should be worked twice.
After the Kitchener stitch, close the center hole by weaving the yarn tail.
Crocheted edge
You can finish the edge any method you like. It can reduce the curl and add interest and detail.
I add a simple crochet edge.
Start by chain 3 stitches, and single crochet through the second stitch (leaving one stitch in between).
Just keep repeating that. Chain 3 stitches again and single crochet through the second stitch.

Finished circle. When using pure cotton yarn, this can be a good dishcloth or washcloth. This project can be done very quickly if you need a quick handmade present.

Recent Posts
- How to machine knit a heart shape on an LK150

- Machine knitting a loop stitch for big texture

- Machine knitting a corner-to-corner, diagonal dishcloth

- Machine knitting a buttonhole band on an LK150

- Tuck stitch blanket on an LK150 – Part 1
- No curl edge with seed, garter, ribbing, or cable stitches
- Full-fashioned decrease, Garter Bar increases or decreases in the middle of a row
- How to machine knit a Chevron Lace Hem
- Machine knitting increases – the full-fashioned increase and double e-wrap
- Picot hem with a scalloped edge and eyelets on an LK150 knitting machine

- The loop through loop bind-off and the sewing bind-off

- The latch tool bind-off and around the gate peg cast-off


You May Also Like
How to knit socks on a bulky knitting machine with a ribber
Machine knit a 2-color mock Brioche stitch without a ribber