
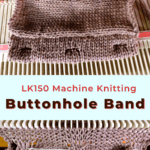
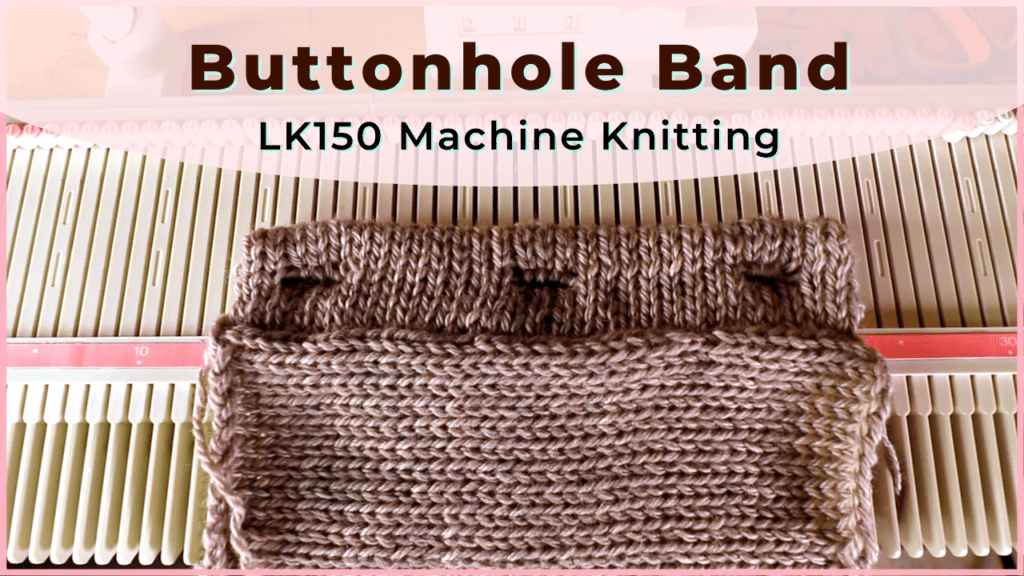
Machine knitting a buttonhole band on an LK150
How to machine knit a basic buttonhole or buttonhole band for the front of a sweater? It takes me a while to even start trying because it looks complicated. Basically, you knit the buttonhole stitches with a ravel cord or waste yarn first. Knit until the other side of buttonhole openings, bind off one row of stitches above the ravel cord, and rehang the stitches below the ravel cord. Then continue knitting. Once you try it, it is actually very easy to knit.
Watch the video tutorial below for machine knitting a buttonhole band on an LK150 machine
Step-by-step tutorial for how to knit a buttonhole band for a sweater
In this sample, I have a stockinette stitch panel of 40 rows. To hang it back to the machine sideways, the rule of thumb is to pick up about 3 out of every 4 stitches. So 40 rows will become about 30 stitches on the machine. I picked up 31 stitches to make the buttonhole pattern more even.
If you want to do a separate buttonhole band or placket, just start cast-on with any preferred cast-on method. You don’t have to hang a panel back to the machine first.
Hang back the sweater’s front panel

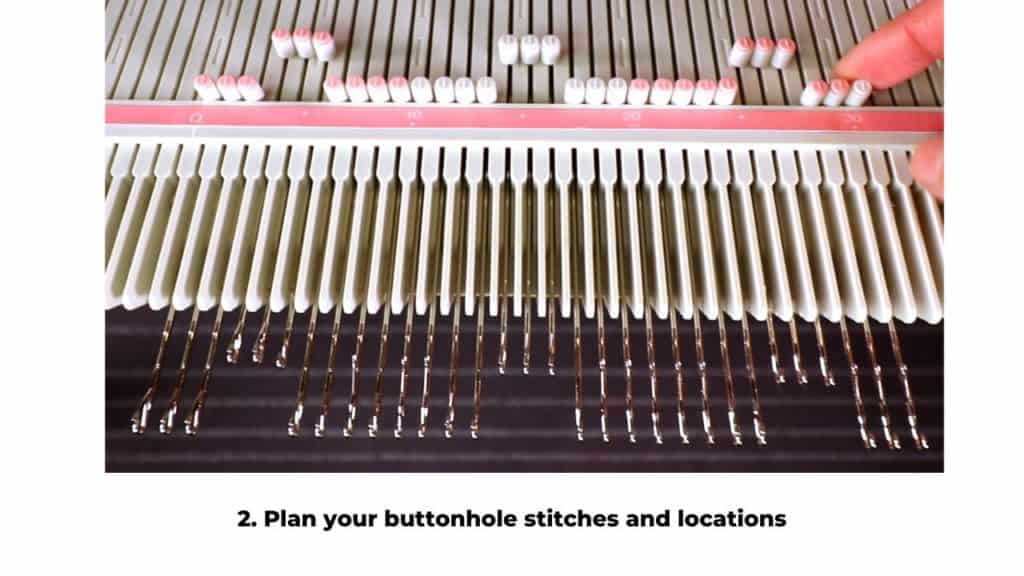
Buttonhole stitches and placement
Depending on the size of the button you choose, you can use more or fewer needles for a bigger or smaller buttonhole.
The top and bottom buttonholes are usually closer to the edge, and the middle ones are evenly spaced.
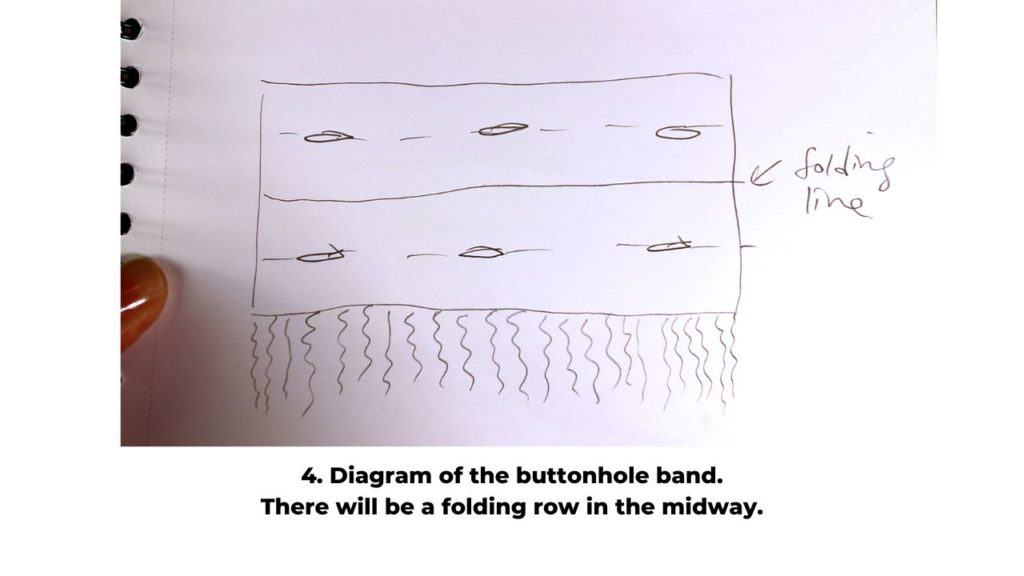
The buttonhole band diagram
The buttonhole band is basically a rectangle folded in half. There will be one or more folding lines in the center. Each side of the buttonhole band can be divided into 2 equal parts too with the buttonholes in the center. So totally there are 4 equal parts.
You can decide how wide you want your buttonhole band to be. Here I use 8 rows wide, so there will be 4 rows above and 4 rows below the buttonhole openings.
Knit back the buttonhole stitches with a ravel cord
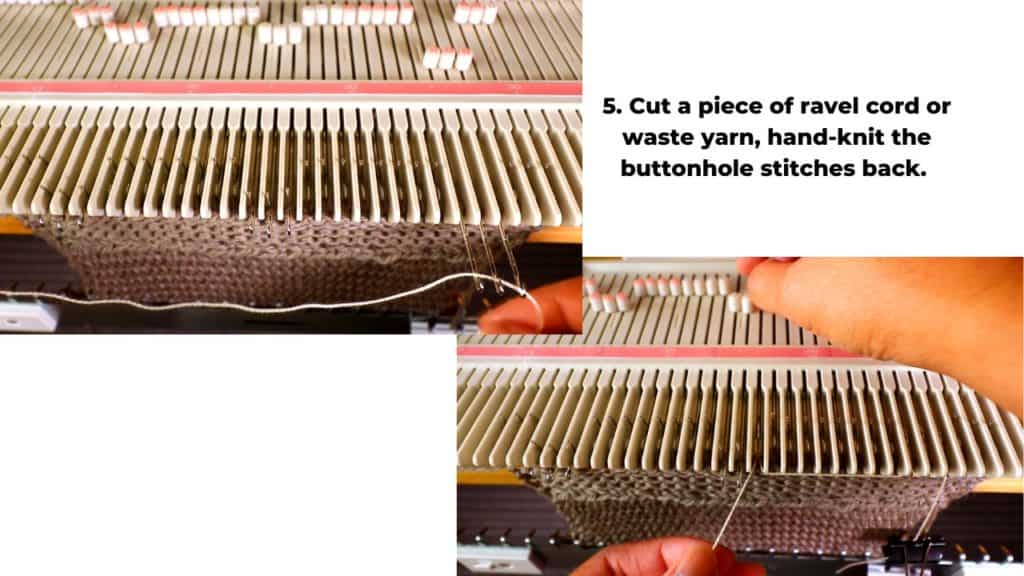
Cut a piece of ravel cord or waste yarn and knit those buttonhole stitches by placing the ravel cord in the latches and pulling the needles back.
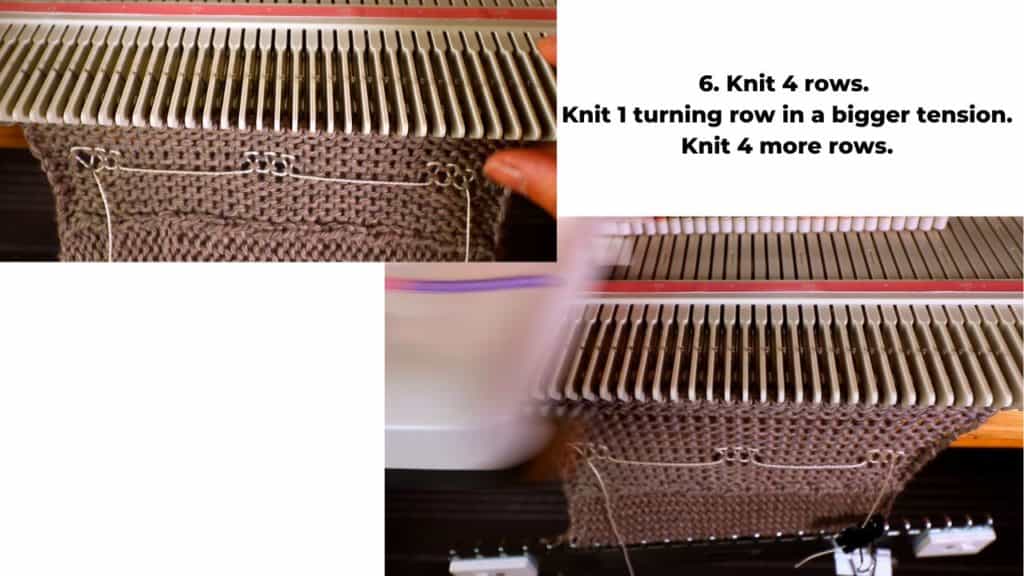
Knit 4 more rows to complete one side.
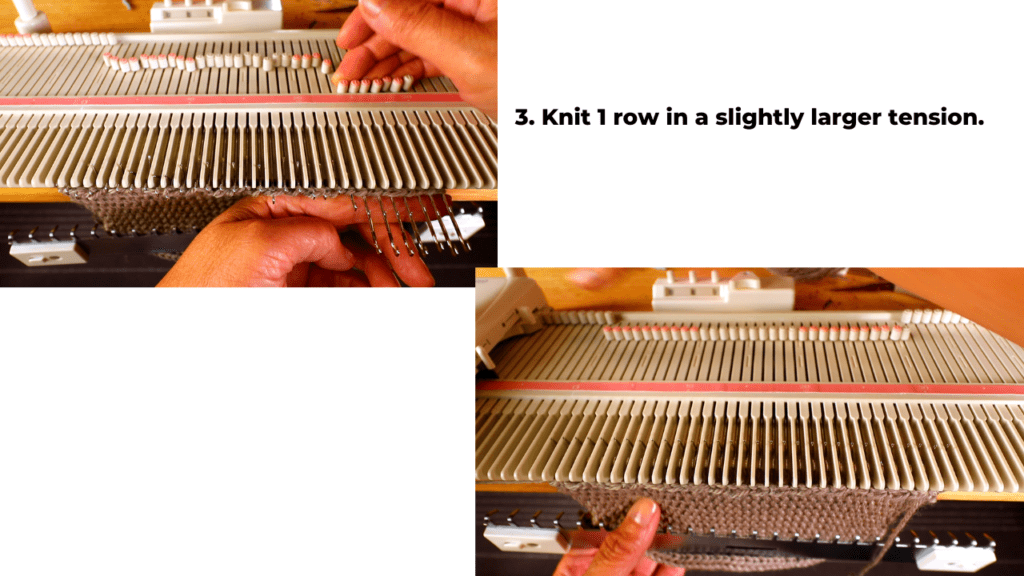
Knit 1 turning row with the biggest tension.
Change the tension back and knit 4 more rows.
Now is time to pick up stitches from the ravel cord.
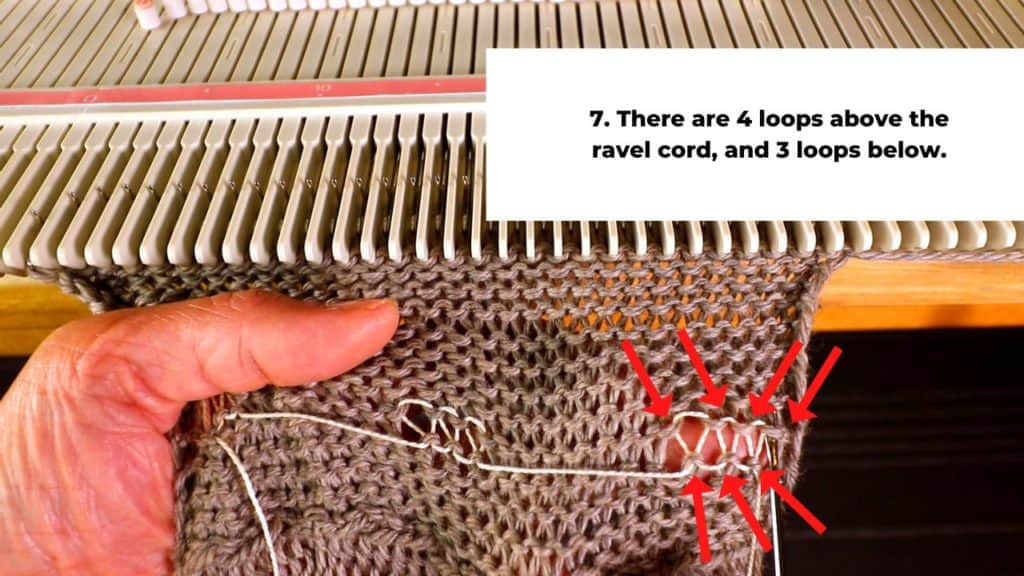
There will be one extra stitch on top of the ravel cord compared to the bottom of the ravel cord.
Pick up the top 4 stitches and hang them on the needles.

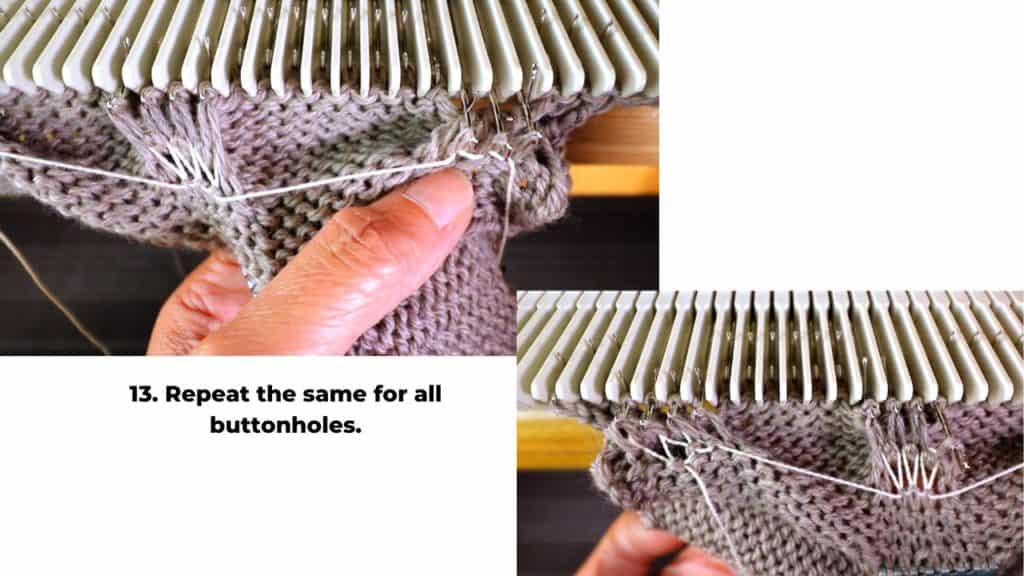
There are 2 stitches on each needle. Start from the right, with one loop in the hook and one behind the hook, knit back the stitch, and transfer to the left needle. One stitch is bound off.
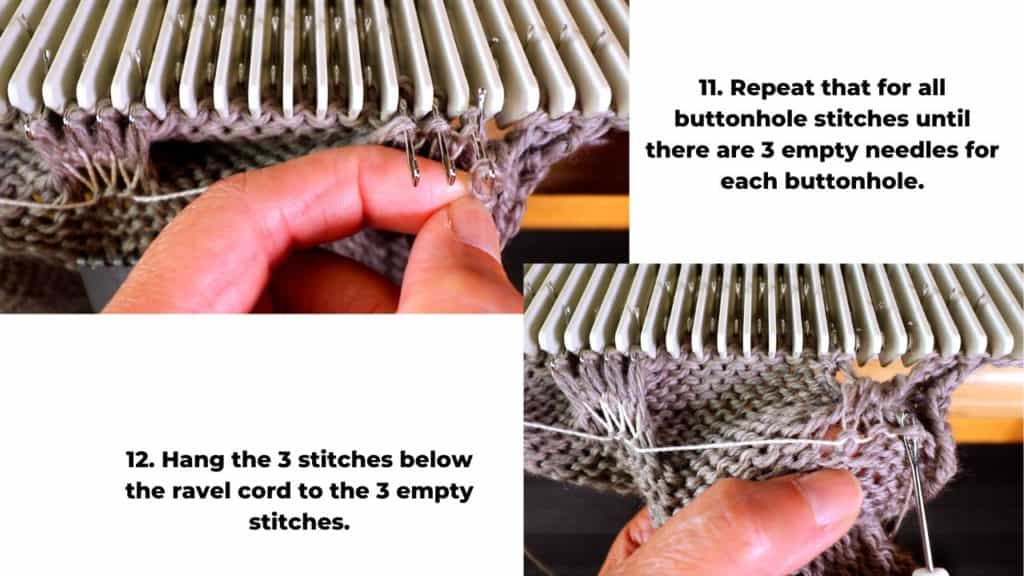
With the new stitch on the hook and 2 stitches behind, knit back and transfer to the left needle. Keep repeating until there are 3 empty needles.
Hang the 3 stitches below the ravel cord to the 3 empty needles. Repeat the same with all the buttonholes.

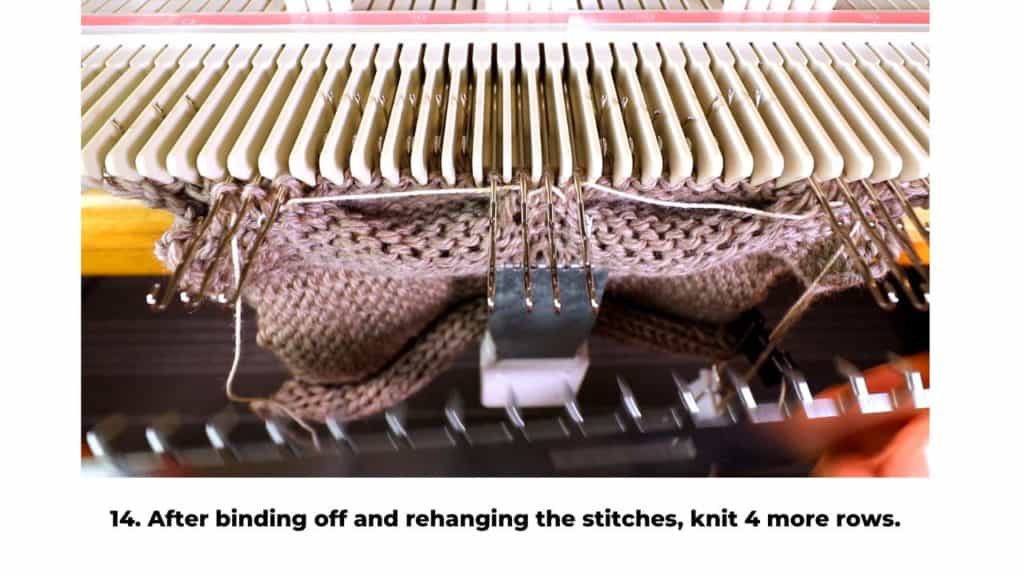
Knit 4 rows to finish the buttonhole band.

Pick up the first row (which looks like chains) and hang back onto the needles. Now there are 2 stitches on every needle.
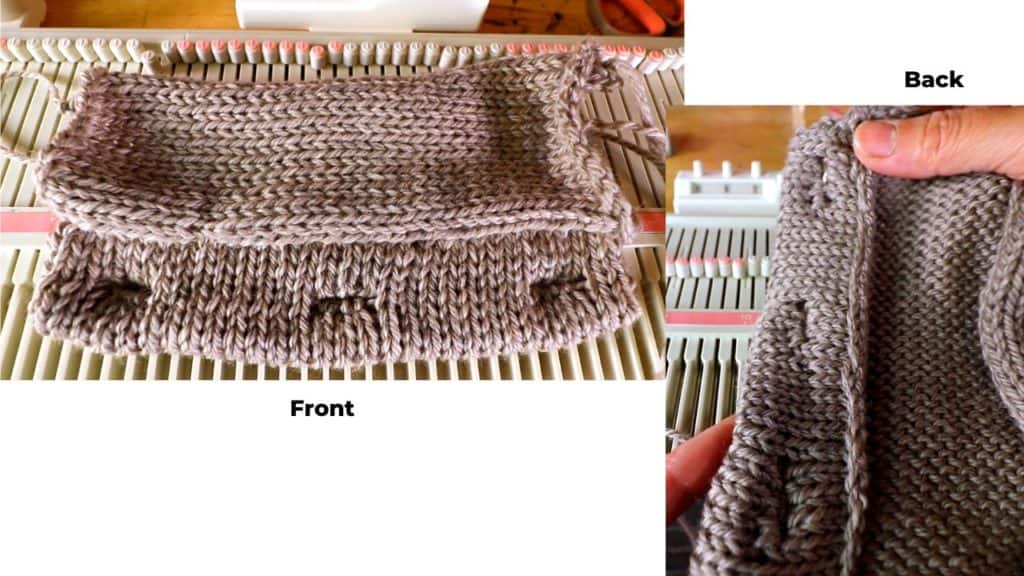
Cut a long piece of yarn and bind off with a yarn needle (sewing bind-off).
Pull out the ravel cord and the buttonhole band is done!


Featured Posts

You May Also Like
Machine knitting a shawl collar with short row

How to add a sew-as-you-go trim or panel on a knitting machine
