
How to machine knit a sweater neckline – Part 1 (drafting chart and partial knitting)
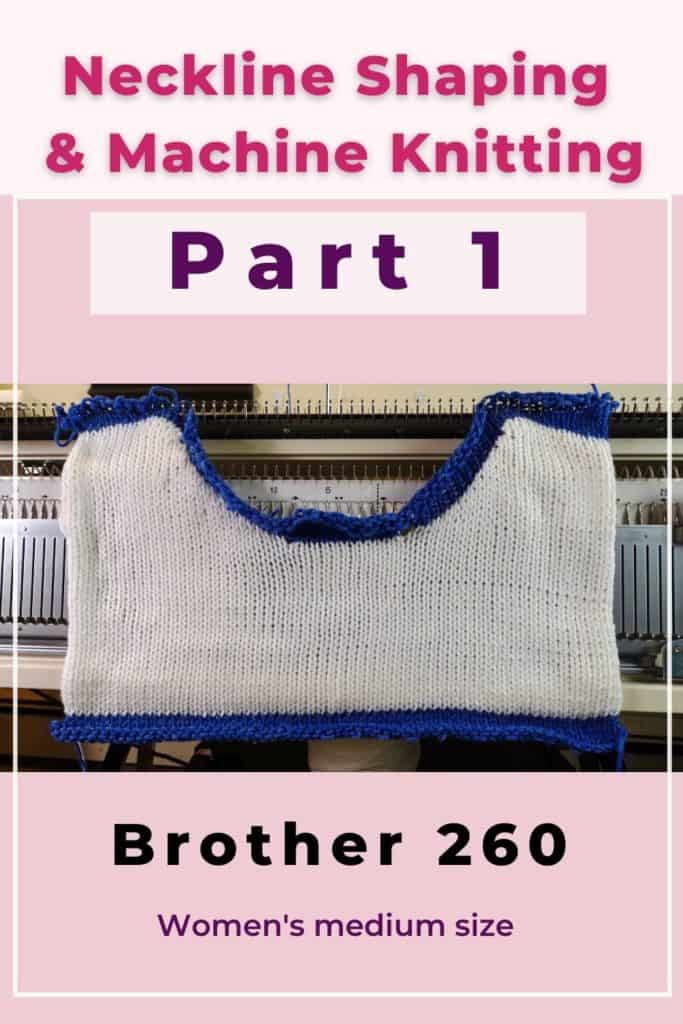
How to machine knit a round sweater neckline – Part 1
Using a knitting machine for the neckline shaping can be confusing. There are neck and shoulder curves, various choices of neck sizes and shapes. Here we are going to start by making our own chart with our own measurements and machine knit a basic round neck with shoulder shaping.
This sample is based on women’s medium size, worsted weight (medium) yarn, and my Brother 260 bulky knitting machine. The same technique will work for most knitting machines. Just need to adjust your own stitch and row count based on your swatch.
Also check out our previous post about machine knitting neckline shaping: Neck and shoulder shaping video.
Watch the video of the machine knitting neckline – Part 1: charting and partial knitting
Material and Machine choice
Yarn:
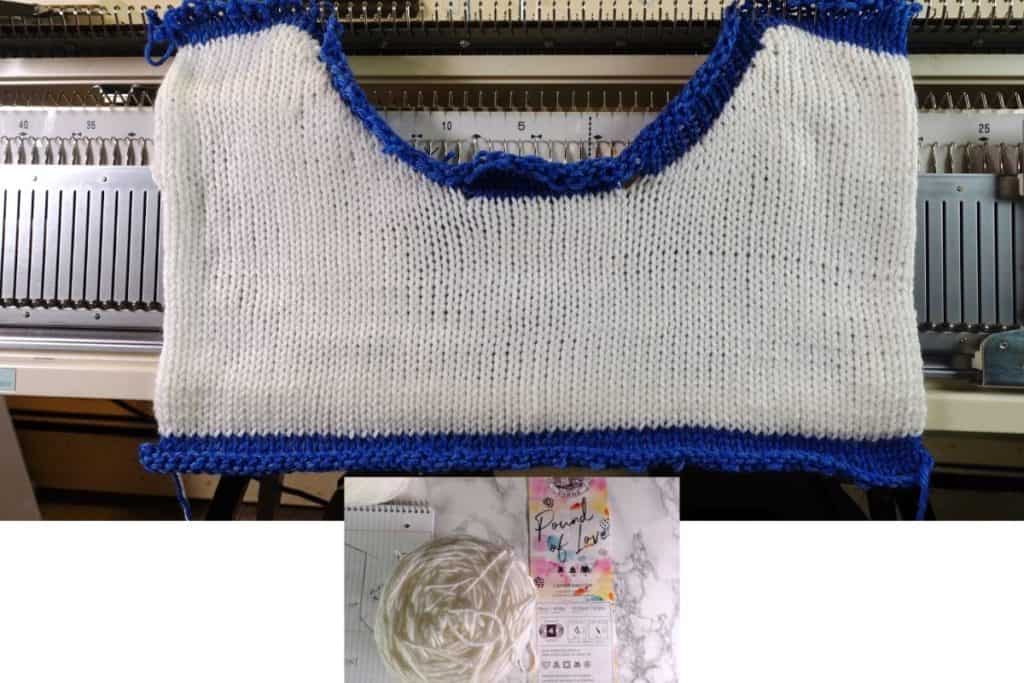
For this sample, I use worsted weight (medium) yarn from Lion Brand Pound of Love.
It is an acrylic yarn and about 1020 yard or 930 m. Nothing fancy but good for practice. First, wind the yarn into cakes so it is easier for machine knitting.
Knitting machine:
I use a Brother 260 bulky knitting machine. A singer machine or LK150 will work fine too.
For the partial knitting or short-rowing technique, you need a “hold” button on the carriage. For the LK150 knitting machine, the equivalent is the Russel lever I. The LK100 carriage does not have this lever, but you can still decrease stitches with a 2 or 3-prong transferring tool for the full fashioned decrease.
Drafting your neckline shaping chart
Making a swatch
Making a swatch is kind of boring, but it is necessary for machine knitting. Try different tension setting and see which one produce the best fabric and still comfortable to knit on the machine.
A bigger swatch can be more accurate in calculating the gauge. Separate each gauge swatch by knitting a row of contrasting yarn in between. Steam blocking or wash first before measuring the stitches and rows for the most accurate gauge.
Just like hand knitting, you can measure 4 x 4 inches (10 x 10 cm) or bigger area first and divide to find the stitch and row count per inch. Write it down.
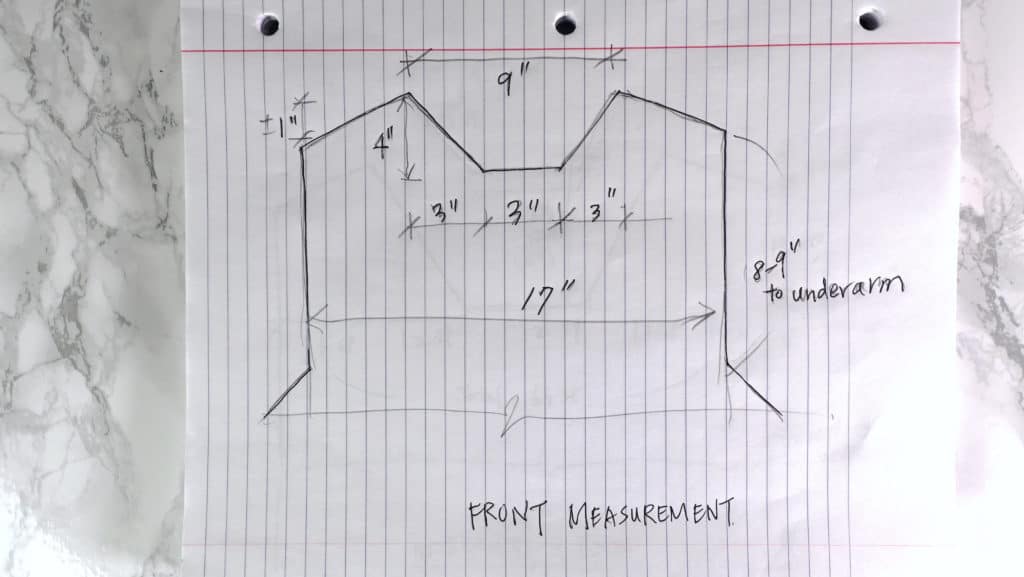
The final measurement (chart 1)
I start with the final measurement of the garment I like. You can refer to your old sweaters and double check with your body measurements so it fits.
Sketch down the measurement of the neck and shoulder dimensions. It does not have to be perfect. See my final measurement chart below.
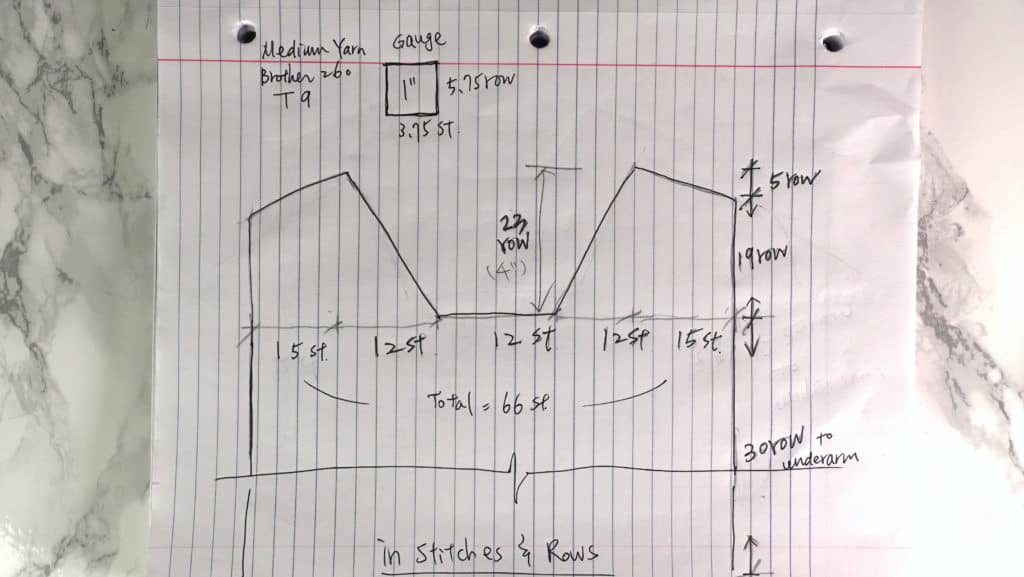
Translate to stitch and row numbers (Chart 2)
From the chart about, calculate the total stitch and row numbers by multiply the inches to your sample gauge.
For example, my gauge is 3.75 stitches and 5.75 rows per inch, so I can multiply 3.75 x 3 inches for the center neckline. You can round up or round down the final number for adjustment. So I have 12 stitches in the center neckline.
For the neck depth, I have 4 inches in the Chart 1. 5.75 row times 4 inches is about 23 rows. So I write down 23 rows.
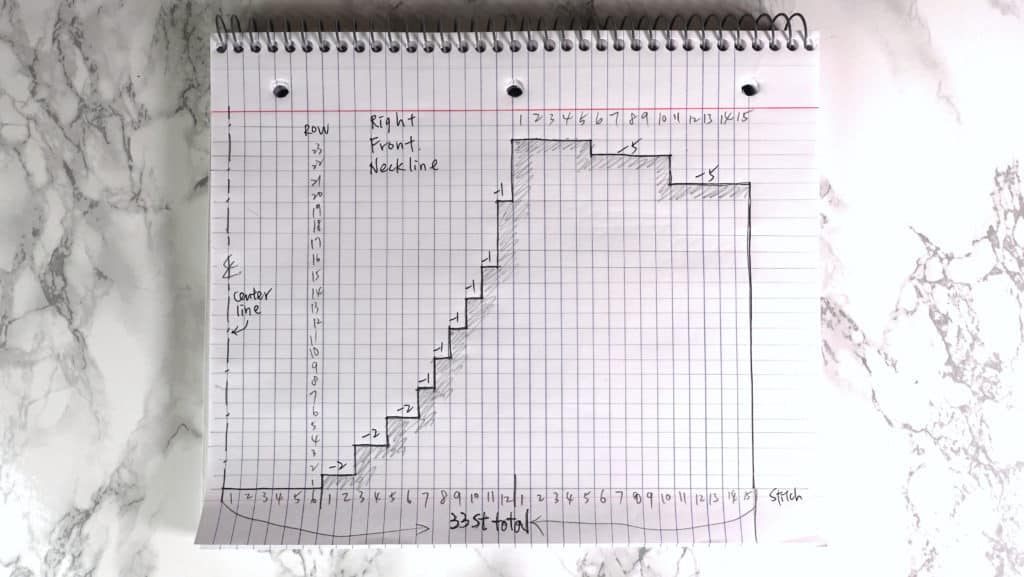
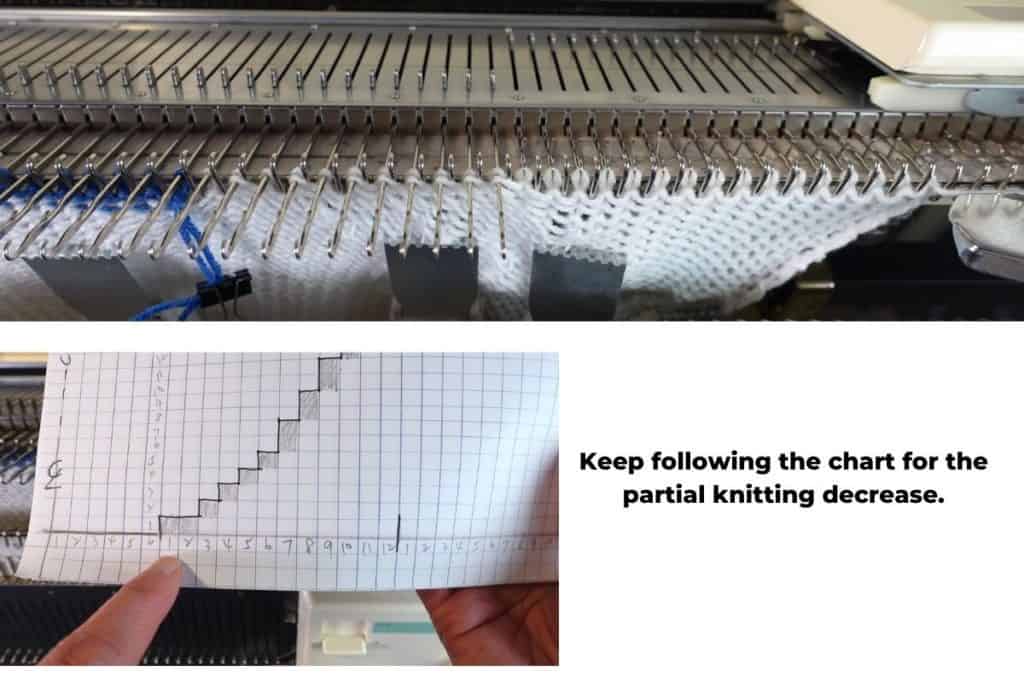
The stitch by stitch graph of the neckline shaping chart (Chart 3)
Prepare the graph paper or any grid paper so the half of the neck/shoulder will fit into the page. You can download free knitting graph paper online, or just draw your own grid paper. It does not have to be perfect. Just for easy reference.
The purpose of this chart is to see the shaping curve stitch by stitch and row by row, so we don’t get confused easily.
I try to avoid 2 continuous decreasing rows so it is easier for the partial knitting (short rows).
It is ok if you make mistakes on the chart, just adjust or take notes when you are knitting. I certainly make mistakes in the first few tries. But once you get it right, you can use the chart in many future projects.
See the third chart below. This is only half of the neck because the other side is just the mirror image. Your decrease does not have to the same as mine. You can make it a shallow curve, or more of a U shape.
Machine knitting the neck and shoulder shaping
Start with waste yarn
Now we are ready to knit on a machine. Start knitting with a few rows of the waste yarn, then change to the main yarn. Set up your main tension according to your swatch, and knit until the bottom of the neckline where the shaping starts. I have 30 rows of plain stockinette stitches before the shaping starts.
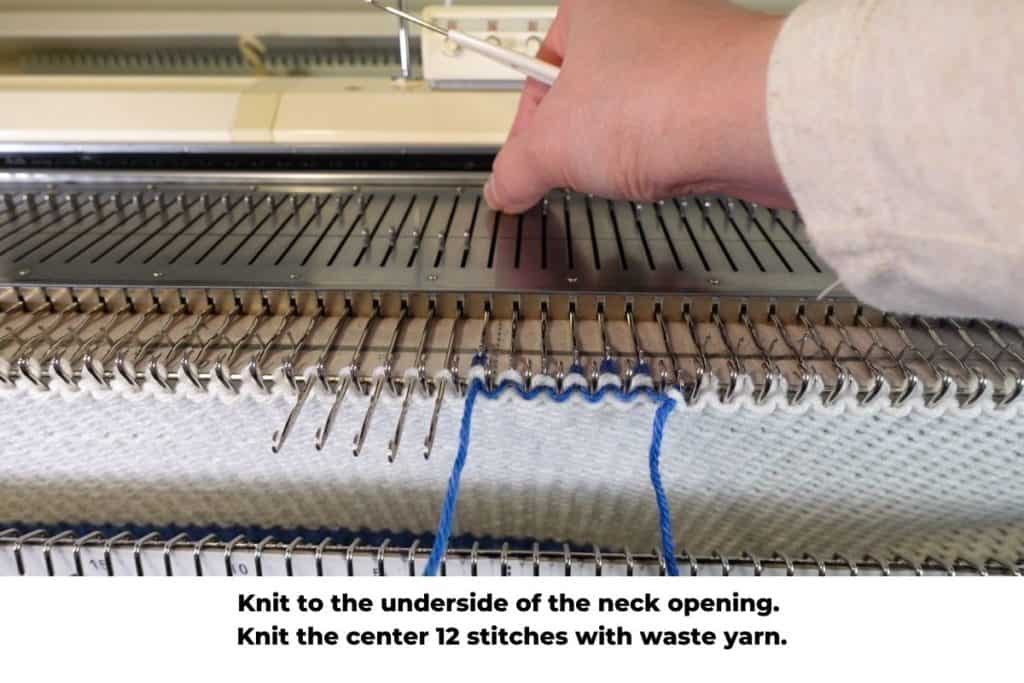
The center 12 stitches
For the 12 center neckline stitches without shaping, we can bind off or just knit with some waste yarn. I cut off a long piece of waste yarn and hand-knit 2 rows on the machine. You can take those stitches off the machine if you prefer, or just leave them there.
Knit one side at a time, and put the other side on hold
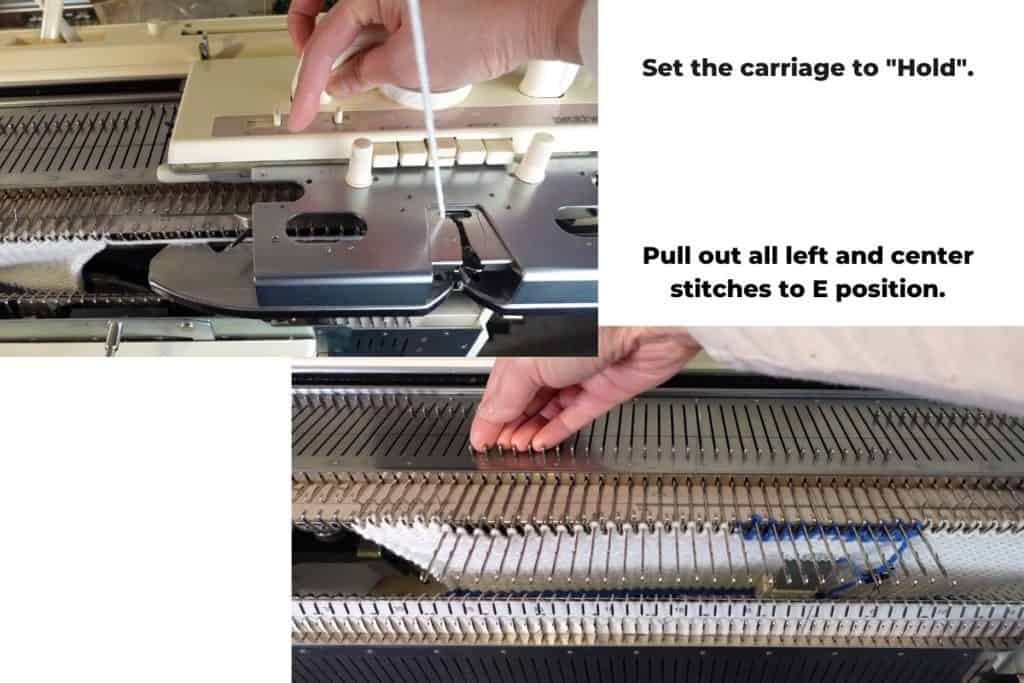
We put one side of the stitches on hold and focus on the other side first. To put the stitches on hold, use the “hold” button on the Brother carriage, or Russel lever I on Singer. Check the manual if not sure.
Now we can start decreasing stitches based on the chart. The easy method is to use the full fashion decrease with a 2 or 3-prong transferring tool and move the stitches in, the decreased stitches will not be right near the outside edge. It creates a nicer finish.
Partial knitting or short-row
The partial knitting is also called short-row knitting. There are many ways to do a partial knitting. I find the easiest way is following the instruction manual.
The carriage is set to the “hold” button. It means the needle will not knit from the E position (the needles are pulled out all the way), but will knit back when it is in the D or B position.
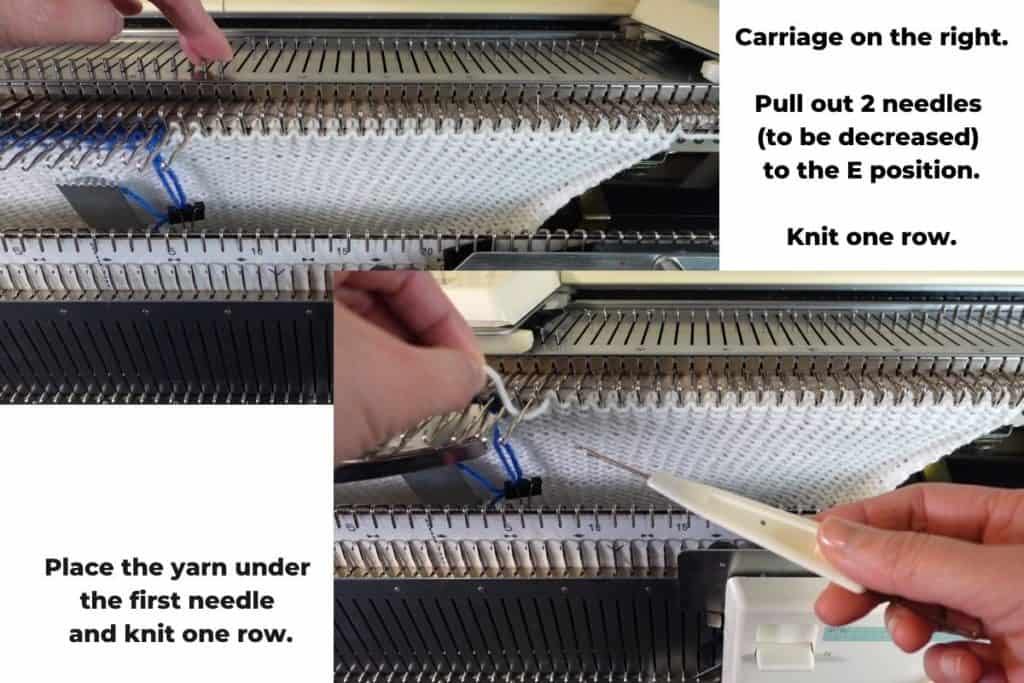
The stitches to be decreased will be on the opposite side of the carriage. You can move the carriage physically, or knit one extra row if it is not on the correct side.
Move the stitches (to be decreased) out all the way to the E position. Refer to your chart. In my chart 3 above, there are 2 stitches to be decreased on the left, so I pull out those 2 stitches to the E position.
Knit one row. (This is row 1, two stitches decreased).
Place the yarn under the first Pulled-out needle to avoid creating holes. Knit one row (This is row 2).
Next row is decrease row again, so repeat the same process. Pull out the needles to be decreased, knit one row, move the yarn under the first needle, and knit one row. Now we are at row 4.
Keep following your chart for all neckline partial knitting, until the shoulder decrease starts.
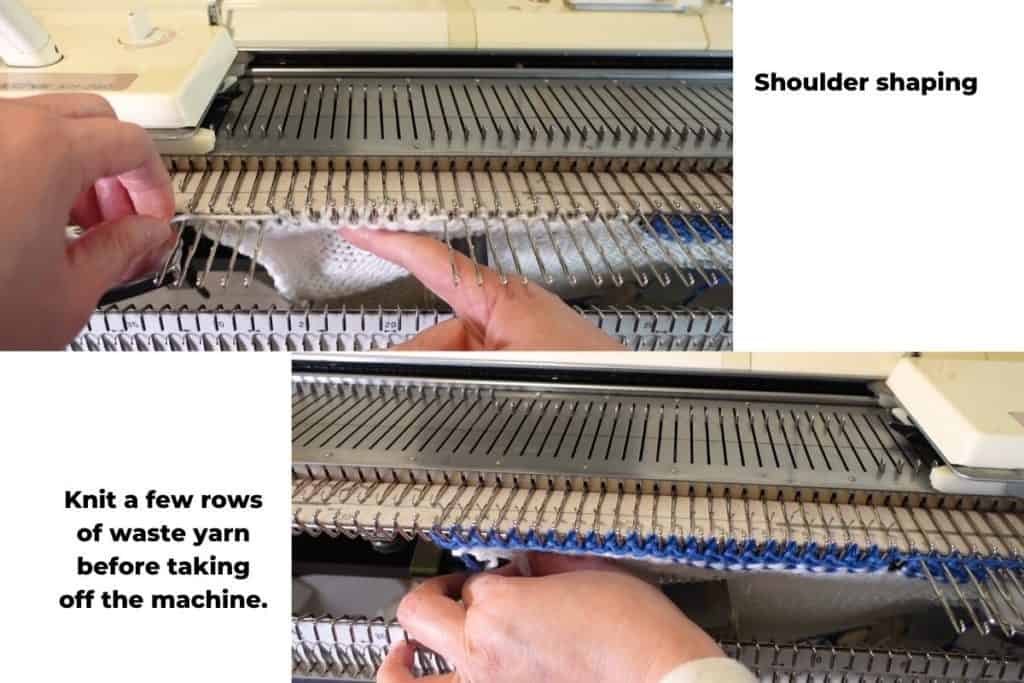
Shoulder shaping
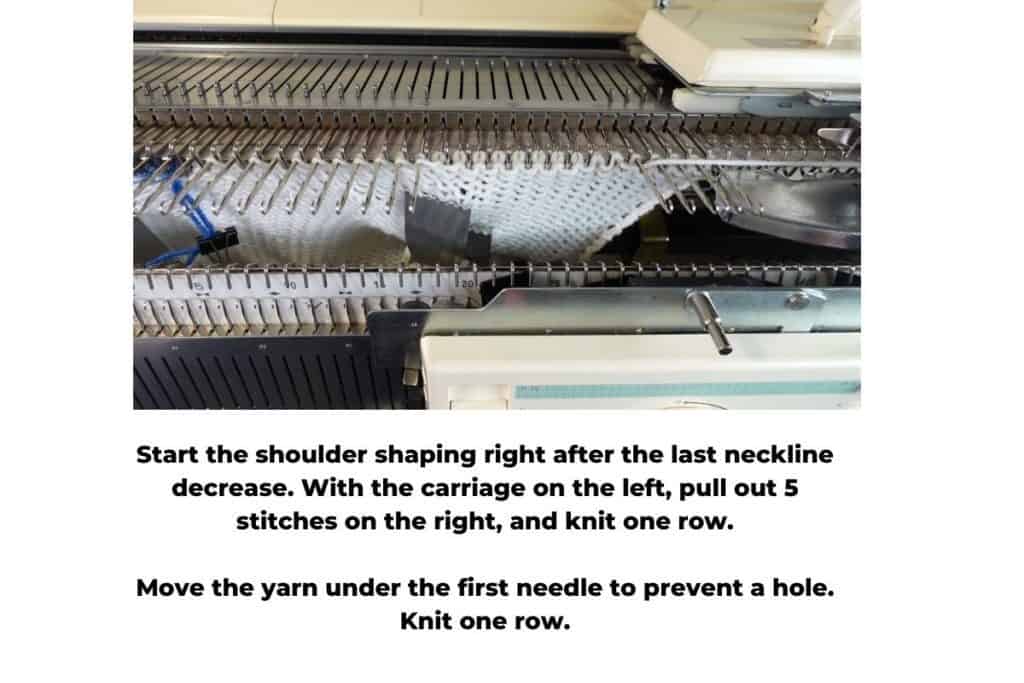
The shoulder shaping is the same as the neckline shaping with a short-row. Some charts have both neck shaping and shoulder shaping at the same time. It takes more concentration.
In chart 3 above, right after the last neckline decrease, when the carriage is moved to the left, I can start pulling out needles on the right side. Don’t forget to place the yarn under the first needle on the left side (neck decrease).
Knit to the right.
Place the yarn under the first decreased needle. Knit to the left. We just finished the first shoulder decrease.
The next row is the shoulder decrease row again. Now the carriage is on the left, pull out 5 stitches to E on the right side (refer to your chart). Knit to the right.
Place the yarn under the first needle. Knit to the left. Now we just finish all the shaping.
The last row to finish up (optional)

The working yarn is in the middle of the row. We can knit one more row to move the carriage all the way to the right. To do that, put all stitches to the D position and knit across. All stitches will be knitted and now the carriage is on the right side.
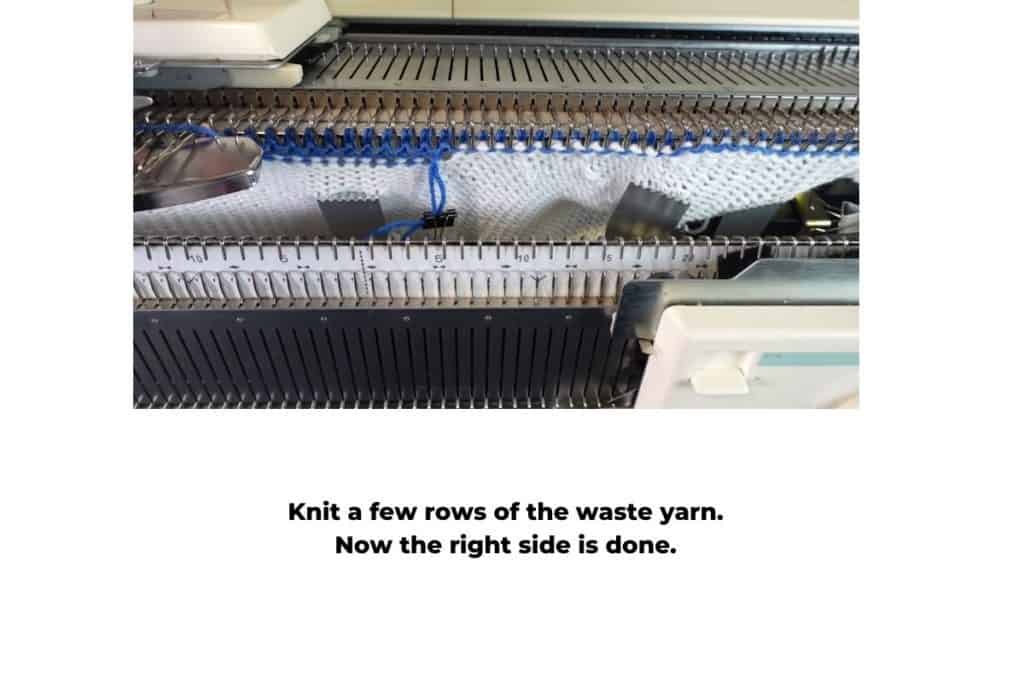
Another way is to cancel the “hold” setting on the carriage, and knit to the right. Now the right side of the neck and shoulder shaping is done. We can move to the left side.
You can knit a few rows of waste yarn and take the right side off the machine. Just let it hand down with some weight.
Or just leave the stitches on the machine when we are working on the left side.
The left side
If you take the right side off the machine, make sure to add some weight when hanging down, so it does not interfere when knitting the left side.
If your right side stitches are still on the machine, we have to put those stitches on hold when we are knitting the left side. To do that, set the carriage to the “hold” position, and pull out the right side and center needles to the E position (all the way out).
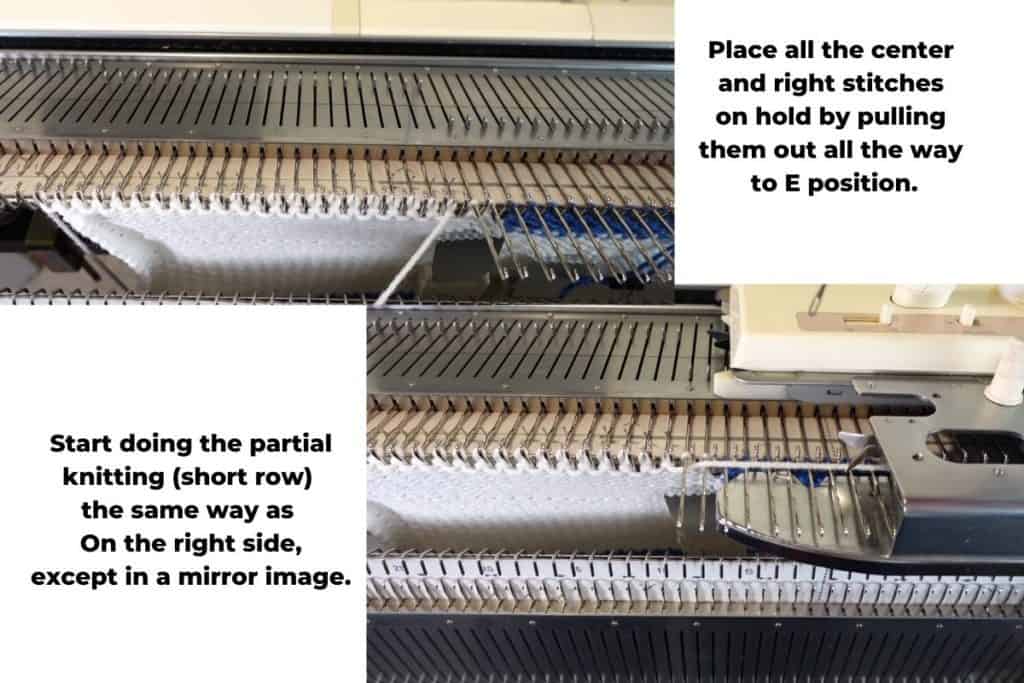
The left side chart is just the mirror image of the right side chart. So you can use the same chart, and just remember it is the opposite. Or, draw a left side chart if you prefer.
In the first row, the 2 stitches near the center neck will be decreased, so we make sure the carriage is on the left side first. Pull out those 2 stitches to the E position, and knit one row. Then place the yarn under the first needle. Knit back to the left. Continue knitting with the partial knitting method until reaching the top of the chart.
After all the shaping is done, if the working yarn is in the middle of the project, we can knit one row so the carriage is back to the left side. To do that, either place all stitches to the D position or just cancel the “hold” setting so all positions will be knitted.
Now you can change to the waste yarn and knit a few rows, or you can bind off all stitches. Steam block and all done.
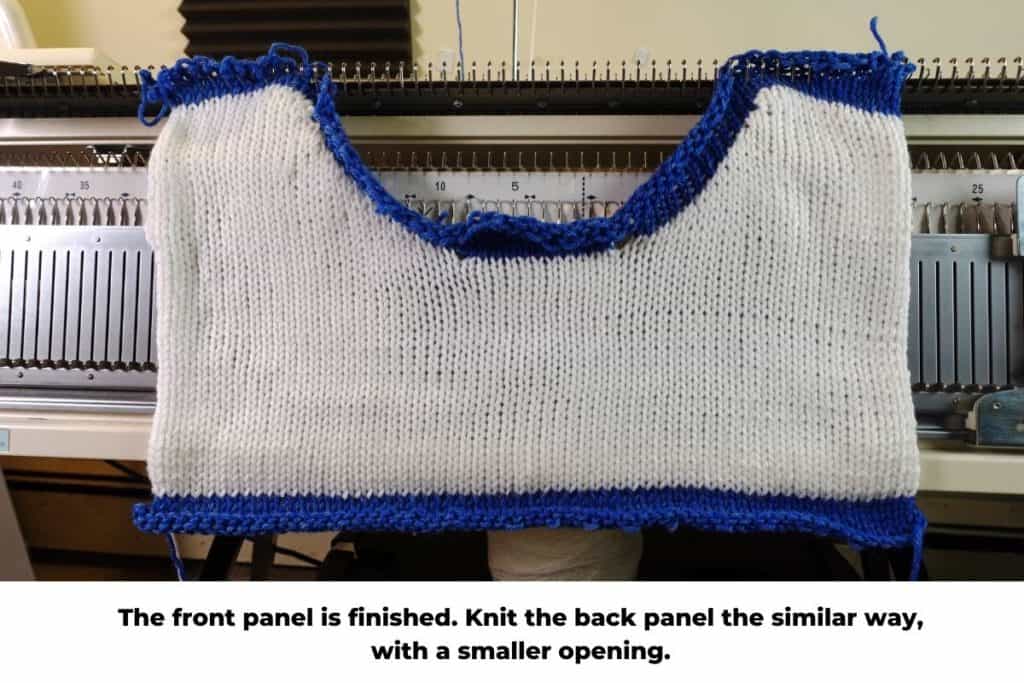
For the back piece of the neck shaping, we can draw the same chart except with a less deep opening on the neck. It can be knitted the same way.
In the next post (part 2), we will finish the neck band and see different options. Happy knitting!
🛒 Visit our Amazon affiliated page (We get a small commission without extra cost to you.): https://www.amazon.com/shop/picturehealer
How to machine knit a sweater neckline – Part 1 (drafting chart and partial knitting)
Featured Posts
- How to machine knit a heart shape on an LK150

- Machine knitting a loop stitch for big texture

- Machine knitting a corner-to-corner, diagonal dishcloth

- Machine knitting a buttonhole band on an LK150

- Tuck stitch blanket on an LK150 – Part 1
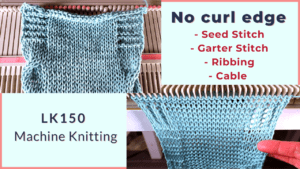
- No curl edge with seed, garter, ribbing, or cable stitches
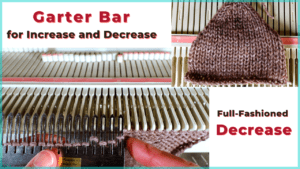
- Full-fashioned decrease, Garter Bar increases or decreases in the middle of a row
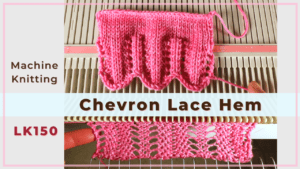
- How to machine knit a Chevron Lace Hem
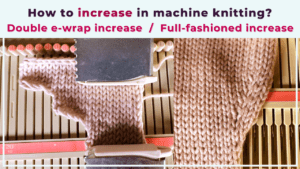
- Machine knitting increases – the full-fashioned increase and double e-wrap
- Picot hem with a scalloped edge and eyelets on an LK150 knitting machine

- The loop through loop bind-off and the sewing bind-off

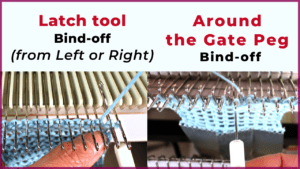
- The latch tool bind-off and around the gate peg cast-off
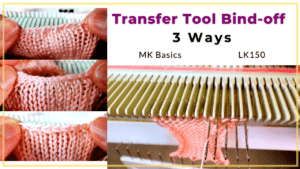
- Transfer tool cast off and variations- Simple, No hole, and Even-tension
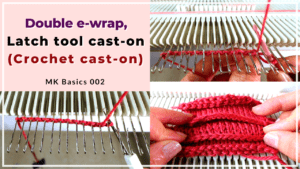
- Double e-wrap, latch tool, and crochet hook cast on
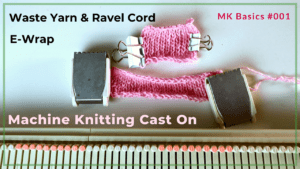
- Machine Knitting basics – Cast on with waste yarn, ravel cord, and e-wrap


You May Also Like
How to machine knit a heart shape on an LK150
Machine knitting a corner-to-corner, diagonal dishcloth
