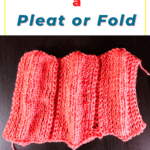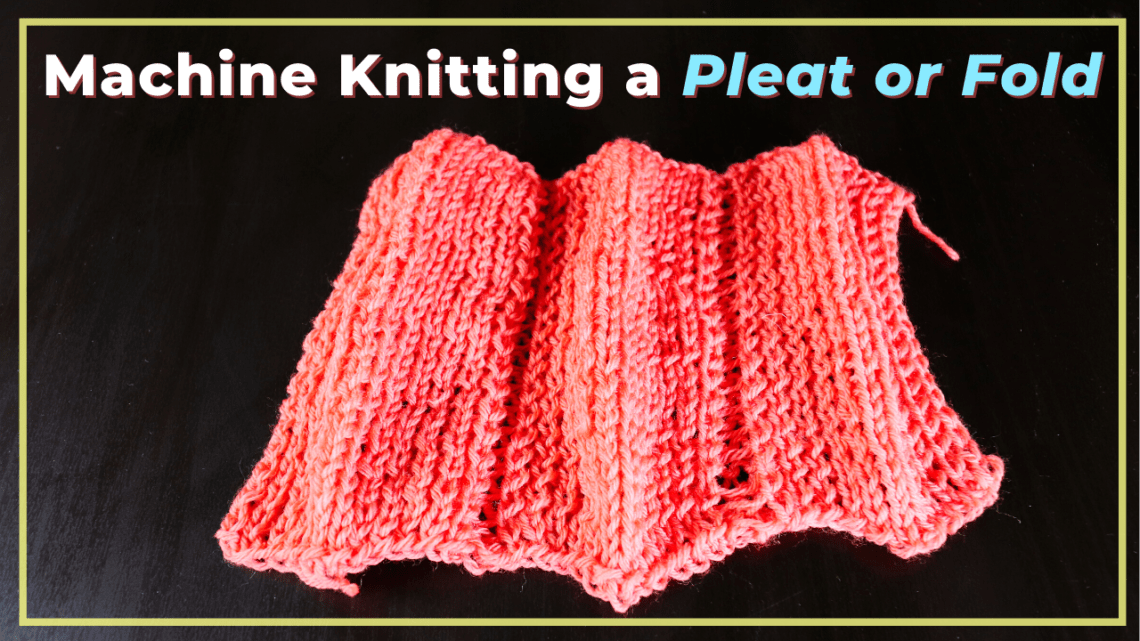
Machine knit the pleats or folding lines with a Ribber
Some people call it origami knitting because the folding lines in knitted fabric look just like Japanese paper folding. A pleated skirt with permanent folding lines is a good application of this technique. This technique requires a ribber. I used a Brother 260 bulky knitting machine together with the Ribber for this sample.
Watch the video tutorial for machine knitting pleats or folding lines
How to knit the pleating or folding line – step by step
Setting up
You will need both the knitter and a ribber for the full needle rib. I use a Brother 260 bulky knitting machine with a Ribber. You can use a standard gauge knitting machine with a Ribber too.
The pleating or folding line technique is based on the full needle rib. So first, we set up the Pitch to Half pitch. H3 or H4 is fine.
Arrange needles as shown in the picture below. The Ribber needles will be in between the Knitter needles.
The total stitch count depends on how wide you want the fabric to be. Since this pleating stitch will curve in, the final fabric will be narrower than the plain stockinette stitches.

Cast on
You can follow your instructional manual to cast on the full needle rib. Or you can do the lazy way, as I did here, using the E-wrap cast on.
Since we have both Knitter and Ribber needles, the cast on of the Knitter needles is the standard “e” shape. The yarn goes from under the needle, goes up from the right, and back down to the left.
Since the Ribber needles are standing vertically, we can wrap the yarn in the opposite direction. So for the ribber needles, the yarn goes from the left side, through the back, comes out from the right, and goes back to the left side to the back again. It is like a clockwise wrapping.
Alternating these 2 e-wraps all the way to the end of the row. Make sure it is not too tight.

Select the proper tension and knit 1 row. You will see the zig-zag line. Place the cast-on comb and weight.

Needle setup
We want to create sections with alternating ridges and valleys. I use 5 stitches for each section and 2 stitches for the highest or lowest points.
You can adjust the stitch numbers and experiment. A tighter tension and higher ridge/valley stitch numbers (2 stitches here) seem to create a more 3-dimensional fabric.
Transferring stitches for the ridges and valleys
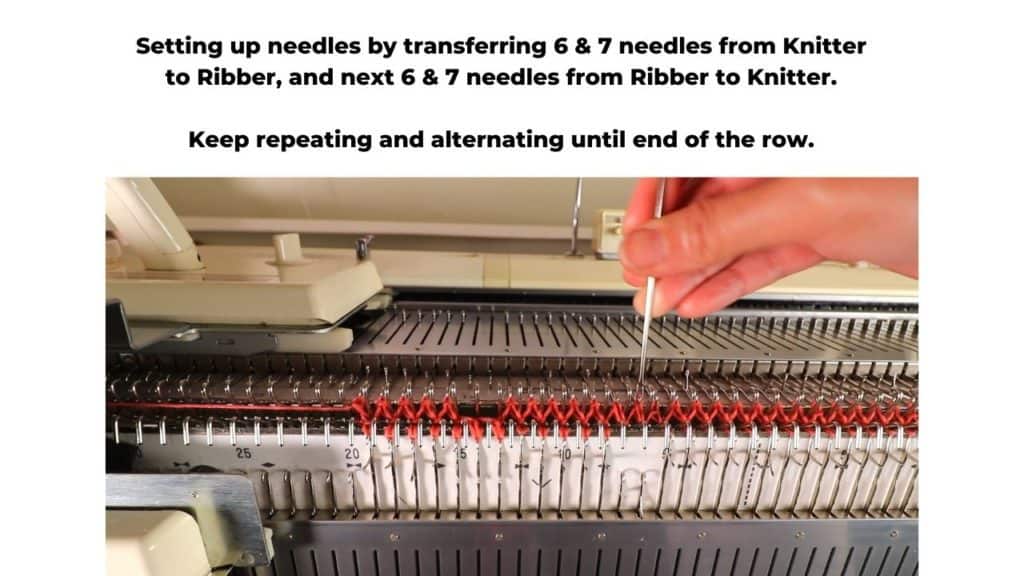
Next, we just transfer the 2 stitches (ridges and valleys) alternatively to ribber and knitter.
I transferred the 6 and 7 stitches to the Ribber, and the next 6 and 7 stitches to the Knitter. Keep repeating until the end.
After transferring the needles, place all the empty needles in the non-working position (A).

Carriage setup
Push the Part button on one side of the Knitter, and keep the Ribber carriage on a normal plain knitting setting.
Set the tension based on your yarn thickness. Start knitting back and forth until the length you like.

Bind off
To bind off, transfer all Ribber stitches to the Knitter with the double-eye transferring tool.
Knit 1 row and bind off with any method you like.
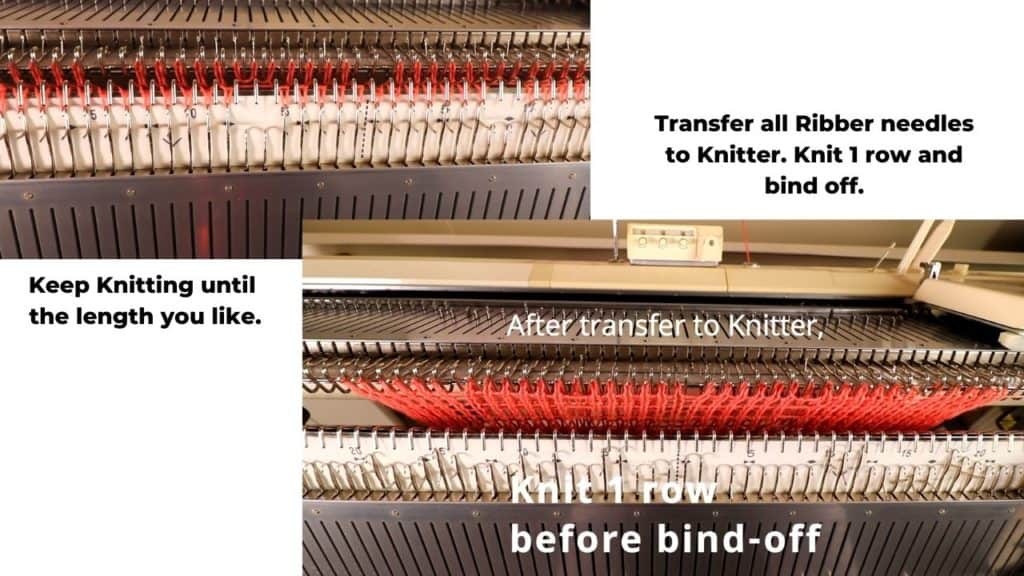
To make a pleated skirt, simply fold the top side and sew them up.


Recent Posts
- How to machine knit a heart shape on an LK150
- Machine knitting a loop stitch for big texture
- Machine knitting a corner-to-corner, diagonal dishcloth
- Machine knitting a buttonhole band on an LK150
- Tuck stitch blanket on an LK150 – Part 1
- No curl edge with seed, garter, ribbing, or cable stitches
- Full-fashioned decrease, Garter Bar increases or decreases in the middle of a row
- How to machine knit a Chevron Lace Hem
- Machine knitting increases – the full-fashioned increase and double e-wrap
- Picot hem with a scalloped edge and eyelets on an LK150 knitting machine
- The loop through loop bind-off and the sewing bind-off
- The latch tool bind-off and around the gate peg cast-off
