Pumpkin punch card pattern design and free download

You can design your own pattern and create unique knitted pieces easily for hand-knitting or machine knitting. If you have a punch card knitting machine, it is worth the time to punch out a card and reuse it again and again in the future.
It looks complicated, but it is actually simple once you have the right tools and how-to. You can find blank punch cards and punchers on eBay. You do not need to spend a fortune.
Get the free PDF download of our pumpkin punch card here. This can get you started in the world of punch card knitting.
Watch our tutorial for punch card design and knitting on a Brother 260 machine
How to design your own punch card pattern?
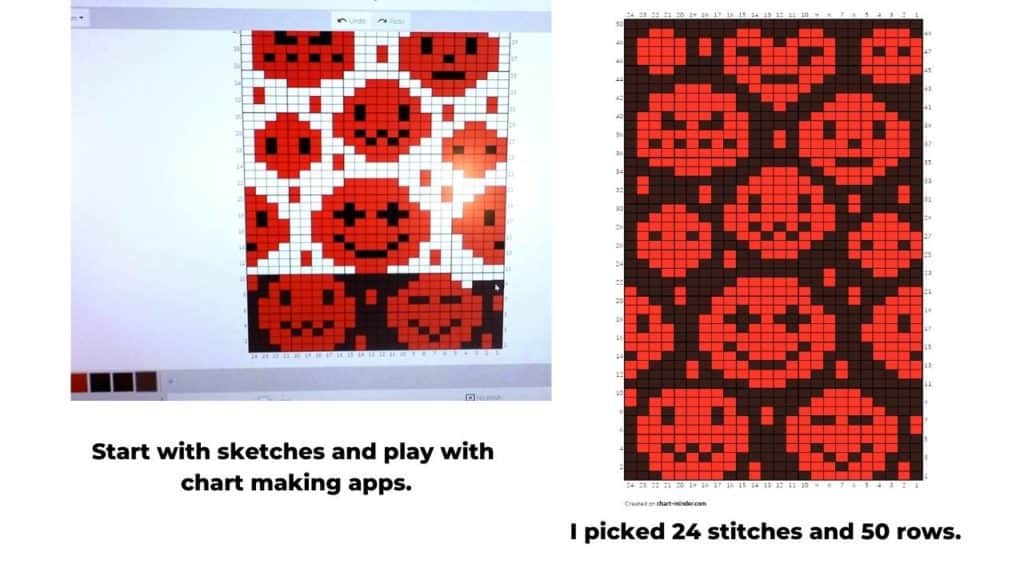
It is easier to start with some sketches with a pen and paper. Then we need some types of knitting graph papers or using chart-making apps online. Since the knitting stitches are usually more rectangle than a square, a knitting chart with the right proportion will help a lot.
There are many free knitting graph papers you can download online. Just print, copy, and sketch on the papers. Another choice is to do the charting on a computer or tablet directly. Again, there are many choices of free software or apps these days. They are all capable of basic color charting.
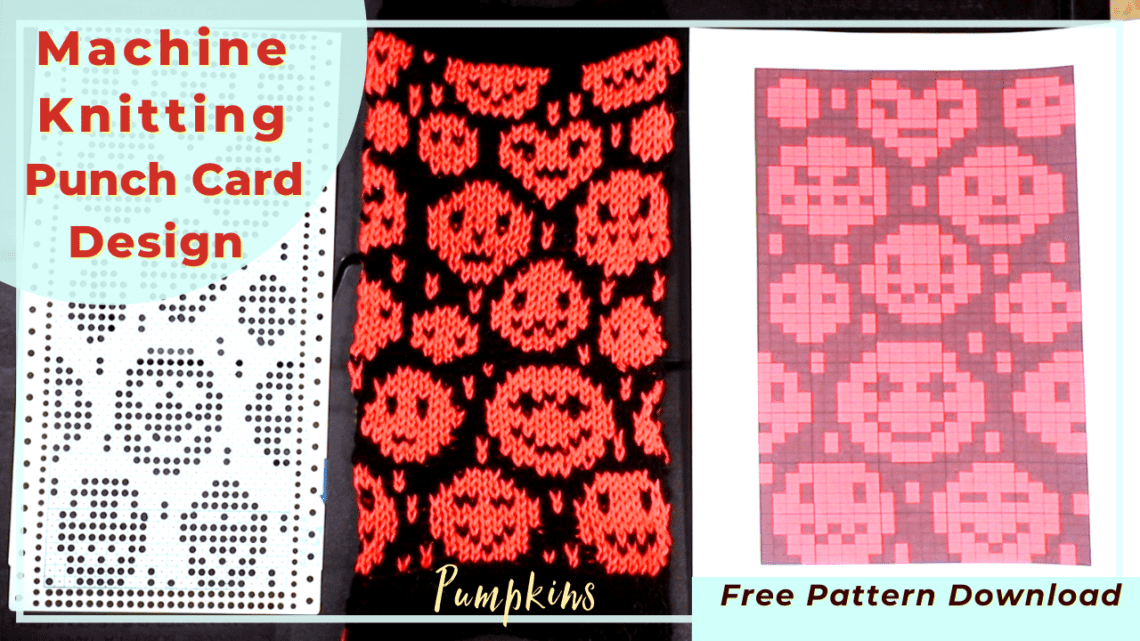
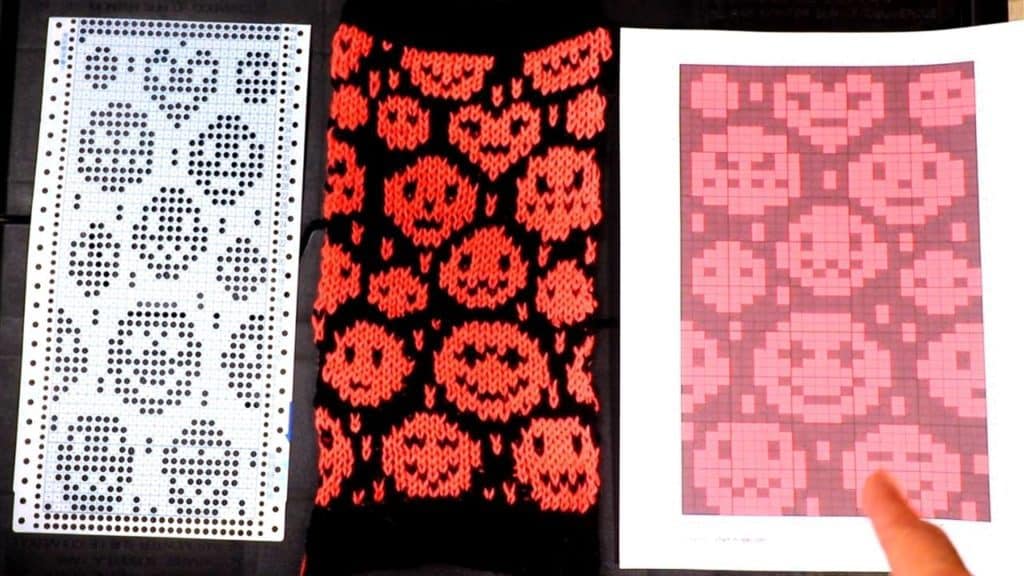
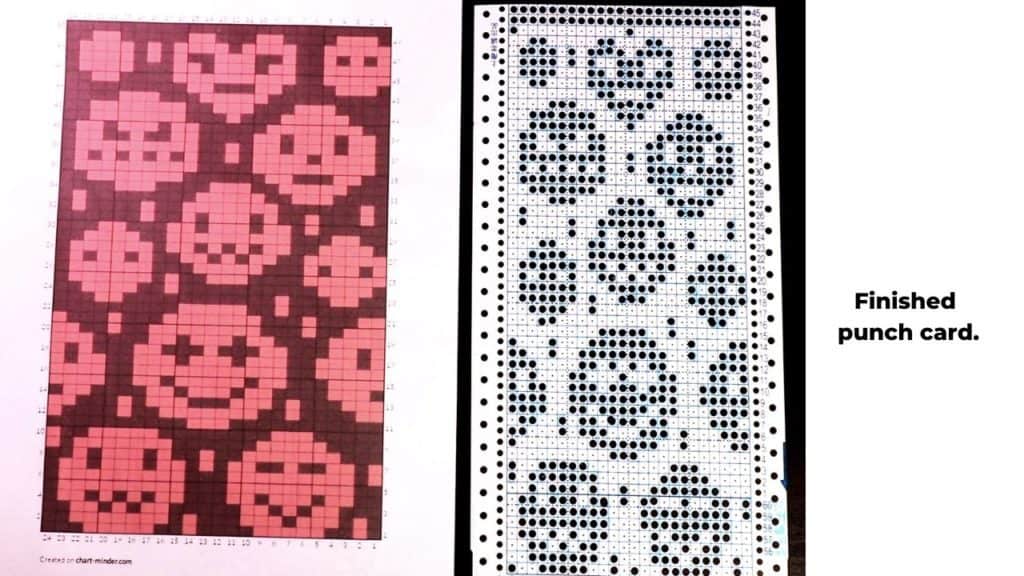
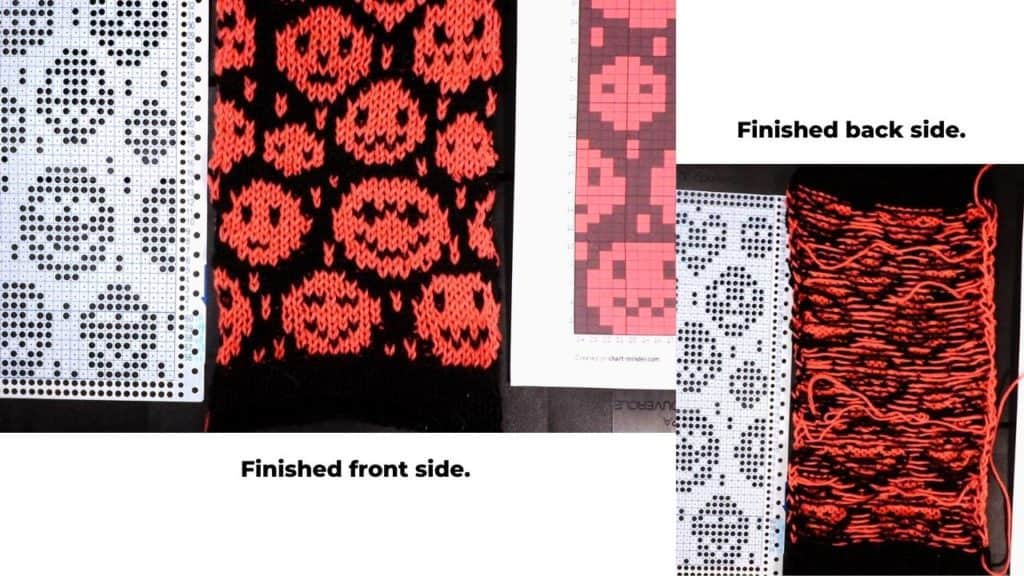
See the picture below. On the right is the printout from the charting app. On the left side is the punch card based on the charting from the right. And the center is the final knitting from the punch card.
Continuous pattern repeat
To make the pattern repeat continuously, make sure the left and right sides of the design can be matched, as well as the top and bottom. Watch our old tutorial about the punch card design HERE.
Tools
You will need a blank punch card and a hand puncher. They are available on eBay for pretty reasonable prices. If you are designing for hand-knitting, you don’t need any of these tools.
I use a Brother 260 knitting machine. You can also use a standard gauge knitting machine.
Brother vs Singer/Studio punch cards
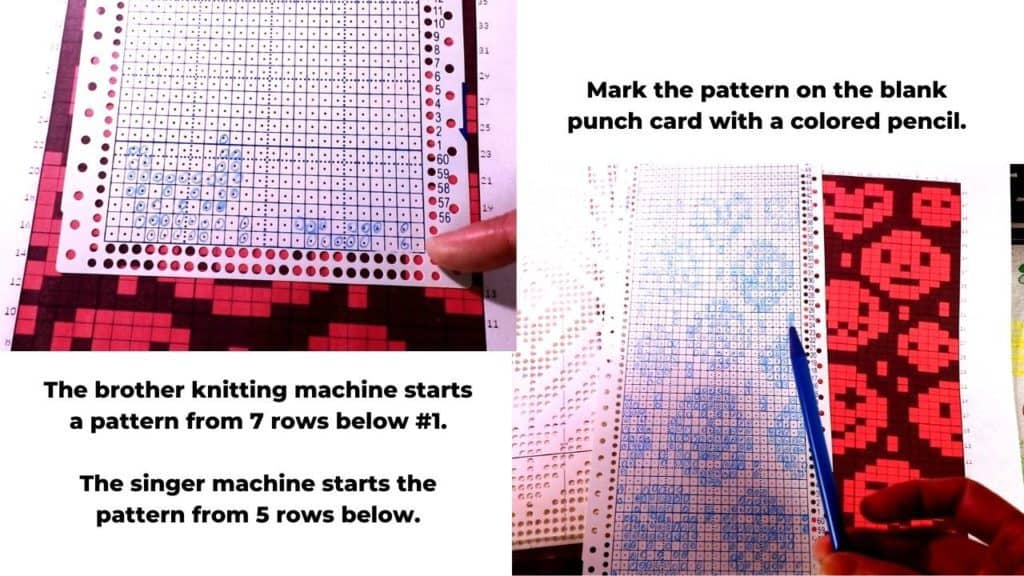
Both are 24-stitches punch cards. They are the same for most parts, but the numbering is different. The Brother machine starts the pattern 7 rows below row number 1, and the Singer machine starts the pattern 5 rows below row 1.
For lace punch cards, the Brother and Singer versions are quite different, but that is another topic for another day. For Fair Isle knitting, like the pumpkin chart we have, the only difference is the starting rows.
Making the punch card
After sketching, I use free online software to come up with pattern placement. I can add colors and see the knitting grid in the right proportion.
I picked 24 stitches and 50 rows for my design because it matches the punch card nicely. You can decide the stitches and row numbers as needed.
The length of the pattern
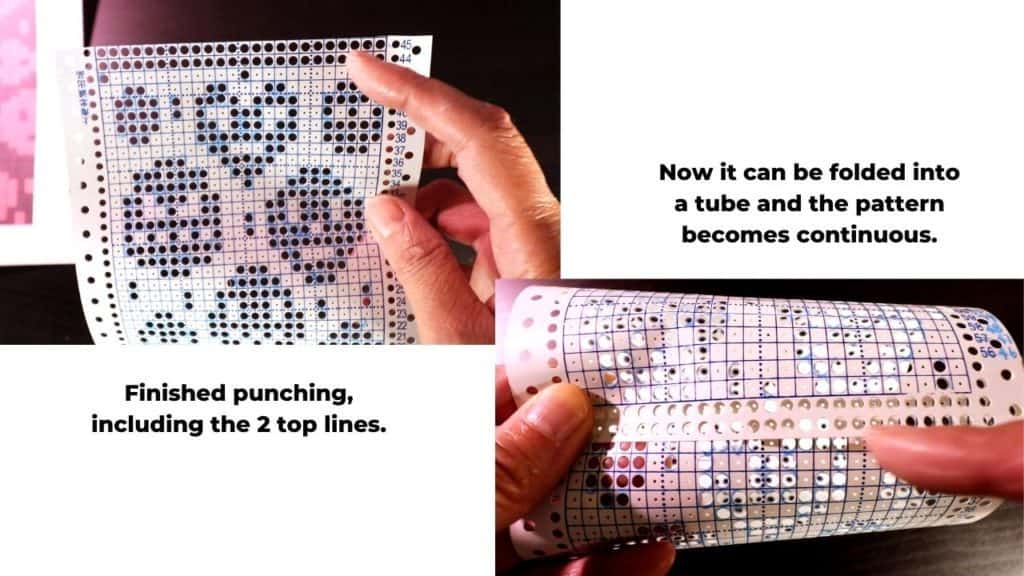
The length of the punch card can be trimmed, so it does not have to be a set number. If you want a continuous pattern, you do need to have long enough rows, so the paper can be folded into a tube. At least 35 or more rows should be enough for a continuous pattern.
If you are just designing single motifs and not continuous rows, the length does not matter.
Punch out the blank punch card
After finishing designing the chart, you can mark the stitches on the blank punch card with a pencil, colored pencil, or marker. Those are the stitches we will punch out.
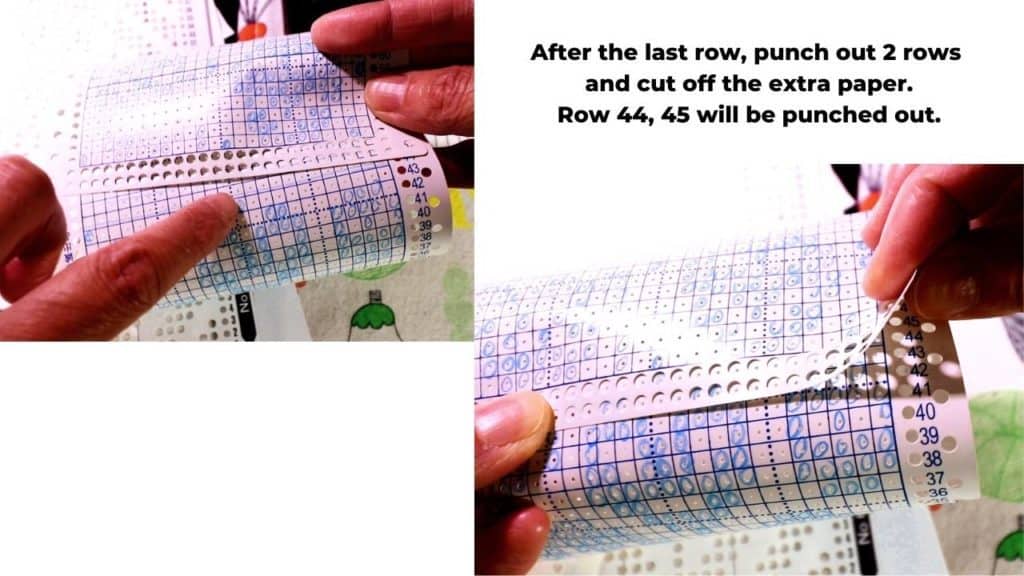
After the last row on the top, we have to punch out 2 rows, so the punch card can be folded into a tube for a continuous pattern.
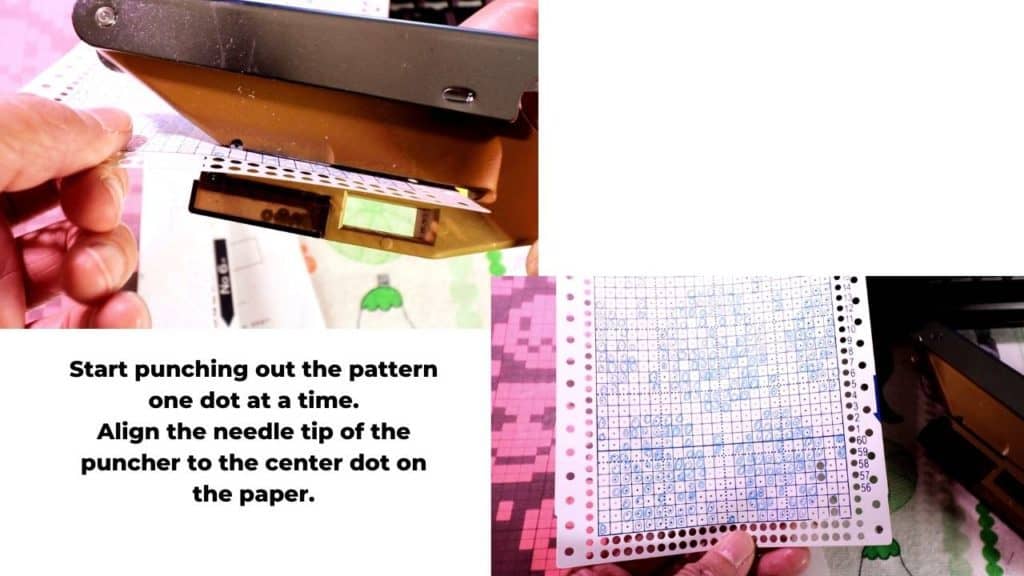
The puncher
Use a puncher to punch out the marked stitches. The puncher has a needle-like tip, it should match the center of the stitch (small dot). You can press the puncher halfway first to match the center dot on the punch card.
For my puncher, it can only reach 12 stitches. So on the right side, I can punch from the right. And on the left side, I have to punch from the left. There is a 24-stitch puncher available, but I have no problem with my 12-stitch puncher.
Punch card knitting on a Brother 260 machine
Now we have the punch card ready, it is time to knit on a machine.
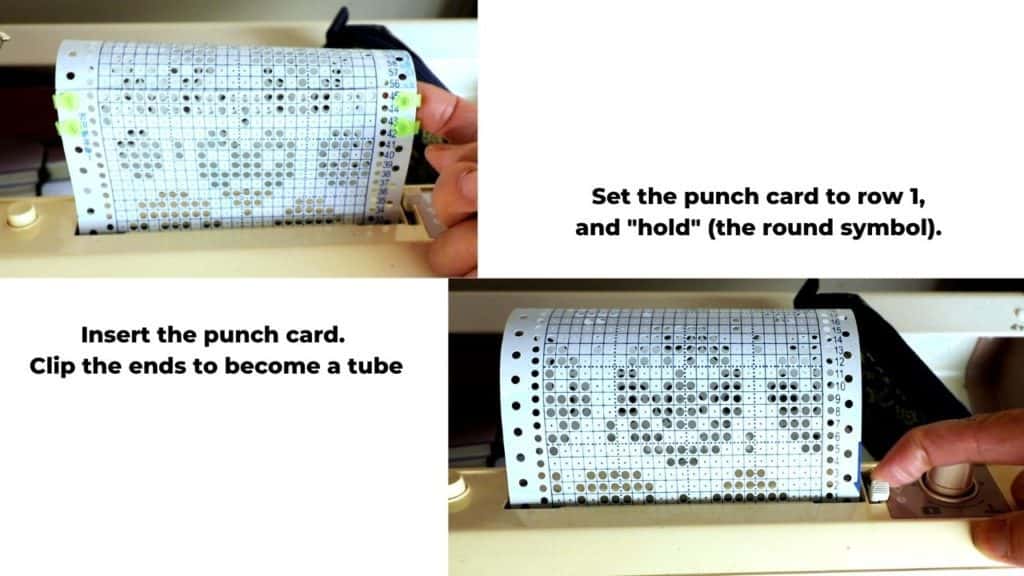
Insert the punch card and connect the ends with clips (Available on eBay). Set the punch card to row 1 and on hold (the circle/dot in the bottom).
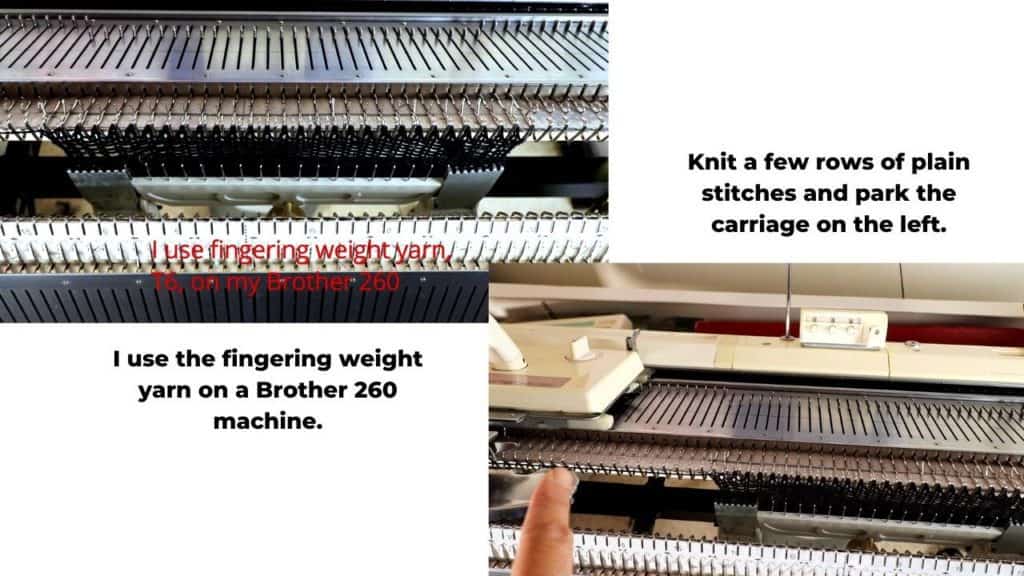
Knit a few rows of plain knitting with the main yarn first. I use background-colored yarn.
The yarn is fingering weight, and my carriage tension is 6. It turns out to be a little loose. I can decrease the tension number, or change the yarn to sports weight next time.
Even though Brother 260 is a bulky weight knitting machine, 2 strands of worst weight yarn can be too bulky for Fair Isle knitting because this will be a double layer. A thinner yarn makes knitting Fair Isle easier.
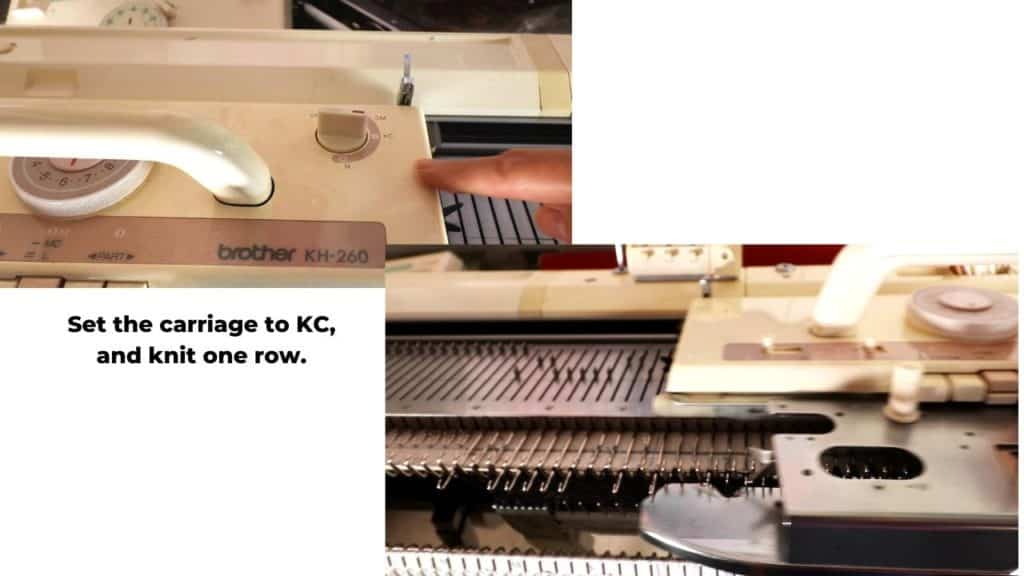
Place the carriage on the left side. Set the carriage to KC. Knit one row. The stitches should be selected according to the punch card.
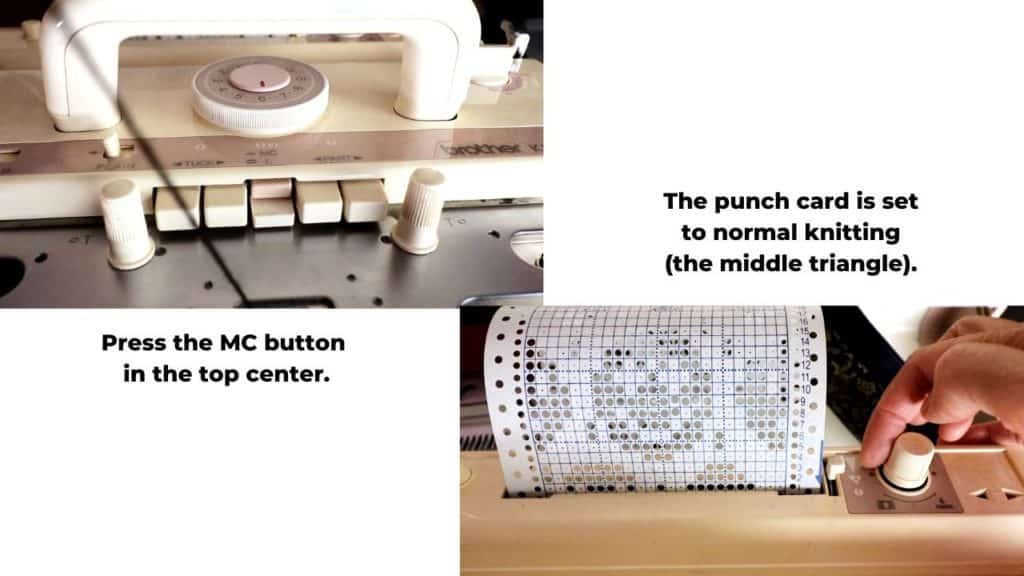
Press the MC button on the center top for Fair Isle knitting.
Set the punch card to normal knitting (select the middle triangle symbol).
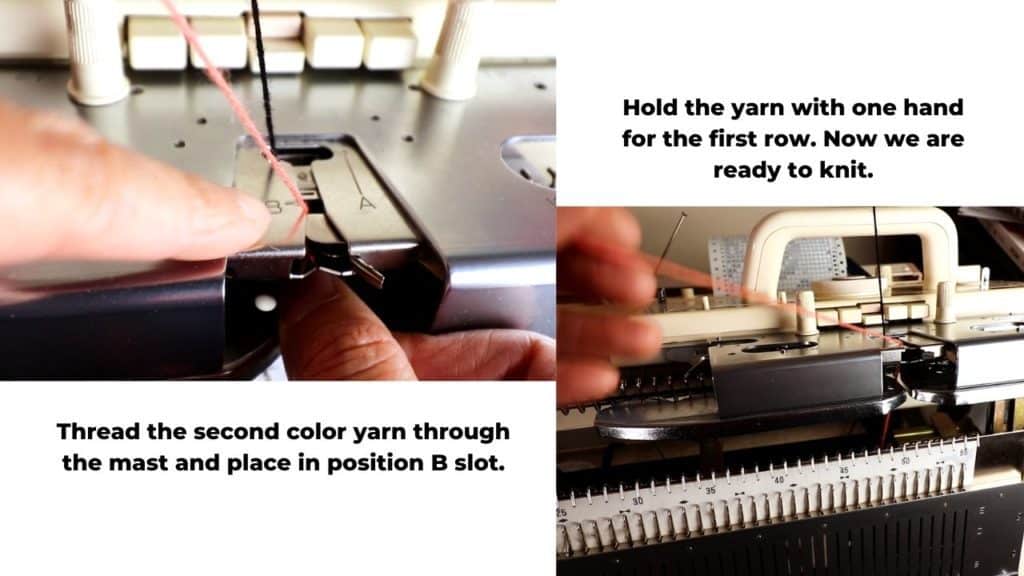
Thread the second yarn through the mast and slot B of the carriage. See the picture below.
Clip the yarn end with a pin. Hold the yarn when knitting the first row. Now we are ready to knit back and forth.
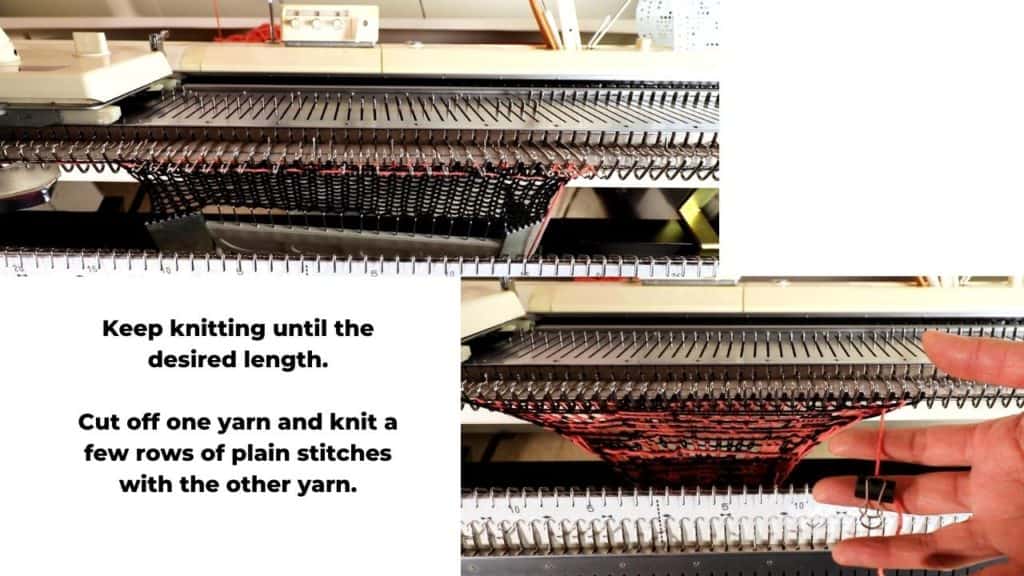
Keep knitting until the desired length. Cut off one yarn, and we will continue knitting a few rows of plain stitches.
Cancel the punch card knitting
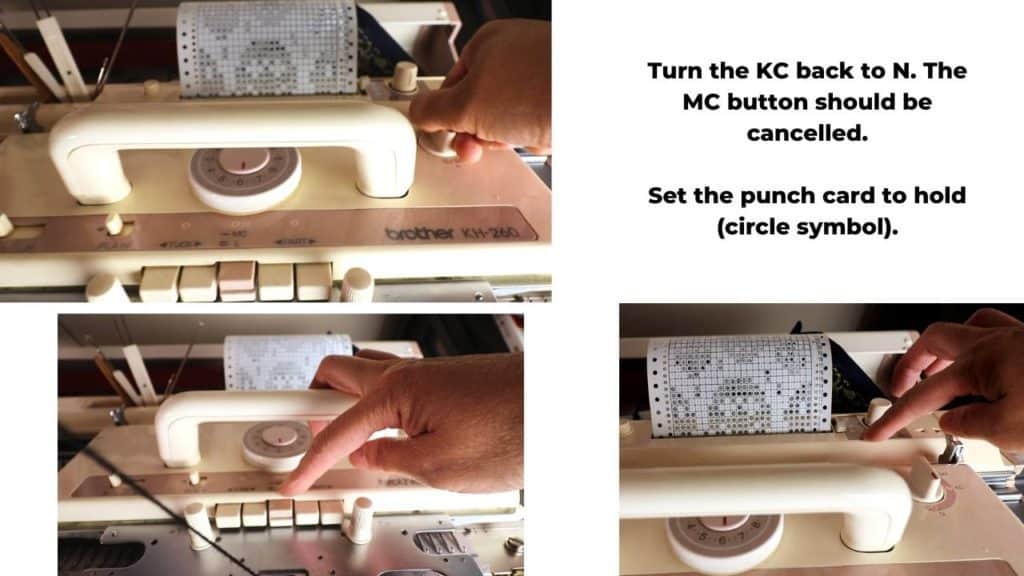
To cancel the punch card knitting, turn the dial from KC to N. This should cancel the MC button too.
Set the punch card to “hold” again (circle or dot symbol on the bottom).
Now knit a few rows of plain knitting and bind them off.
You can steam block it to make the stitches even.
There will be long floats in the back. You can crochet up to tighten the loose yarns.
To reduce the long floats, you can also add more random stitches or small designs to break up empty areas. This should be done when designing the cards.
Free pattern download
For a free PDF download of this pumpkin punch card knitting pattern, Click Here.

Recent Posts


You May Also Like
Simple bookbinding with PVA or Elmer’s school glue