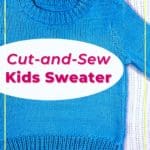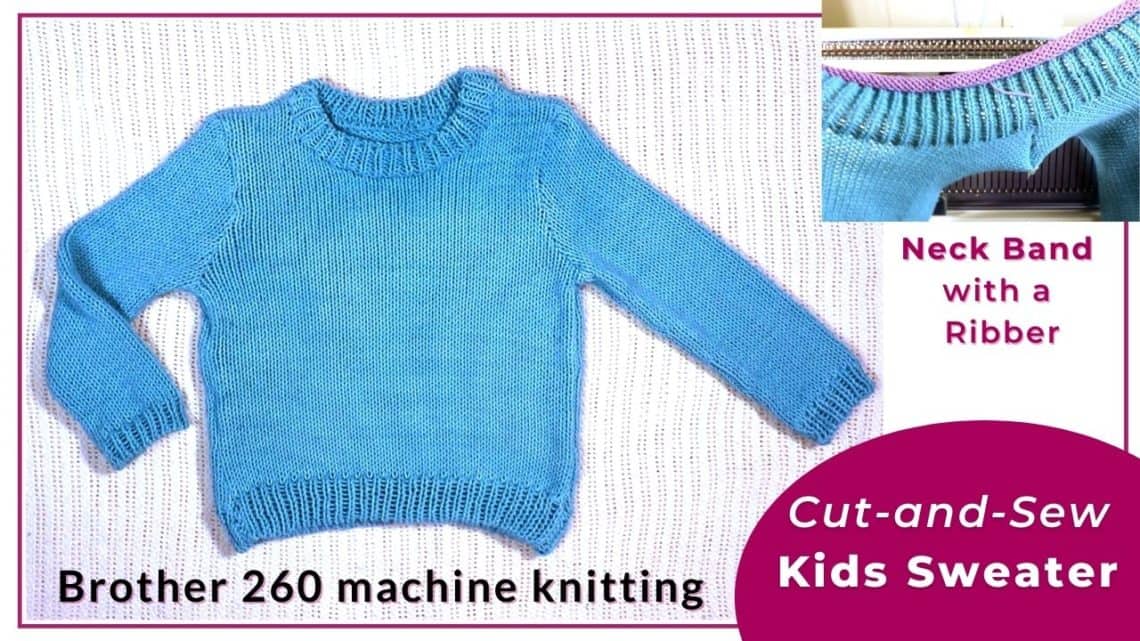
Kid’s cut and sew sweater on a Brother 260 knitting machine
This project is to make a classic sweater for my 7-year-old boy. The same technique can be used for any size of sweater. I use the cut and sew technique for most curve lines to keep the project simple.
Basically, I knit big rectangles with a knitting machine and finish up with a sewing machine and a serger (overlocker). For the neckband, after cutting up the curve, I hang it back on the machine and use a ribber to knit the ribbing.
I drafted my simple pattern by measuring the dimensions of his old sweaters and cutting out all the pattern pieces just like a regular sewing project. Then use a serger (overlocker) to cut and finish the edges, and use a regular sewing machine to seam them up. You can find free or paid sewing patterns online easily if you don’t want to draft your own pattern.
Watch our 2 part video tutorial for the cut-and-sew kid’s sweater on a Brother 260 knitting machine.
Part 1 of the Kid’s Cut-and-Sew Sweater Tutorial
Part 2 of the Kid’s Cut-and-Sew Sweater Tutorial
Step-by-step picture tutorial for the cut-and-sew sweater on the Brother 260 knitting machine
Design and calculation
There are many ways to make a cut-and-sew sweater. You can rely more on the knitting part and less on the sewing, or vice versa. Some people only leave the neck opening for cut-and-sew. Some people like to knit big fabric and treat it like a sewing project. Both ways have pros and cons. It is a balance between saving time, better fitting, and the final look.
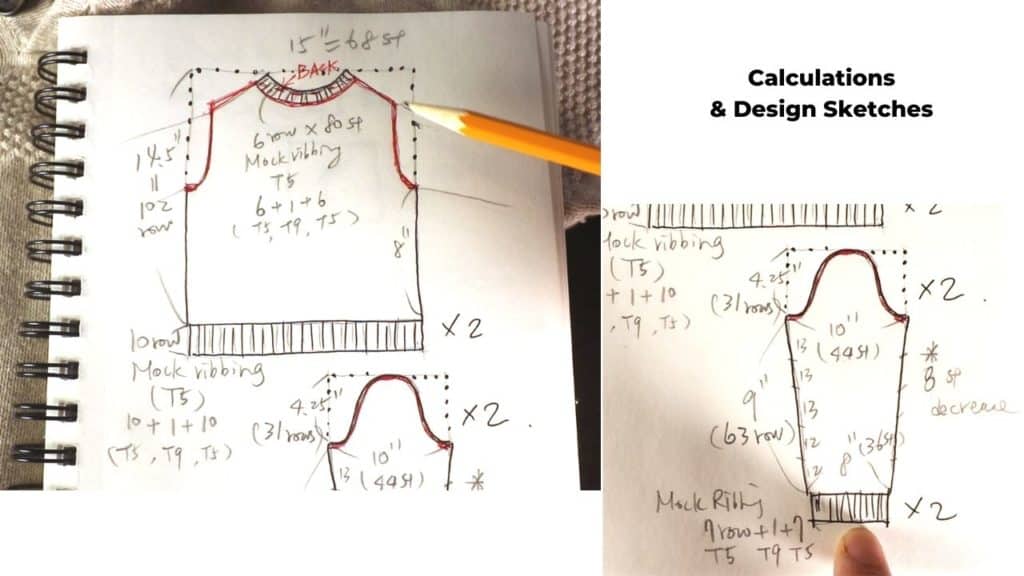
All machine knitting projects start with a swatch. I use the Caron Cotton Cakes yarn (Medium weight), and tension 7 on a Brother 260 knitting machine. The gauge is about 4.5 stitches and 7 rows per square inch. If you use a different yarn or tension, the gauge will be different. Just calculate from your swatch. It does not have to match mine.
My idea is to knit big rectangles with mock ribbing on the bottoms. The shoulder, sleeve openings, and neck will be cut-and-sew. The sleeve increase is easy to knit on the machine, so I also knit the sleeve increase on the machine. You can decide which part you prefer to knit on a knitting machine, and which part you prefer to sew. There is no right or wrong way to do it.
If you do not want to knit the mock ribbing, you can attach the ribbing later, do a fold-over (and sew from inside) hem, or hand-knit the ribbing later.
The charts below show my calculations based on my kid’s old sweater and my swatch. I start from the bottom (mock ribbing) and knit the plain stitch all the way to the top.

Cast on and mock ribbing
I started by e-wrapping every other needle. Start with a smaller tension (T4 or T5) and knit a few rows. Knit 1 row of bigger tension (T9) as a turning row, then back to the smaller tension.
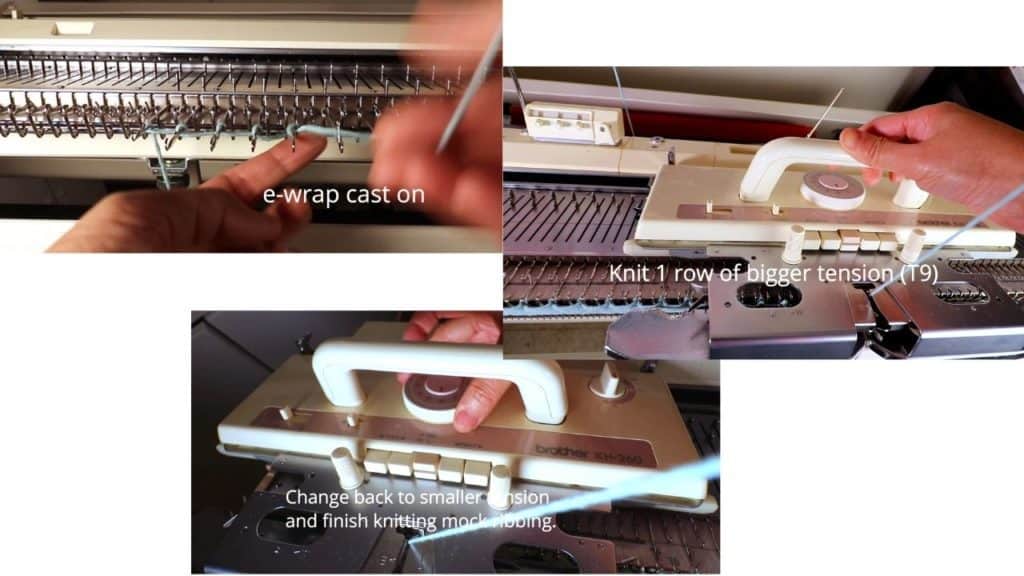
Now hang the cast on row stitches back to the empty needles. We just completed the mock ribbing.
Push all the needles out and knit one row with the main tension (T7). This prevents dropped stitches.

Knitting the main part
Set the main tension (T7), change the row counter back to 0,0,0. Now we can start knitting the main part based on your row calculation. Mine is about 102 rows.
After that, you can knit a few rows of waste yarn and take it off the machine. Or, you can just bind off on the machine. It does not matter because the top edge will be cut later.

Sleeves knitting with increase
The 2 sleeves are knitted similarly. Start with the mock ribbing at the bottom.
There are a few increased stitches on the sleeves. I use a 3 prong tool to do a full-fashioned increase. I increase 1 stitch on each side for about every 13 rows. Totally 8 stitches increased (4 on each side).
Your increased number might be different from mine. Follow your calculation. Alternatively, you can also machine knit a rectangle like the front and back panels and cut the slope later.


Use patterns and mark the curved lines
You can draft your own sewing pattern easily by measuring from an old garment that fits. Knitted fabric tends to be stretchy and forgiving, so it does not have to be super precise.
You can also google free kids T-shirt sewing patterns and download some free PDF patterns for reference.
The front and back pieces should be almost the same except for the neckline opening. The front neckline is lower than the back piece.
After drafting and cutting out the sewing patterns, mark down the outline with a marker. You can leave 3/8 of an inch or 1/2 inch for seam allowance.

Sewing with a serger and a standard sewing machine
If you have a serger, you can serge the outline of the pieces. It will cut and finish the edge at once. Or you can use a standard sewing machine, sew the outline first, and cut it off just outside the sewing lines.
I use a serger for this step, and the edge is a little wavy. You can steam block it first to reduce the wavy edge.

Knitting the neck band ribbing
First, I seam up one shoulder seam with a standard sewing machine and straight stitch from the backside.
Open up the piece and hang it back on the knitting machine. Keep the tension as even as possible.

Now we are going to bring up the ribber, and transfer every other needle to the ribber.
Make sure it is set to the full pitch (P3). See the picture below.

Use a lower tension for the neck ribbing. Gradually decrease the tension, knit a turning row, and then gradually increase the tension.
It can be tension 5 for a few rows, change to tension 4 or even 3, knit a few rows. Add a turning row. Then reverse the tension, starting with T3 or 4 for a few rows, then ending with a few rows of T5.
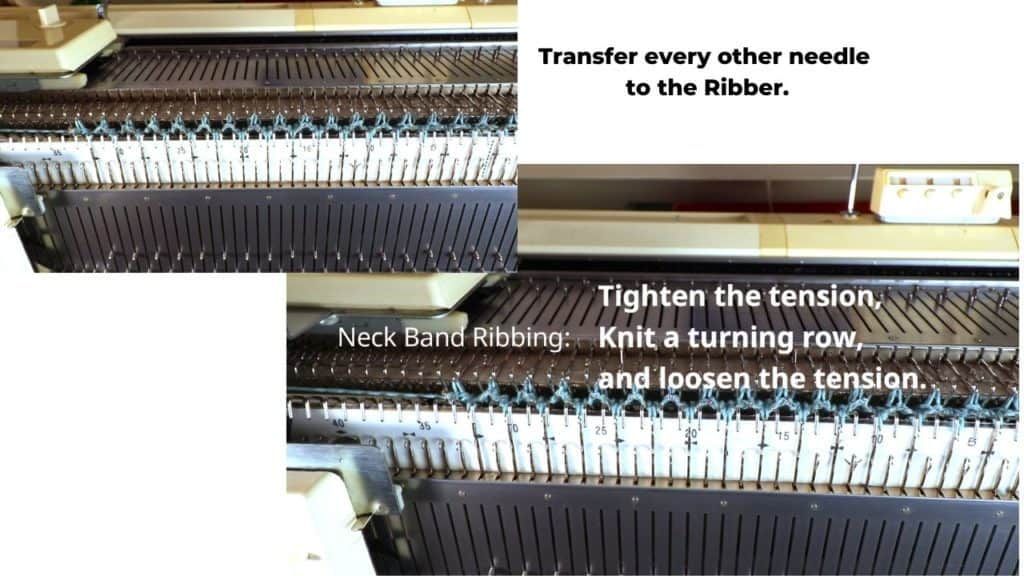
After all the ribbing rows are done, transfer all the stitches from the ribber to the knitter, and knit a few rows of waste yarn before taking off the machine.
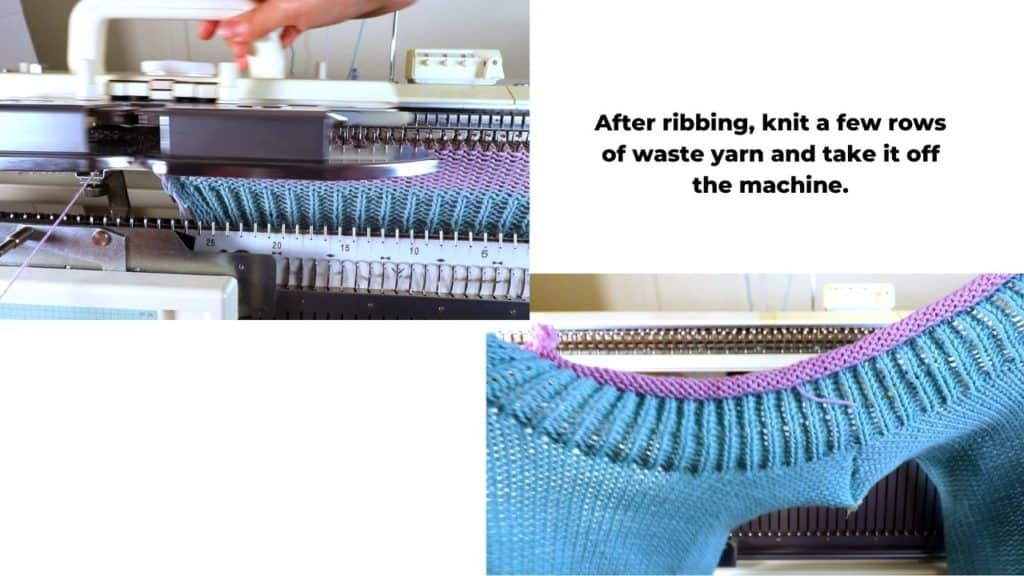
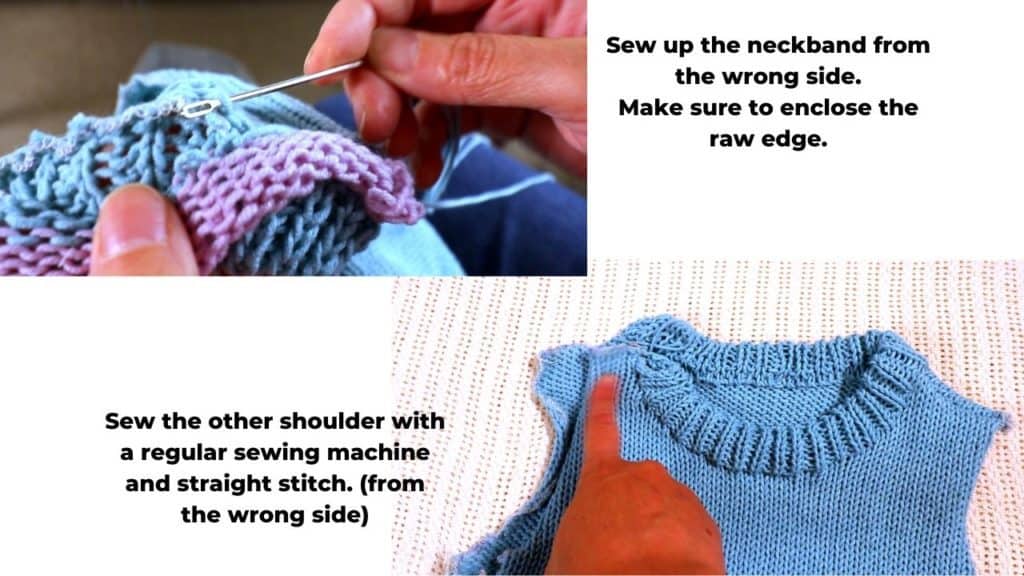
Now fold the ribbing halfway toward the wrong side. Attach a long piece of yarn and use a yarn needle to sew up the neckband stitch by stitch. The raw edge should be enclosed inside the neckband.
Sew the other shoulder up from the wrong side with a standard sewing machine and straight stitch. The straight stitch creates a sturdy edge, so it will not stretch out of shape later.
Sew up the sleeves
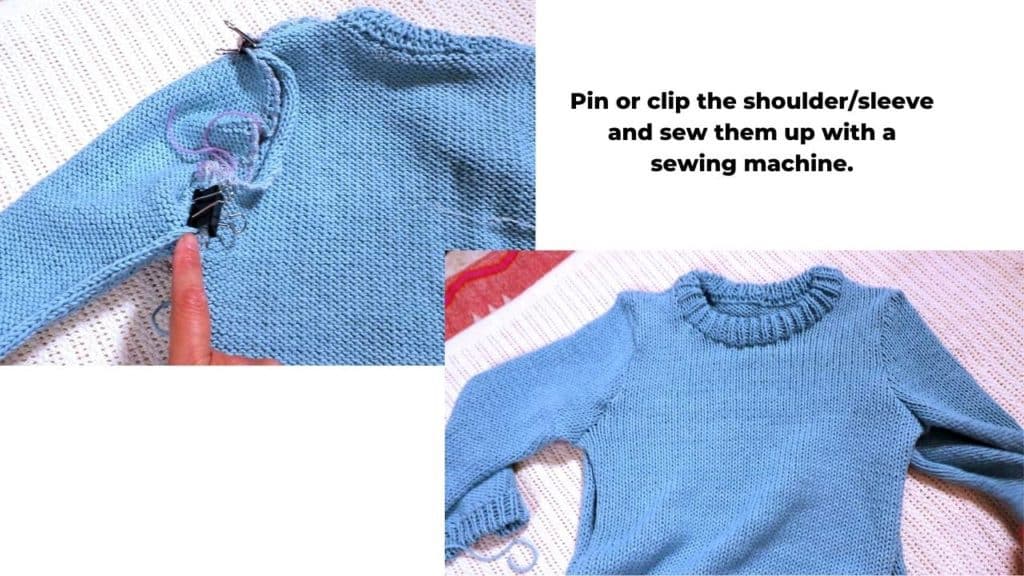
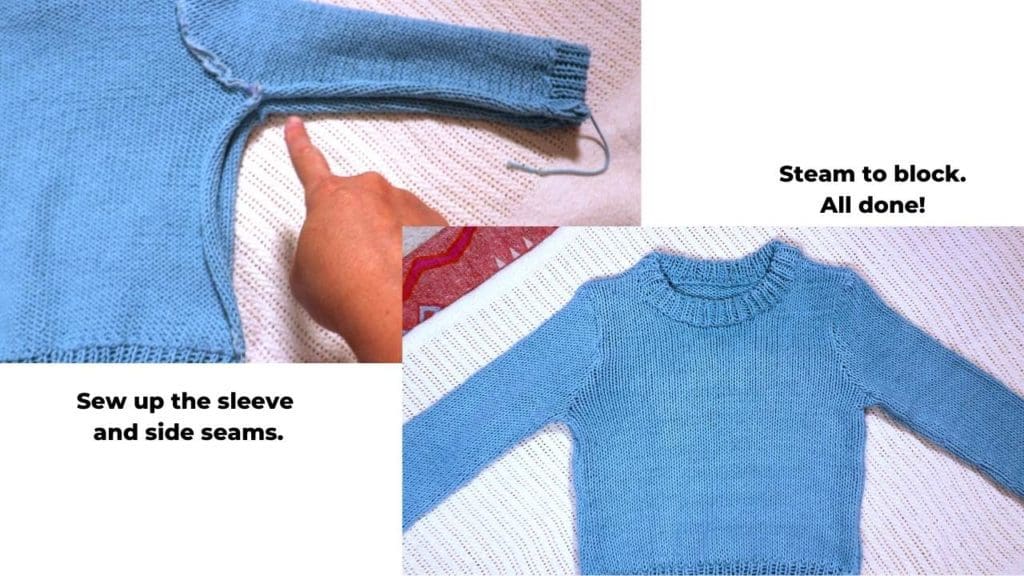
Next is to sew up the sleeves. Pin or clip in place first from the wrong side, and use a serger or standard sewing machine to seam up. If you need extra stretchy for the sleeve opening, use a serger to seam up. If the opening is big enough and you don’t need the extra stretch, you can use a standard sewing machine and a straight stitch.
Sew up the seams under the sleeves and the side seams.
Steam blocks the garment and all is done!
If you want more stretch on a standard sewing machine, use a zig-zag stitch instead of a straight stitch. It is a good idea to test first. Some sewing machines might have difficulty sewing stretchy fabric. You might want to experiment with a round-tip needle for knitting fabric, a walking foot, or even twin needles.
I use my vintage Singer 201 sewing machine with straight stitches only. It works well with my Brother serger (overlocker). You can combine a serger, traditional sewing machine, or even hand sew. There is more than one way you can make your own garment. Trying is part of the fun.
Happy machine knitting!

Recent Posts


