Easy machine knitted Poncho Cardigan on an LK150

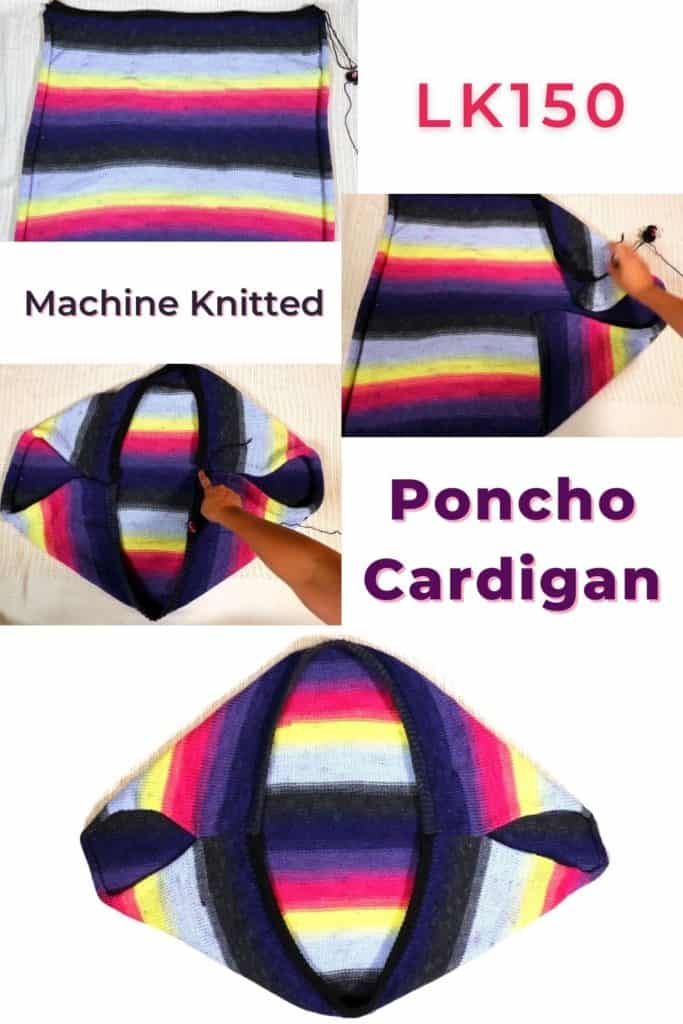
There are many variations of names for this type of garment. It can be called a cocoon sweater, poncho, shrug, bolero, cardigan, and so on. This is one of the easiest sweater garments you can knit by hand or knitting machine. It is basically a rectangle or square and folded in 4 corners toward the center. Seam up a few inches for sleeves and that is all.
Easy and quick cardigan knitting
Since the construction is so simple, you can modify it easily and make it your design. Change the size of the rectangle to make it longer or shorter, change the yarn type or yarn color, or even crochet it instead of knitting. I am using a color-changing yarn to make it more fun.
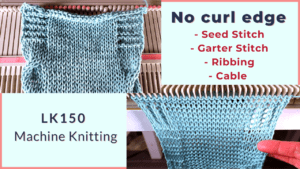
With a knitting machine such as an LK150, you can knit this poncho in half a day. You can also hand manipulate different stitches such as lace or cable to make it special.
LK150 vs. Brother 260
One good thing about the mid-gauge LK150 knitting machine is the number of needles. It has 150 needles, compared to my Brother 260 bulky machine which has only 110 needles. Since my calculation shows cast-on stitches of more than 140, the LK150 is the better choice for this project.
You can also knit 2 separated pieces and seam them up for a bigger fabric if there are not enough needles to cast on. Some people combine (2) LK150 knitting machines to make a very long machine, suitable for knitting a big blanket without seaming.
That is something to consider when you are choosing a knitting machine to match your project.
Watch our video tutorial of the bolero poncho knitted with an LK150
Picture tutorial for machine knitting the Cocoon Poncho on an LK150
Design ideas, materials, and gauge
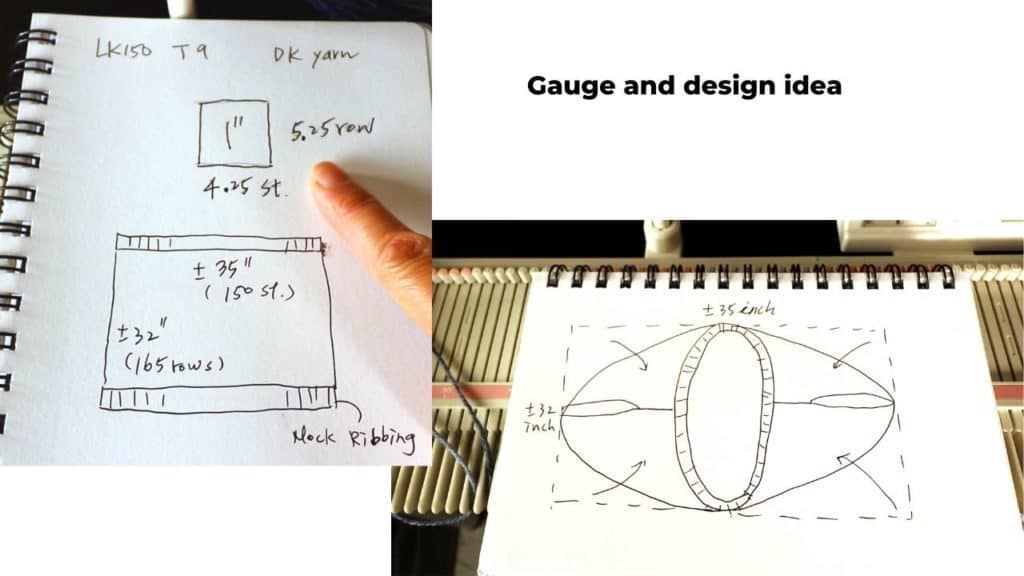
The yarn I use is the Yarnspirations Caron Skinny Cakes (category 3 or DK weight yarn). This is a color-changing yarn. I also added some black DK weight yarn just because I am a little short on my stash.
The design is a 35-inch by 32-inch rectangle. The numbers can range from 28 to 40 inches, depending on the length and the look you like.
I added some mock ribbing on the top and bottom, so I don’t have to finish it later. You can also skip that for now and add ribbing or other finishes later. Maybe crochet the edge later.
Based on my sample swatch, I have about 4.25 stitches and 5.25 rows per square inch, with Tension 9 on an LK150 knitting machine. You can calculate stitches and rows based on your gauge. You do not have to match my calculation.
Cast on for Mock Ribbing
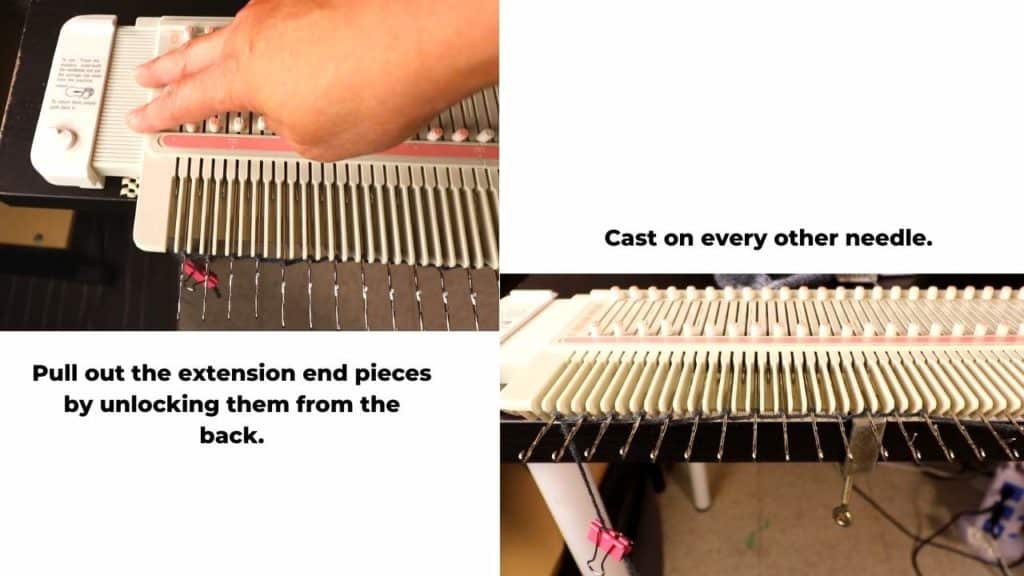
Since I need about 150 stitches for this project, I try to use all the needles on the LK150 knitting machine.
First, pull out the extension beds on both sides of the machine, so the carriage has enough space to rest when knitting a full bed of needles. The locking device is on the backside. You will need to turn the machine over to see it.
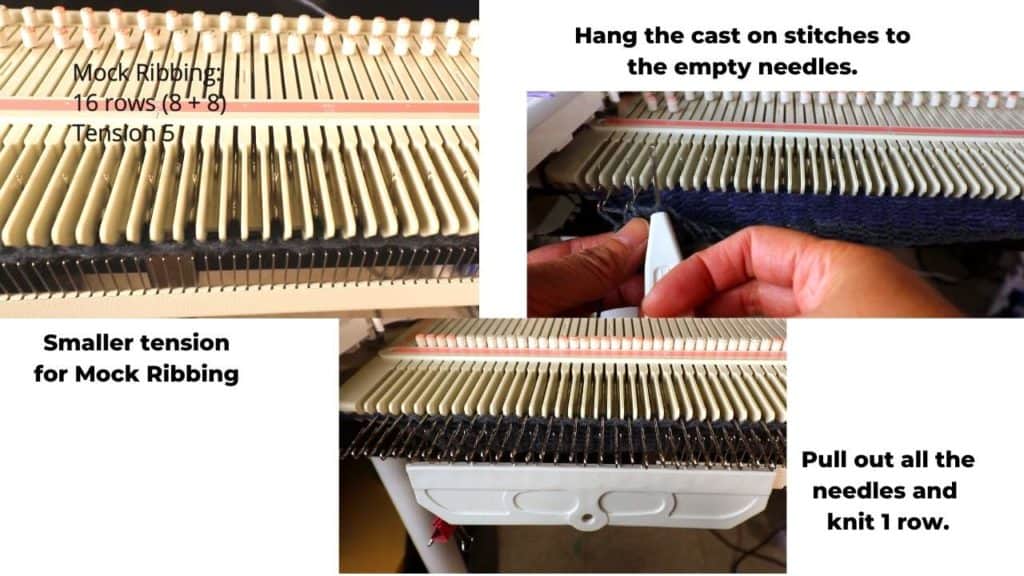
To cast on with mock ribbing, pull out every other needle and do the e-wrap cast on. Or you can start with waste yarn and ravel cord, then start the e-wrap. Starting with waste yarn can make casting on easier and stitches more even.
Set a lower tension for the mock ribbing. I use Tension 5. Since we will fold the mock ribbing in half, knit double the amount of the final rows you see. I have 8 + 8 rows. You can also add a turning row in between, so it will be 8 + 1 (turning) + 8 rows = 17 rows.
Pick up the cast on stitches and hang them back on the empty needles.
Pull out all the needles and knit 1 row. You can use a higher tension for this row.
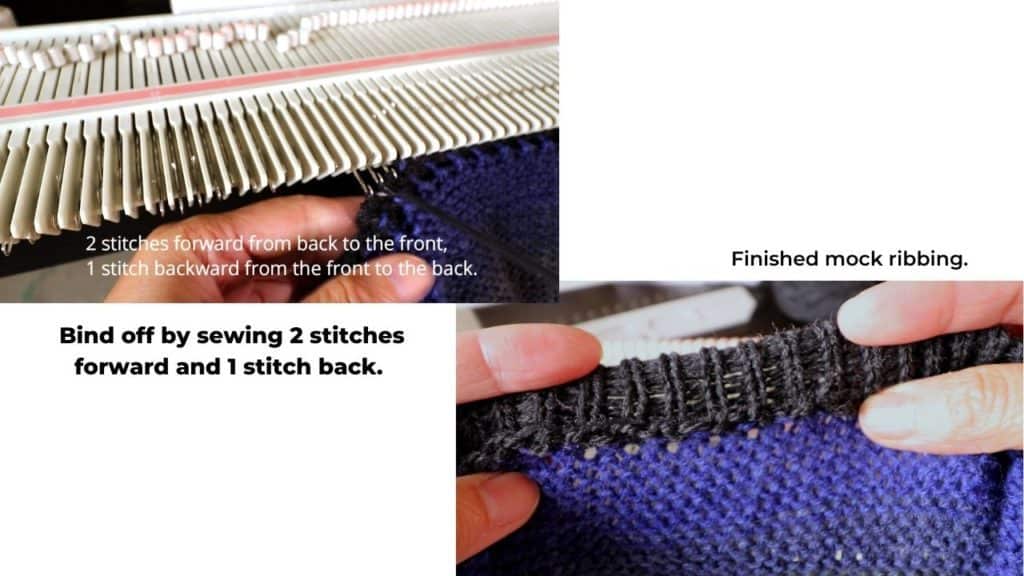
Now the mock ribbing is done.
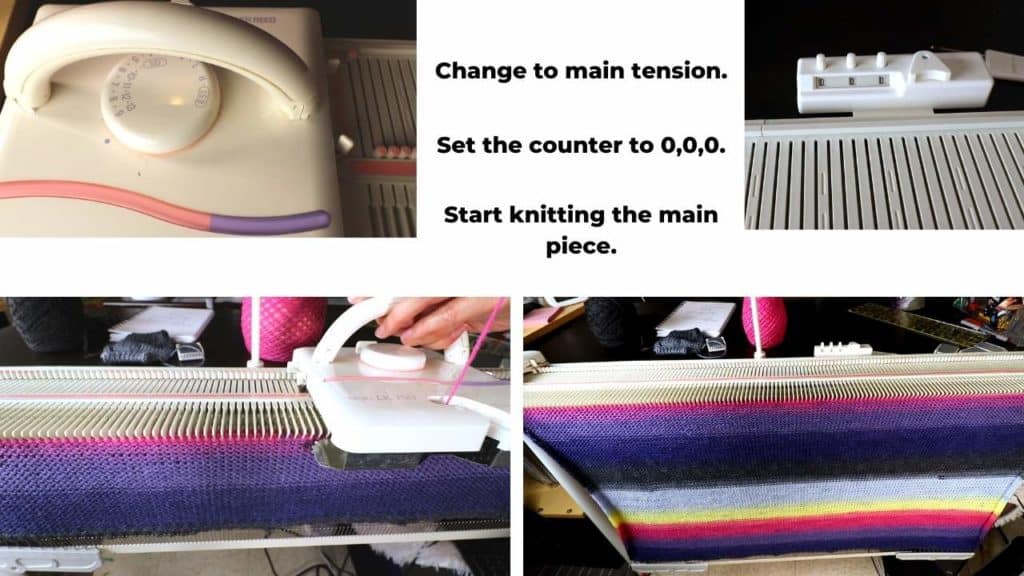
Knitting the main body
Now we can start knitting the main body. Set to the main tension (T9). Set the counter back to 0,0,0. Start knitting the rows according to your calculation. I have 165 rows.
Mock ribbing on the top edge
After the main part, we had to do a mock ribbing again to match the bottom.
It is easier to cut a piece of waste yarn in a contrasting color, thread the yarn through every other needle. The empty needles should go back to the A (non-working) position.
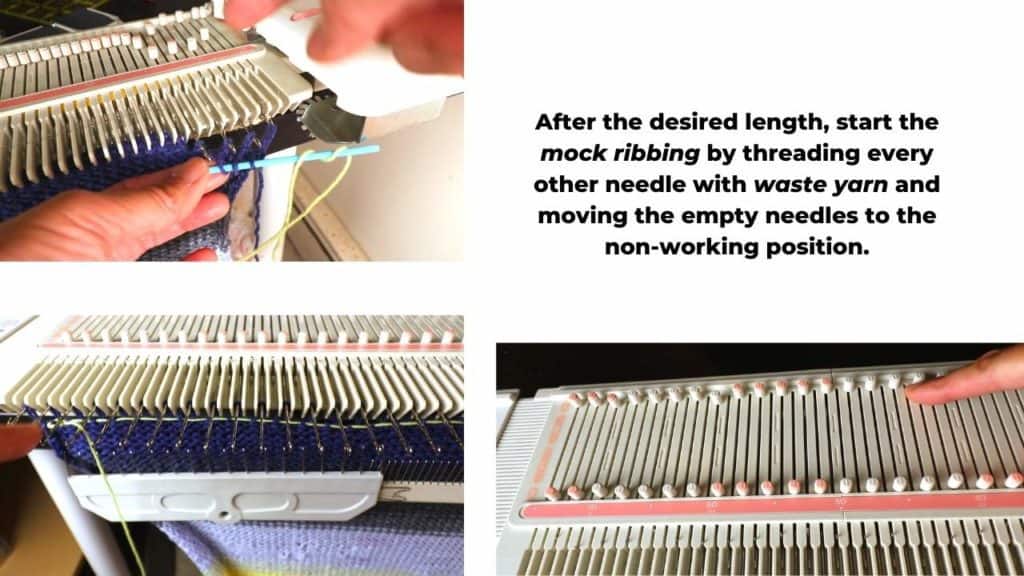
Change the tension back to the mock ribbing tension (T5) to match the beginning mock ribbing.
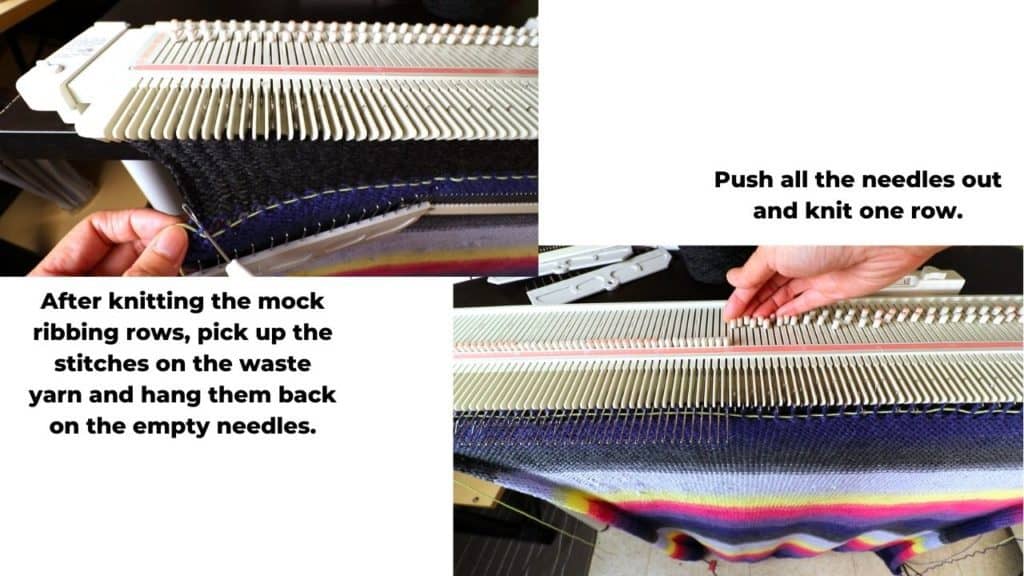
Knit the rows to match the bottom mock ribbing.
Then, pick up stitches on the waste yarn and hang them back to the empty needles.
Knit 1 row and bind off by sewing 2 stitches forward and 1 stitch back.
Or, you can use any method of bind-off. This project does not need the extra stretch.
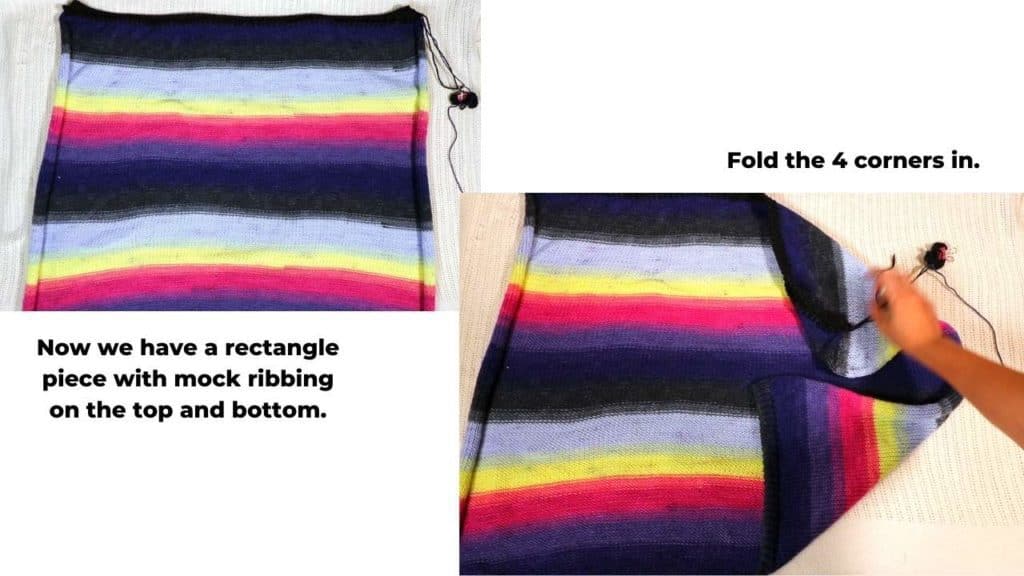
Fold and seam the sleeves
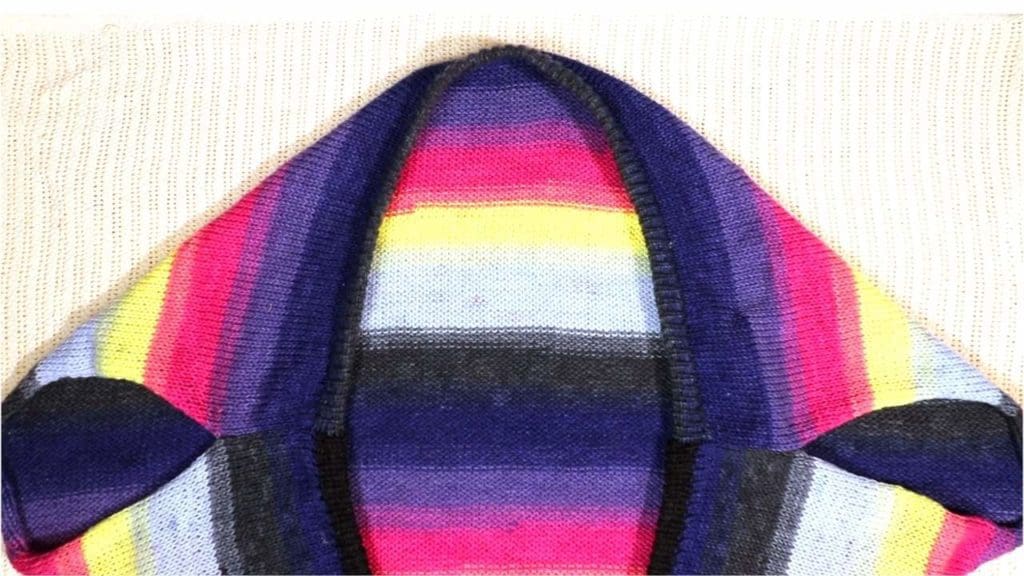
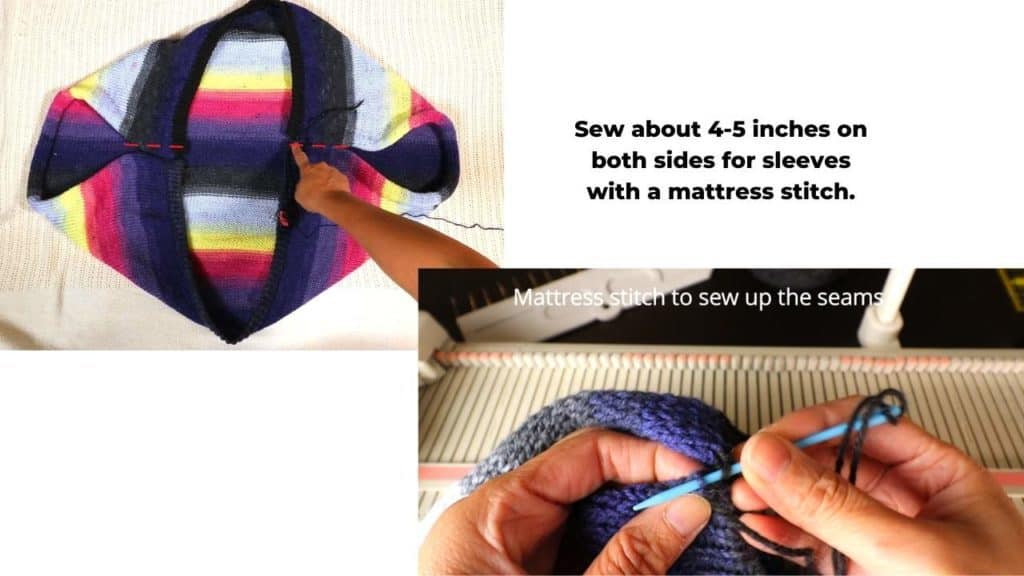
Now we just need to fold the 4 corners into the center and seam up about 4 to 5 inches for each sleeve.
See the picture below for areas to seam up. You can use a mattress stitch for this.
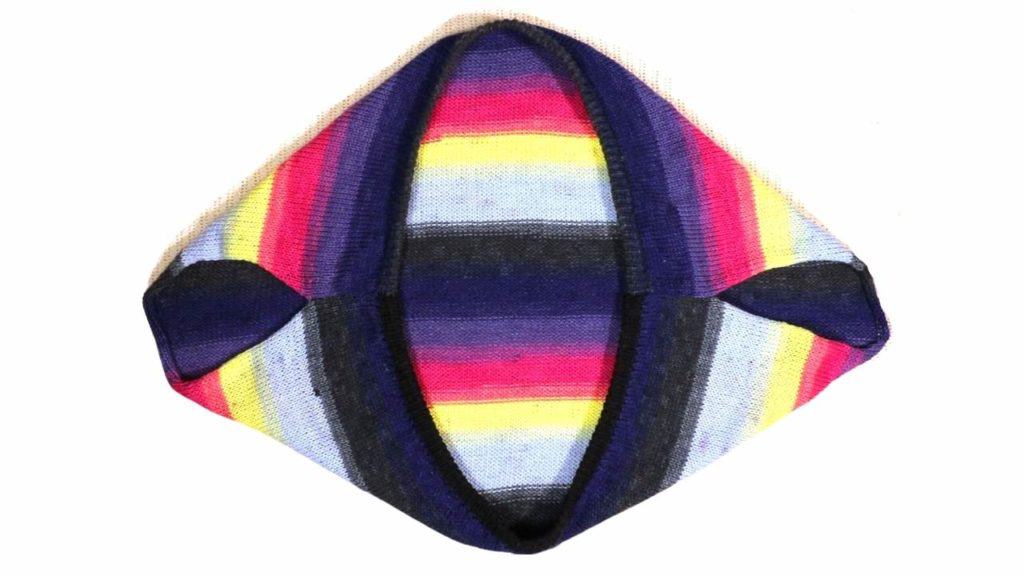
Steam block and all done!
If you like, you can add ribbing for the sleeve openings too. Attaching the yarn and hand-knit the ribbing would be my choice. Or, you can just leave it as is and let the sleeve edges roll in a little.
Happy machine knitting!
Finished bolero/poncho/cardigan.
Recent Posts


You May Also Like
Kid’s cut and sew sweater on a Brother 260 knitting machine

Neck warmer with ruffled edges