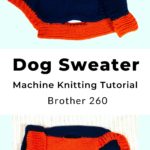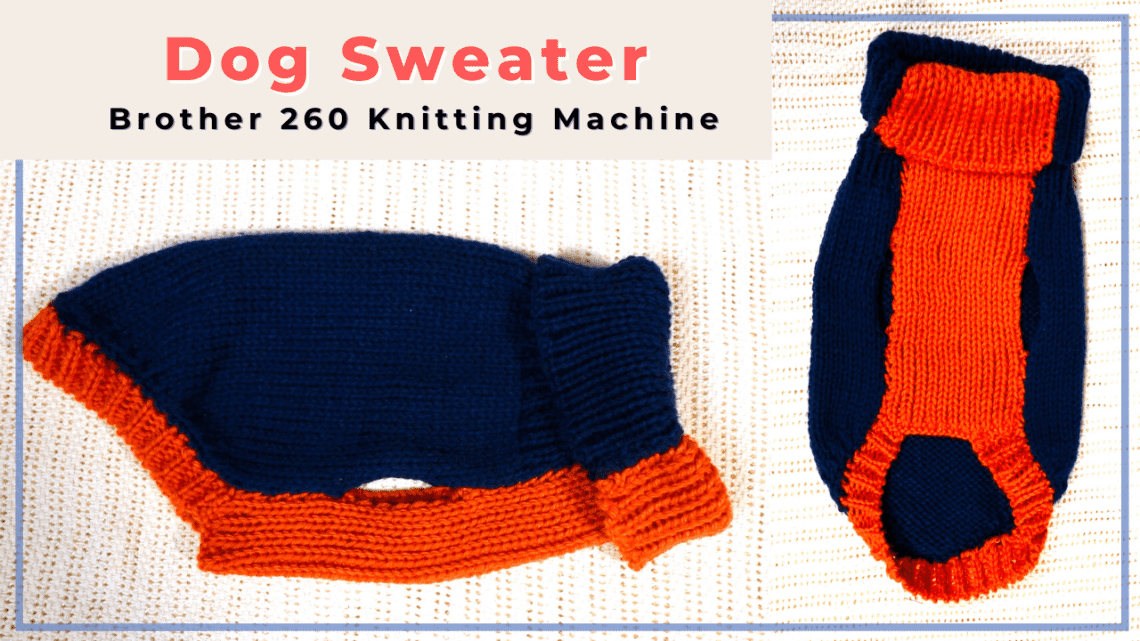
Machine knitted dog sweater on a Brother 260 with a ribber
A dog sweater is a fun project for machine knitting. The size is smaller, so you can experiment with different designs and color combinations. If it does not work out the way you like, it is easy to just start over. We can also match the machine knitted dog sweater with the human sweater, so the owner and the pet can have the matching set.
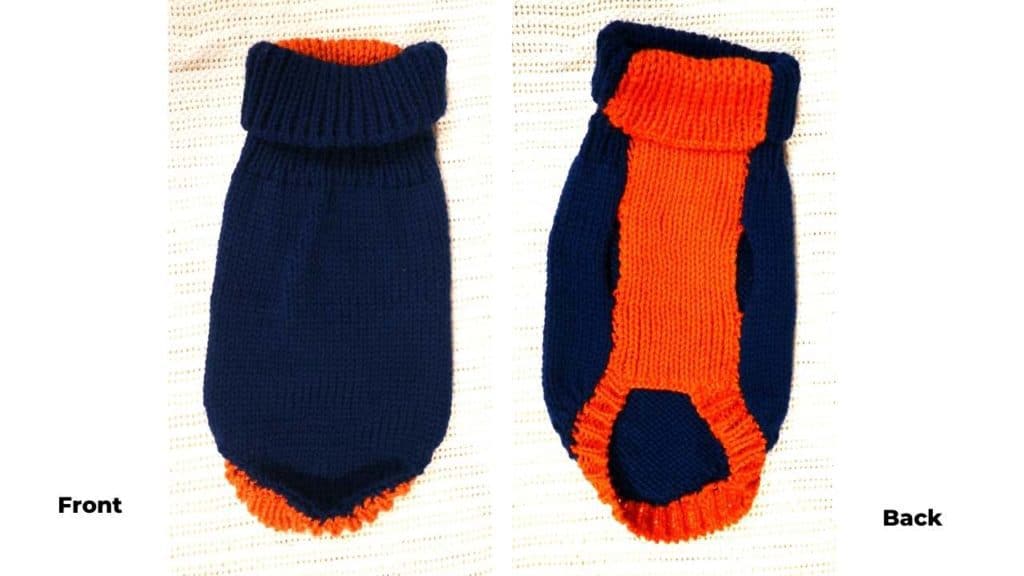
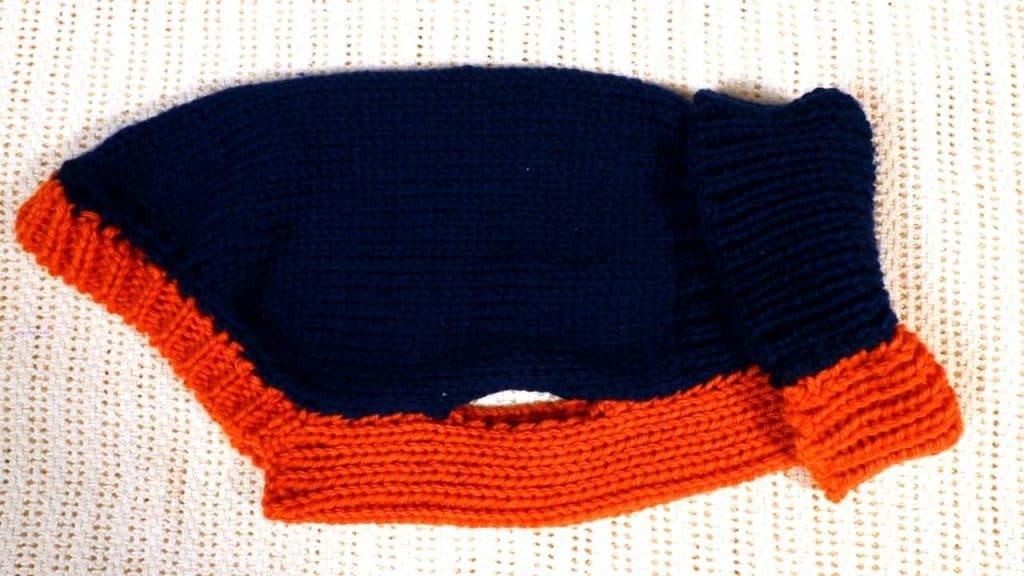
In this project, I am using a Brother 260 knitting machine with a ribber for the 1 by 1 ribbing. The neck and under panel will be stretchy ribbing, and there is a curved line at the end of the dog sweater by decreasing stitches.
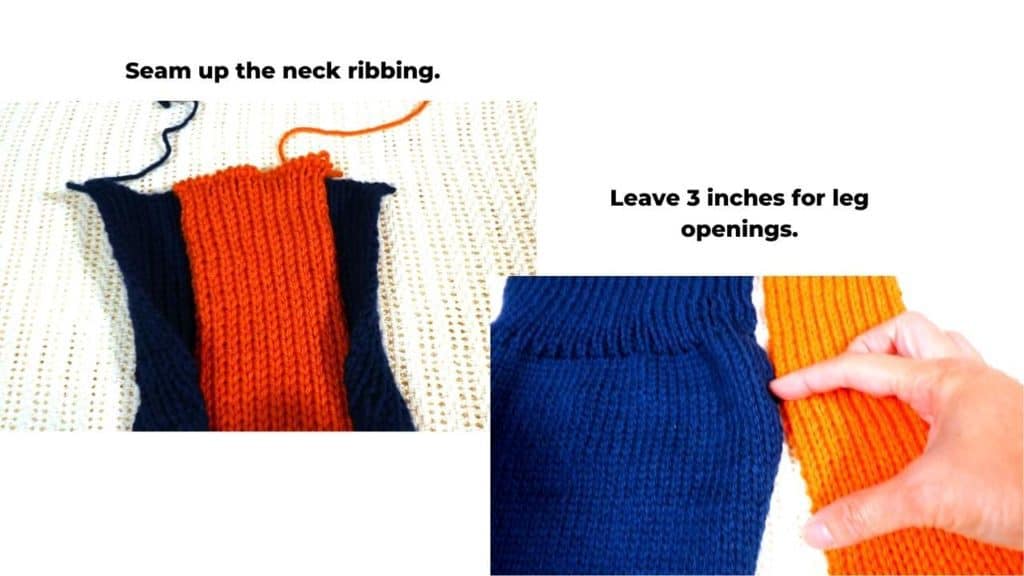
The leg openings are created by leaving a 3 inches gap when sewing up the top and bottom pieces.
I am using worsted (medium) weight acrylic yarn from the local craft store. It is machine washable and the heavier yarn makes it look more like a hand-knitted sweater.
Hand-knitting would be a good idea too, because you can add a lot of details, such as different motifs or textured stitches at the back. You just have to change your calculation a little based on your swatch. Since this is a small project compared to the adult sweater, it can be knitted fairly quickly.
Watch the video tutorial for a machine knitted dog sweater on a Brother 260 knitting machine
Step-by-step tutorial for machine knitting a dog sweater on a Brother 260 bulky knitting machine
Design and calculation
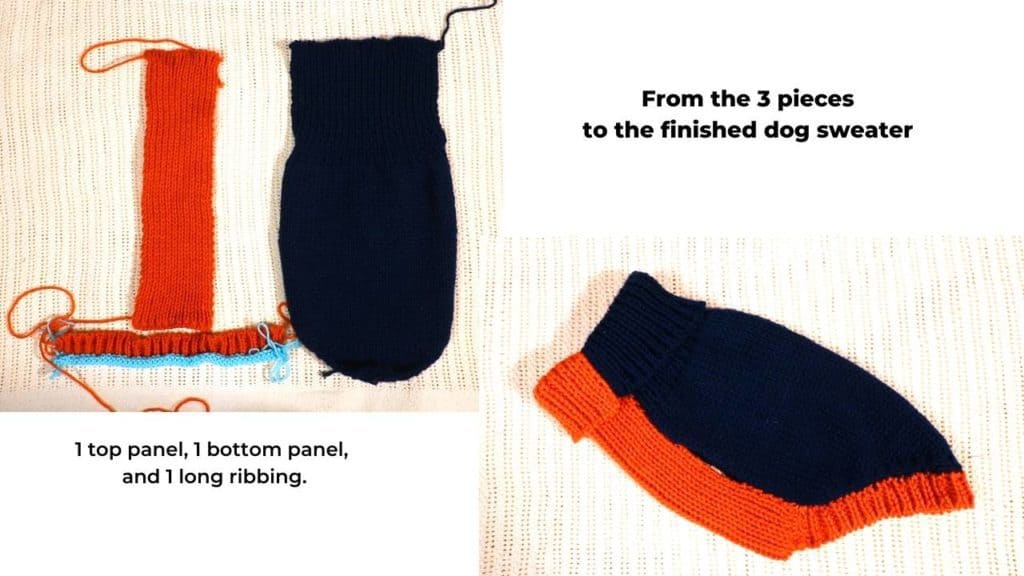
The basic design of this dog sweater is to knit 3 separate pieces and sew them together.
The main piece starts with the neck ribbing and switches to plain stockinette stitches. Then decrease stitches on both sides to create the curve.
The under panel piece is just 1 x 1 ribbing. It also starts with the neck ribbing and continues to the length of the under panel. It should be shorter than the top piece.
The third piece is the 1 by 1 ribbing to finish up the curved line. You can skip this part too. The curved line does not roll in much because of the full-fashioned decrease.
Key measurements and common sizes for dog sweaters
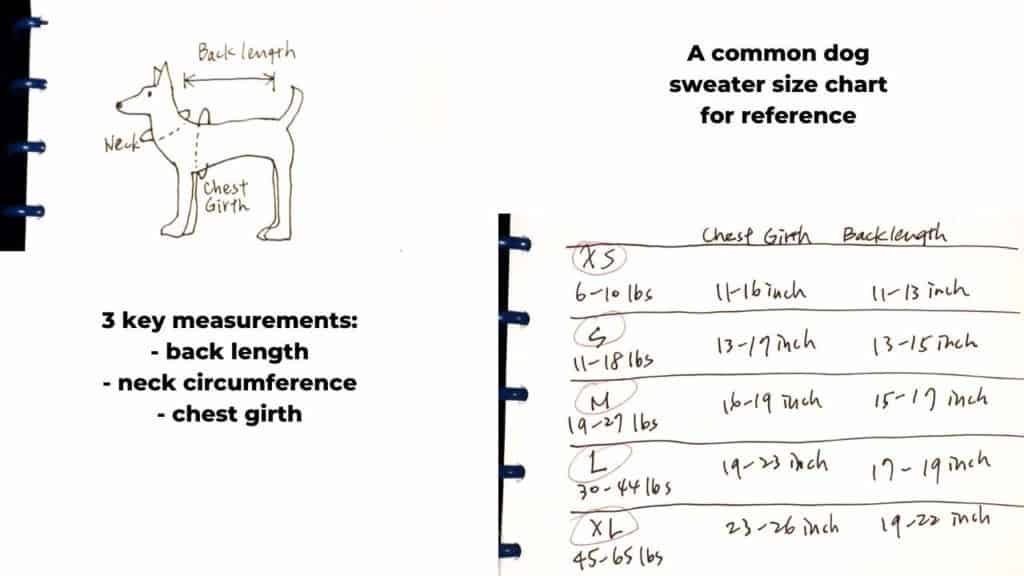
The 3 key measurements include the length of the back, the neck circumference, and the chest girth.
The chart below is for reference. Every dog has a unique shape and size.
The most important thing is to make sure the sweater can go over the neck and chest. Since we use a lot of ribbing stitches, the sweater is pretty stretchy and forgiving.
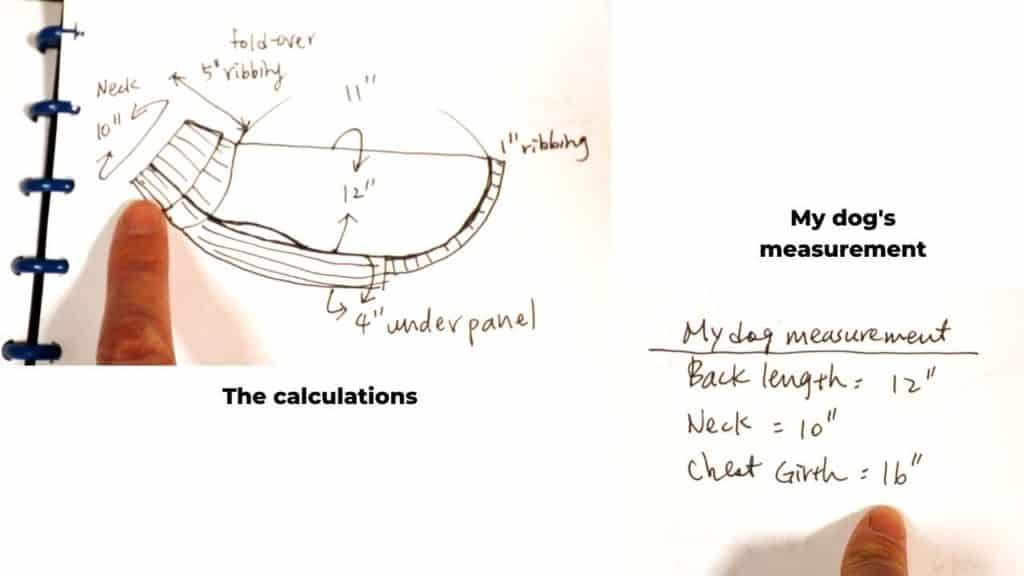
The picture below shows my calculations based on my dog’s dimension and my sample gauge.
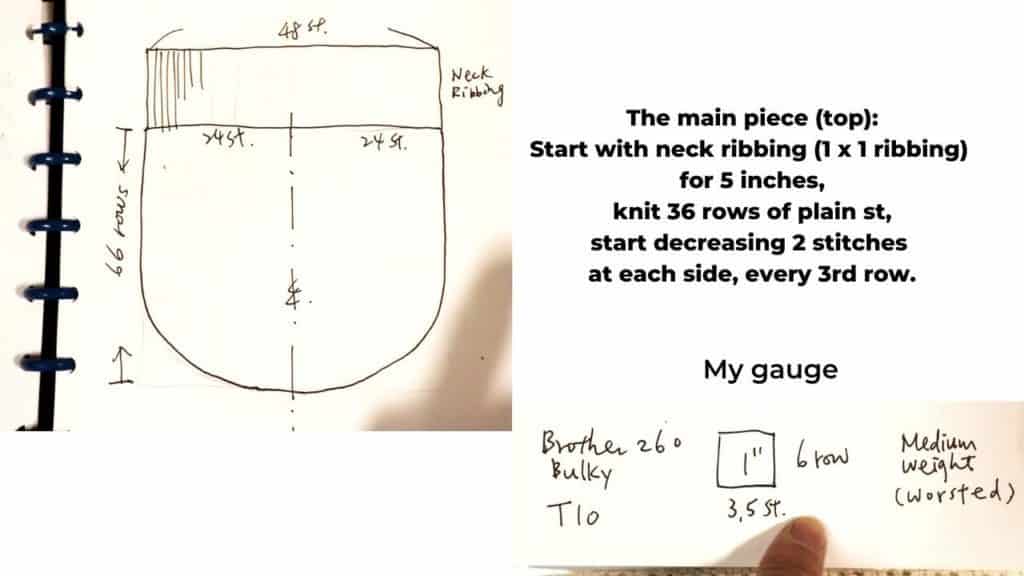
Machine knitting the top panel
We start with the neck ribbing of the main piece. Set the pitch to P3. Cast on every other needle on both knitter and ribber.
I have 24 needles on the knitter and 23 on the ribber, so the end stitches are on the knitter.
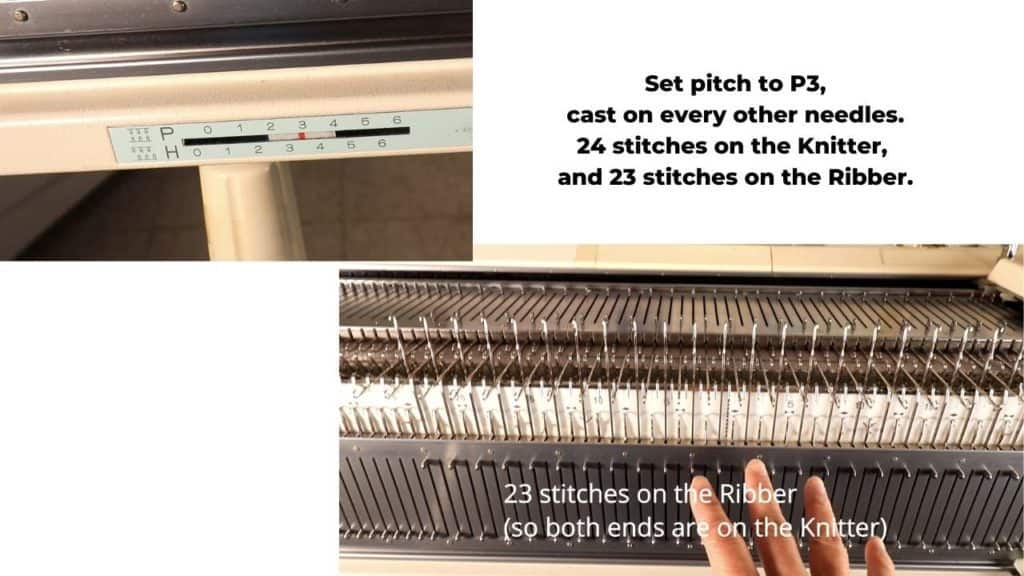
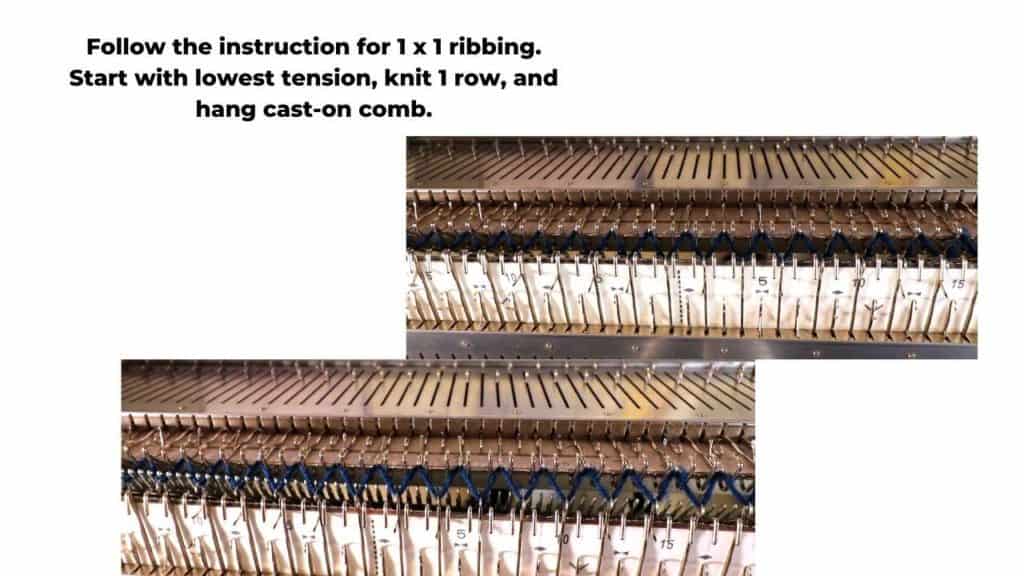
Follow the instruction manual for the 1 x 1 ribbing. Start with the lowest tension, knit 1 row, and hang the cast-on comb.
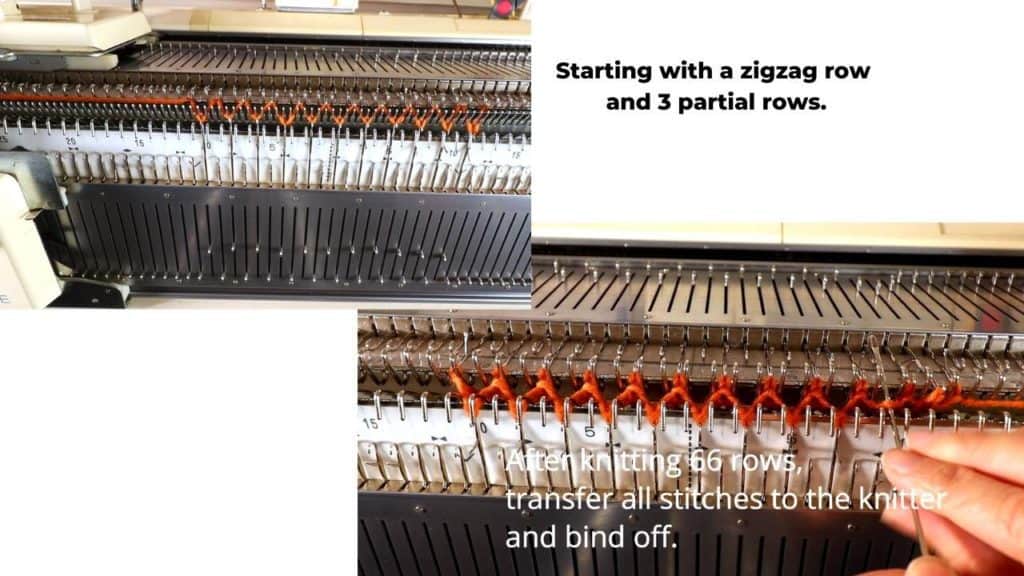
You see the first zig-zag row.
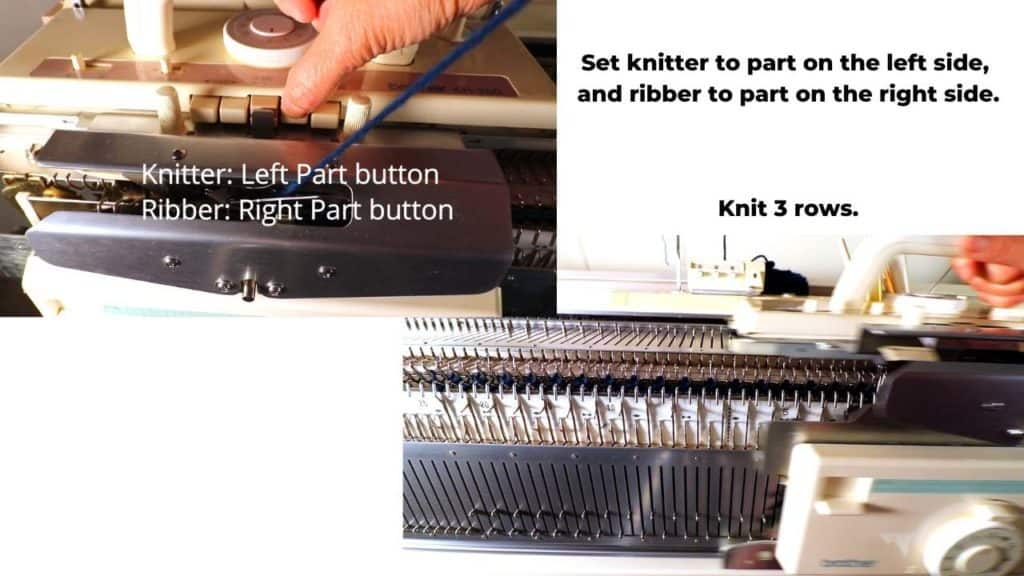
Set the knitter to left “Part”, and ribber to right ” Part” and knit 3 rows.
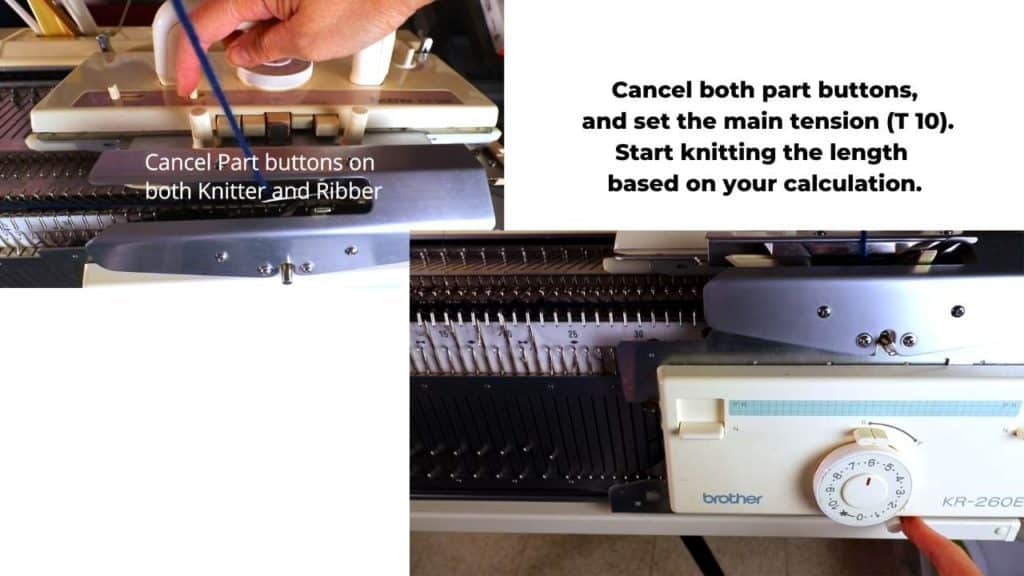
Then, cancel the “part” button and set the main tension (I use tension 6 for ribbing) on the carriage.
Start knitting back and forth to the length you like. I knit 30 rows, so the neck can be folded over for a turtleneck.
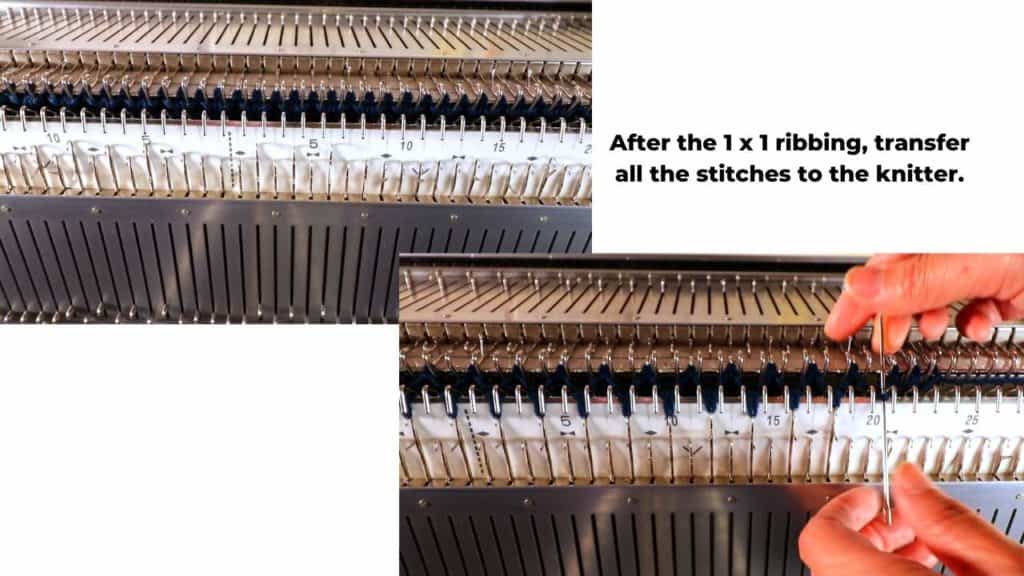
After 30 rows of your desired length, transfer all stitches to the knitter with a double-eye transferring tool.
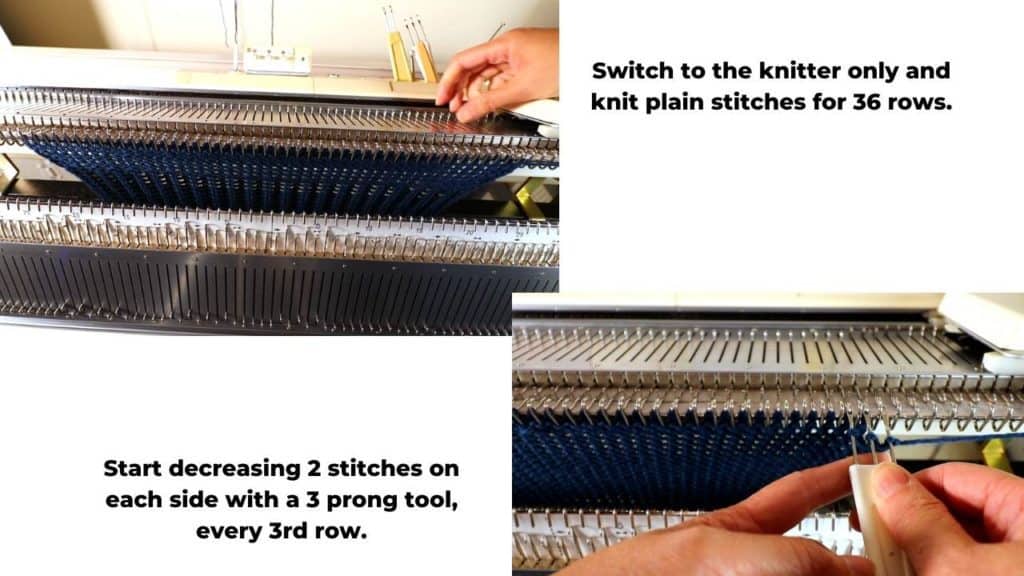
Change the carriage arm to the knitter’s arm, set the new tension (I use tension 10), and start knitting the stockinette stitch before the curve line. I knit 36 rows.
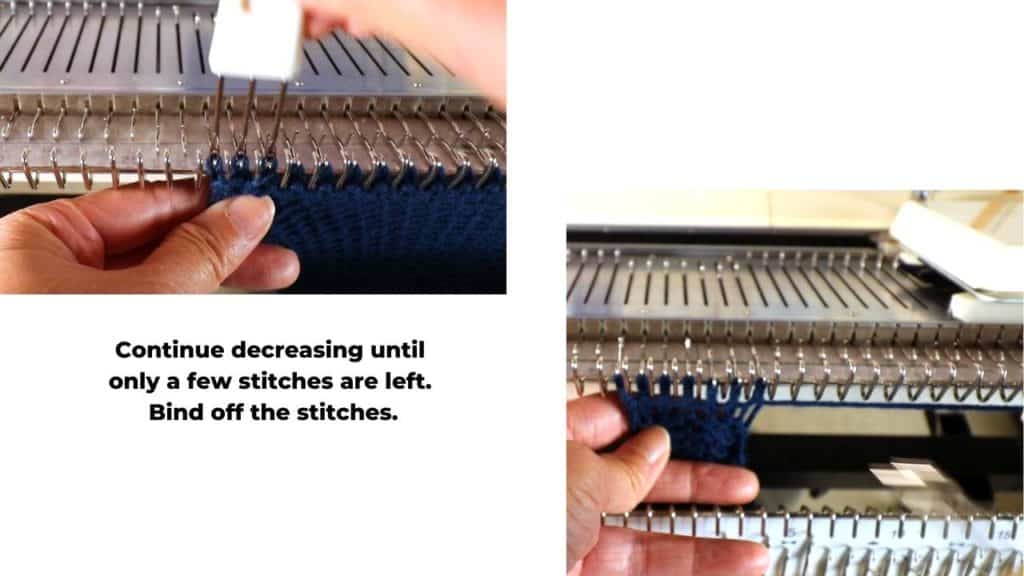
Start by decreasing to make the curved shape. I use a 3-prong transferring tool, decrease 2 stitches at a time on each side. Repeat every third row.
When there are only a few stitches left, just bind them off.
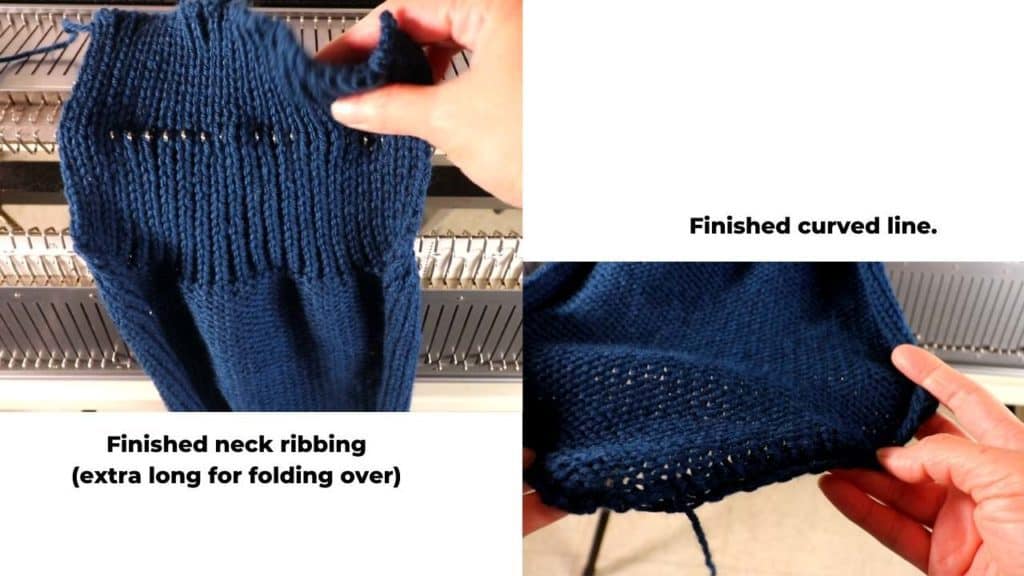
The finished main (top) panel has neck ribbing on the top and a curved line on the bottom.
Machine knitting the under panel ribbing
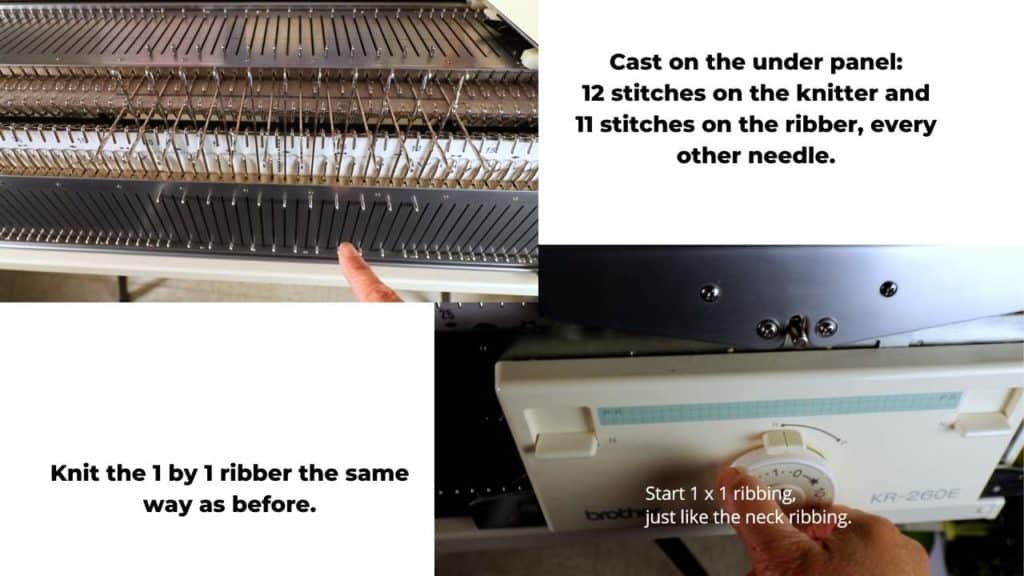
Now we knit the under panel the same way as the neck ribbing. The whole under panel will be 1 by 1 ribbing.
Cast on 12 stitches on the knitter and 11 stitches on the ribber, every other needle.
Set the lowest tension and start the zig-zag row. Hang the cast on comb and weight.
Change the setting to left “Part” on the knitter and right “Part” on the ribber. Knit 3 rows.
Set the tension to your ribbing tension (T6) and knit the rows according to your calculation. About 60-66 rows.
Transfer all stitches to the knitter.
Bind off all the stitches.
Long ribbing for the end
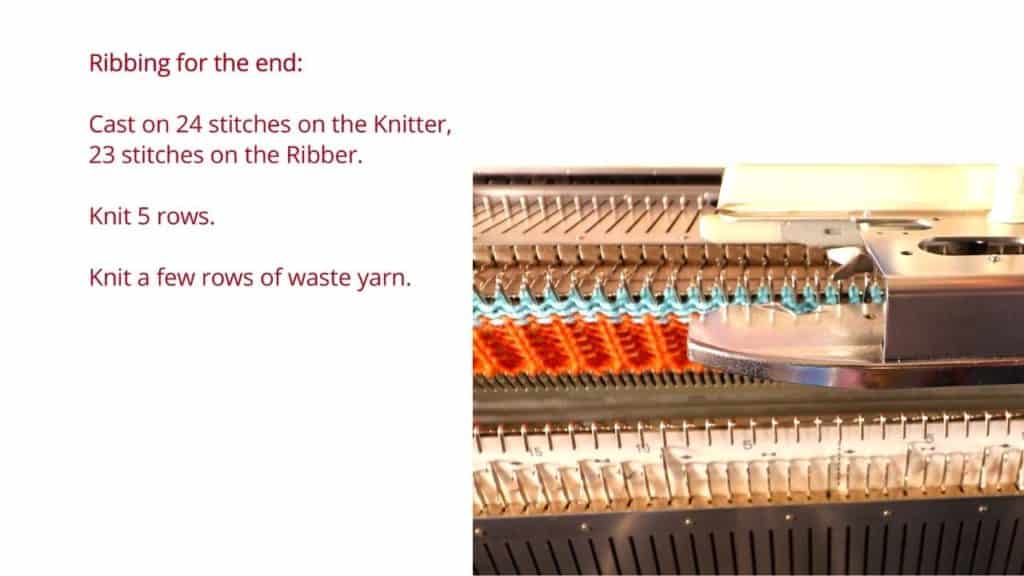
Cast on 24 stitches on the knitter and 23 stitches on the ribber, every other needle. Knit the 1 x 1 ribbing the same way as before.
Knit about 5 rows.
Change to waste yarn and knit a few rows.
Assembly of the pieces
Now all 3 pieces are knitted. Time to sew them together.
Match the neck side and start sewing the seams. Decide the location of the leg opening, and leave about 3 inches without sewing it up. This gap becomes the leg openings.
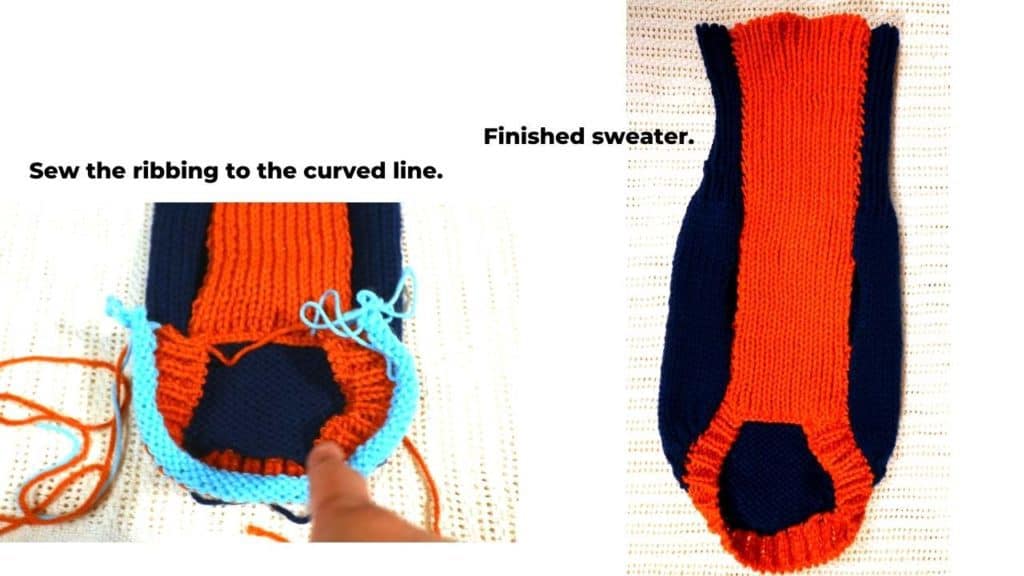
Match the long ribbing to the end opening. Pick up the stitches on the waste yarn and seam up with a yarn needle and a long piece of yarn.
That is all! Time to try on your dog.
You can also add sleeves by adding ribbing around the leg openings. That is optional.
Happy machine knitting!
Recent Posts


