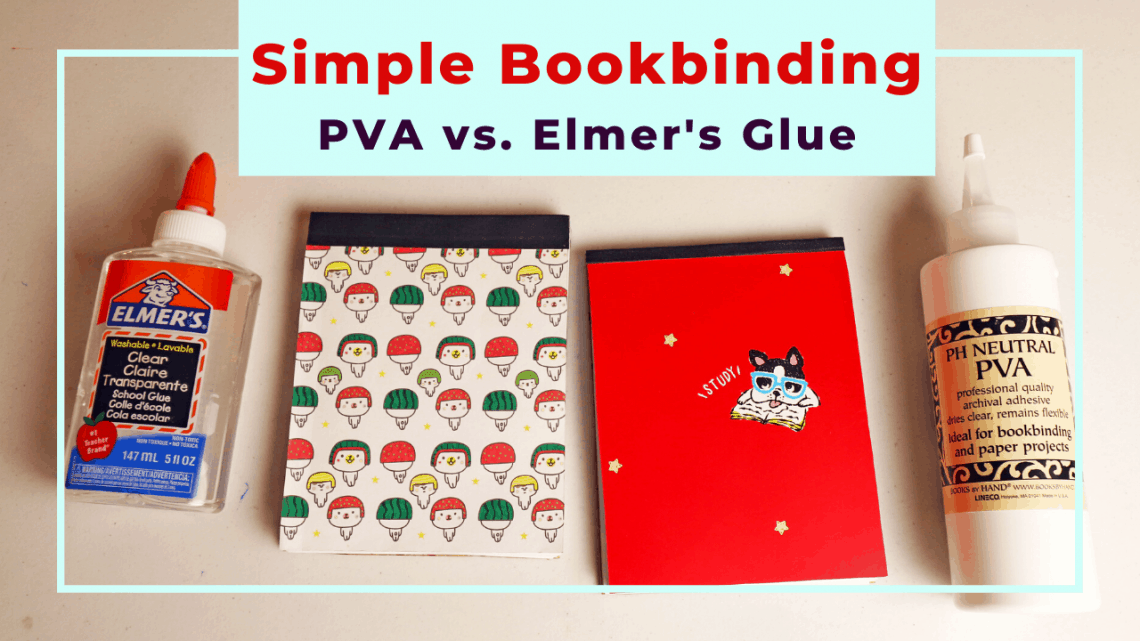
Simple bookbinding with PVA or Elmer’s school glue
It is fun to design your own notebook, journal, or notepad so it is the right size, the right paper, and the right style for you. I always have a lot of different blank journals and notebooks around but still difficult to find the perfect one when I need it.
Bookbinding can be complicated but the basic is very simple. There are tons of methods to create your own book. Some like to sew papers together, some use ring binders or the trendy “Disc bound” system. I like the simplicity of the bookbinding with glue for beginners.

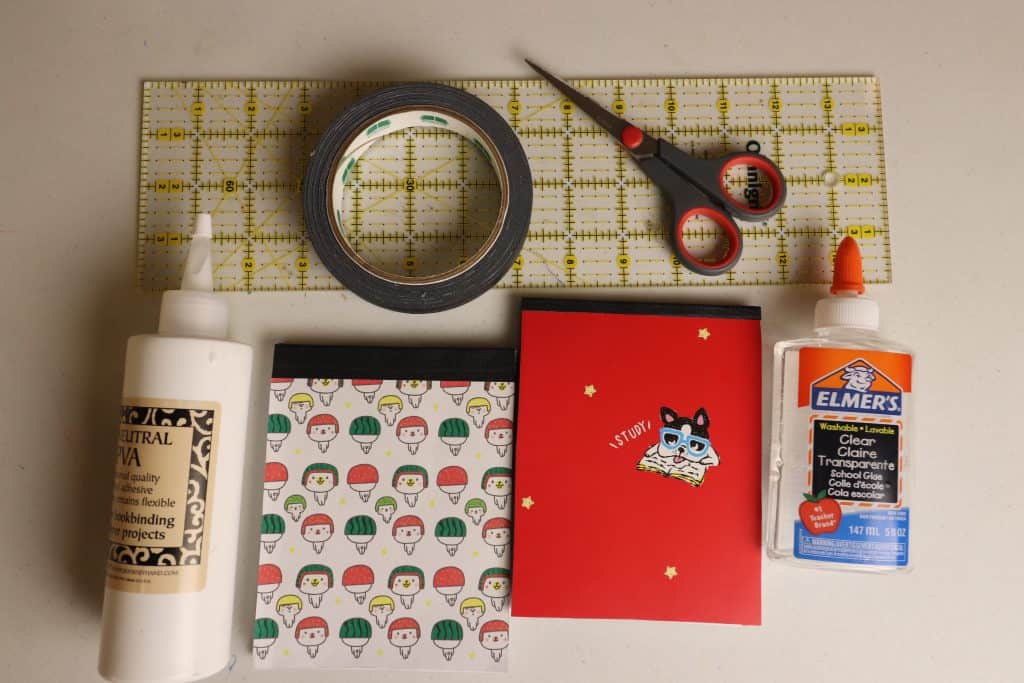
Materials
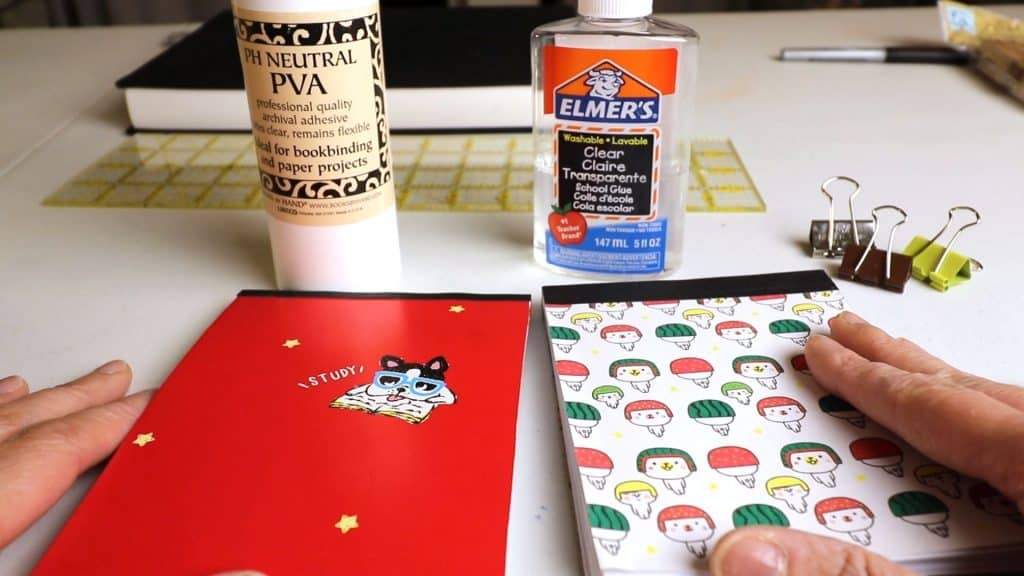
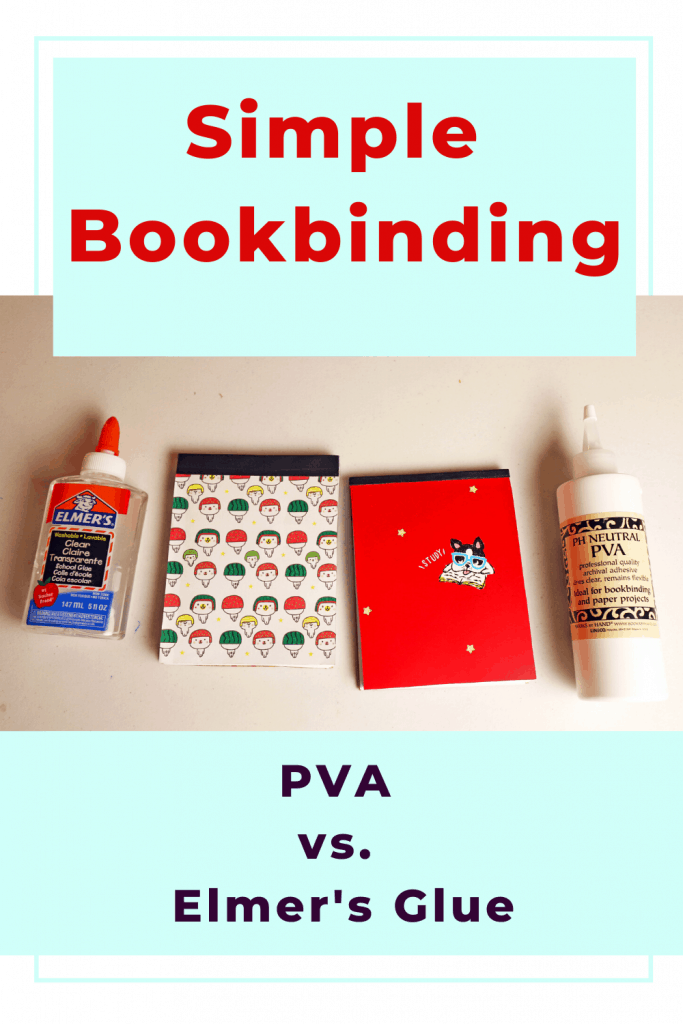
One popular bookbinding glue is called PVA glue. You can find it on Amazon or other websites online. It looks like white glue and the price is fairly cheap. So I do recommend buying the PVA glue if you plan to DIY more notebook in the future.
If you just want to try out bookbinding, you can certainly use basic school glue or Elmer’s glue. They come in clear, white, and many different colors. Kids love using Elmer’s glue to make slimes these days so there are a lot of color choices out there. The glue will be hidden in the book spine so the color does not really matter.
Another material you might want to buy is the bookbinding tape. They come in different width and color. If you don’t care about long term storage or acid-free quality, any tape will do. Duct tape, washi tape, or just a piece of paper with glue will do the same job.
A book press will be nice too but not necessary. A professional book press can cost a lot. You can just place some heavy books or objects on top of the new book to keep it straight and clean.
Comparison of PVA vs Elmer’s glue
What are the differences of the PVA and school glue? PVA is acid free so it will not yellow the papers and the book can last longer. PVA dries clear, stay flexible, and it does not create much wavy wrinkle on papers.
The Elmer’s school glue is not acid-free, so it can discolor the pages in the long run. It is not as flexible when dry. That means the pages can be a little rigid to turn. It also creates more wrinkles on papers and it takes much longer to dry.
If you just want to put together a notepad quickly so you can write down a quick note or shopping list, then you do not need to worry about the acid-free quality for long term storage.
Both PVA and Elmer’s glue will keep the pages together after completely dry. I still prefer the PVA glue because the book spine can bend easily and it creates less wrinkle. However, it is a personal choice. Elmer’s glue can be a good choice for kid’s first bookbinding project.
The process
Preparing the papers
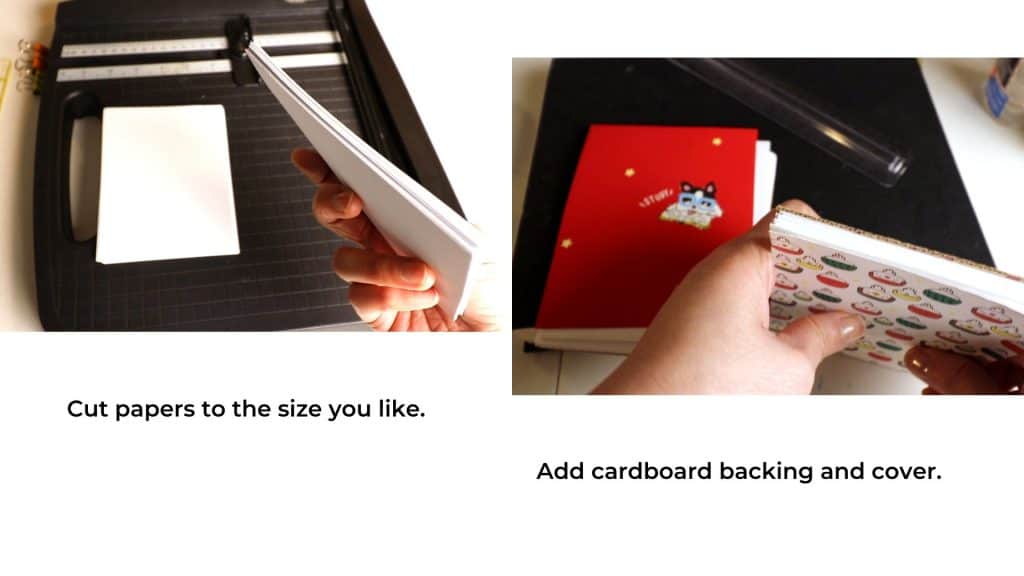
I like to use the standard printer paper. Cut into any size you want. That is one benefit of customizing your own book. Make sure you cut it precisely so the final product will look clean and neat.
If you want grid, line, or dots on the paper, you can create them on a computer first using a graphic design website such as Canva.com. Then print out pages and cut into size.
I cut my letter size paper into quarters so each booklet is small.
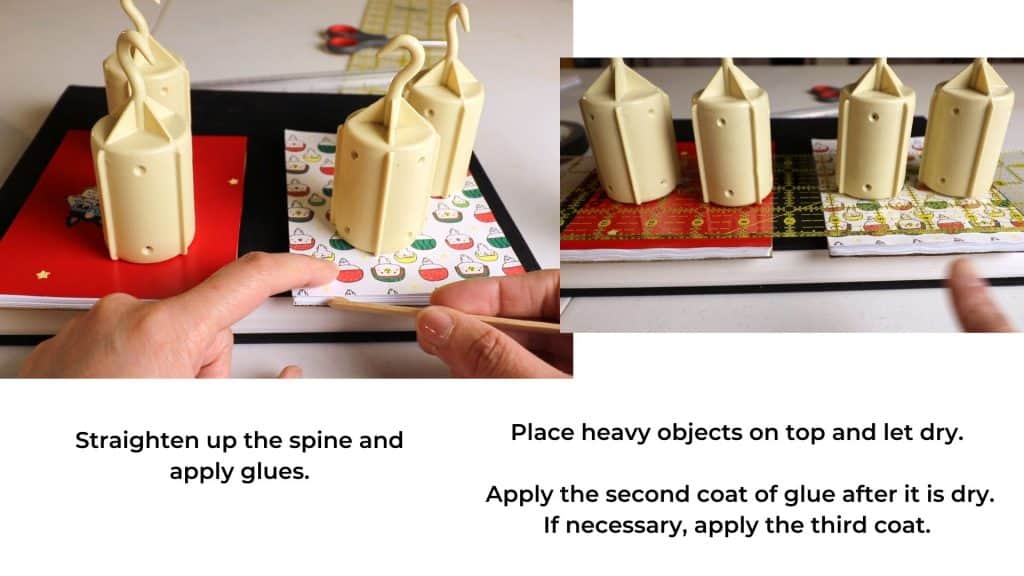
Before applying any glue, tap the spine on a flat surface so all pages align neatly.
Apply glue to the spine
I apply one book with the PVA glue and the other with Elmer’s clear glue. You can use a brush to apply the glue or use a disposable craft stick. You can apply directly from the bottle but you have less control of the amount and evenness.
Apply from the center toward outsides and a little bit at a time so it creates an even coat. Press down a little bit so the glue can get into the spaces between pages for the first coat.
You can place wax papers or scrape papers on top and bottom of the book, then place something heavy on top to keep the book in shape when it is drying.
The drying time can be from 15 minutes to several hours depending on your local weather (dry or humid) and the glue types. PVA dries very quickly but Elmer’s glue can take hours to dry.
After the first coat is dry, apply 1 or 2 more coats as necessary. Then just keep the book under heavy objects or book press and leave it overnight.
To make sure the book dries completely, leave it for several days before opening the pages so the book spine will not bend out of shape.
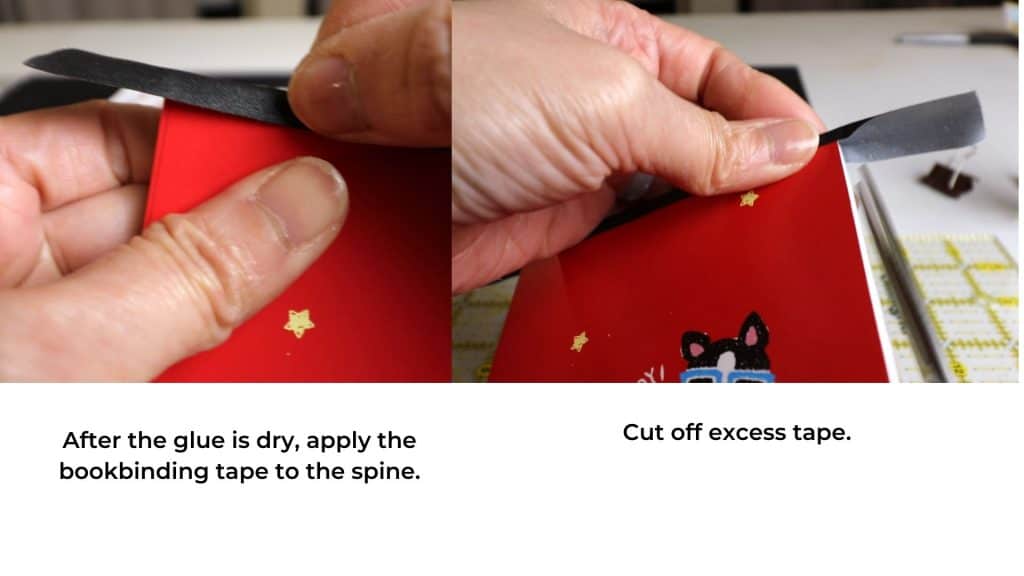
Add bookbinding tape to the spine
After the glue is dry, you can apply a bookbinding tape or other types of tape over the spine. You can cover with a simple paper cut strip and just glue it on, or use other tapes such as duct tape or washi tape.
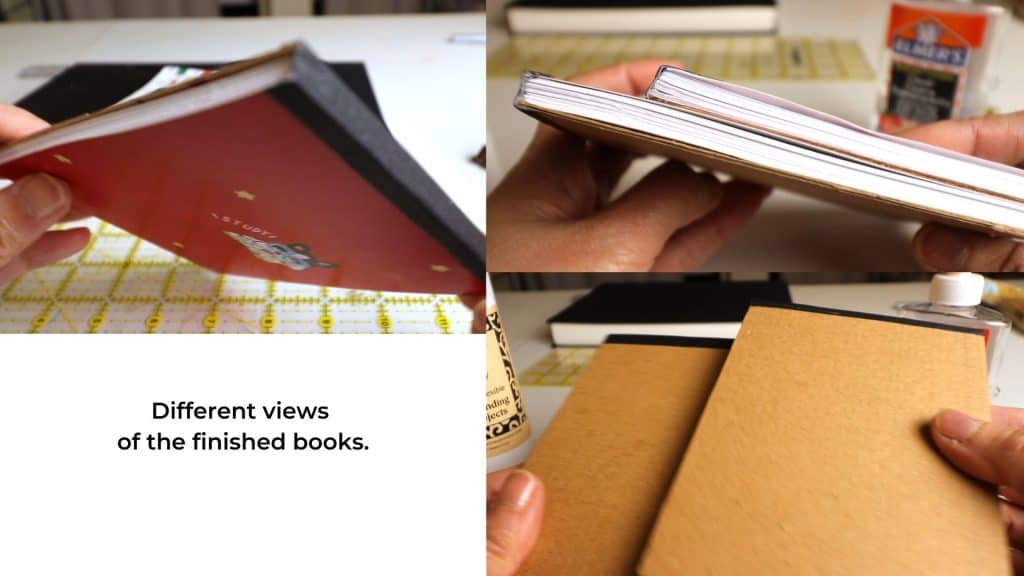
Exterior of the book
You can design your book jacket any way you like. It is more complicated to make a hardcover. It takes precise measurements to cut. You can experiment with different card stock, cardboard, leather, fabric, and other materials.
I place cardboard in the back of the book and recycle some notebook cover by cutting it to the right size. Then use the bookbinding tape to tape over the spine.
There is no limit on what you can do with the book design. Use watercolor paper or special art papers to create your own sketchbook. Once you try the first book, you will want to make more. Have fun bookbinding!
Watch our video for the bookbind with glue


You May Also Like
Replacing sponge bar for LK150 and general maintenance
Review of the KB Flexee loom — a flexible knitting loom for various sizes and shapes