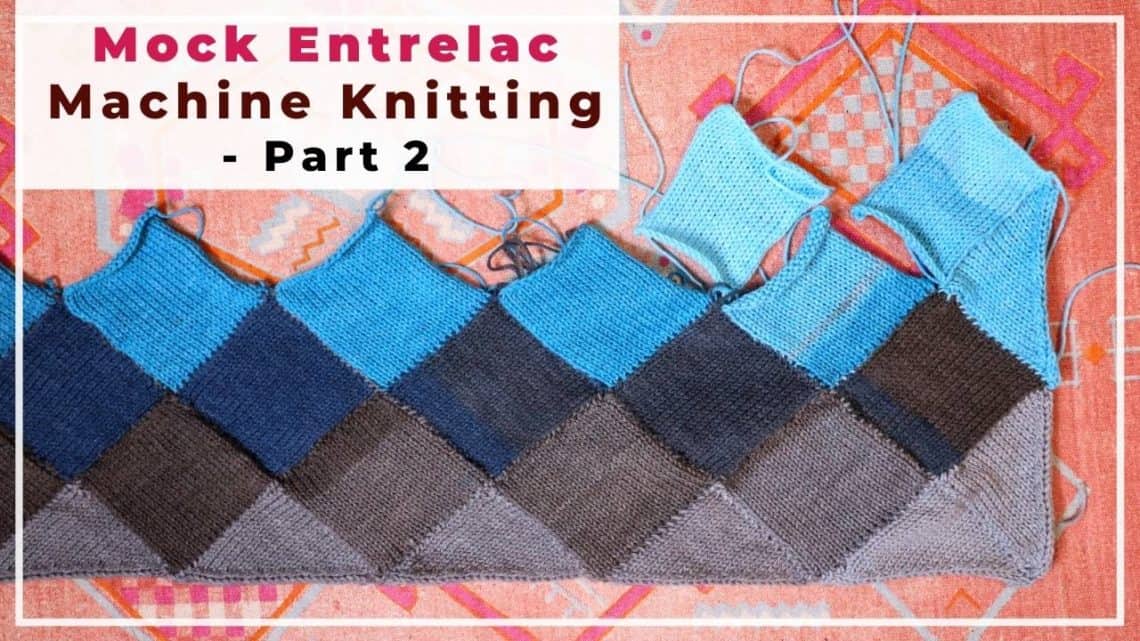
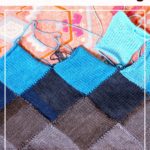
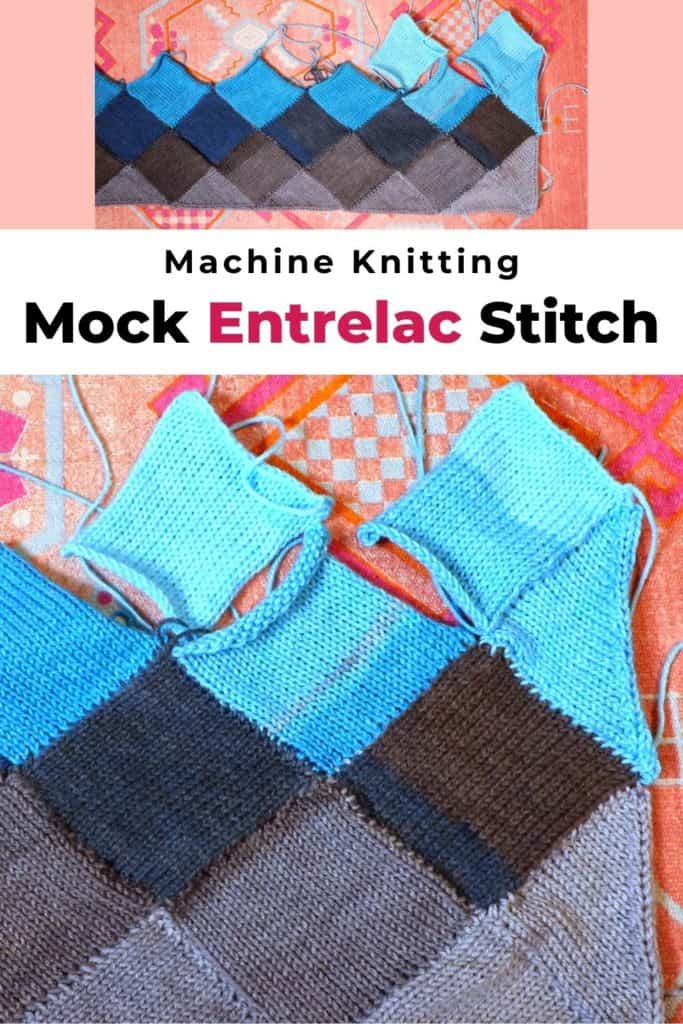
Mock Entrelac Machine Knitting (or hand-knit) – color changing blanket
The Entrelac is a special knitting technique creating a diamond or basket weave-shaped pattern. It can be done with hand-knitting or machine knitting. You can find a lot of tutorials on the internet for the proper techniques. But, they all look kind of complicated to me with so many steps to remember.
Here we are trying to keep it simple and knit individual squares and triangles first. And sew them up later. It is like the granny squares in the crochet world. Or, it can be called modular knitting. The final look is very similar to the Entrelac.
If you use a color-changing yarn, you can see the gradual change of colors and the basket-weave texture. It can be a beautiful and warm blanket on cold winter days.
Here is the link to the Lion Brand Mandala yarn I use. (Disclaimer: Not sponsored by Lion Brand. It is an affiliated link, and we get a small commission if you shop through the link.) The color-changing sections are long enough, so it is perfect for a blanket. It is also acrylic, so it is machine washable and dryable. Suitable for kids.
Watch our Mock Entrelac machine knitting videos Part 1 and Part 2 on an LK150 knitting machine
Construction and chart making of the Mock Entrelac knitting
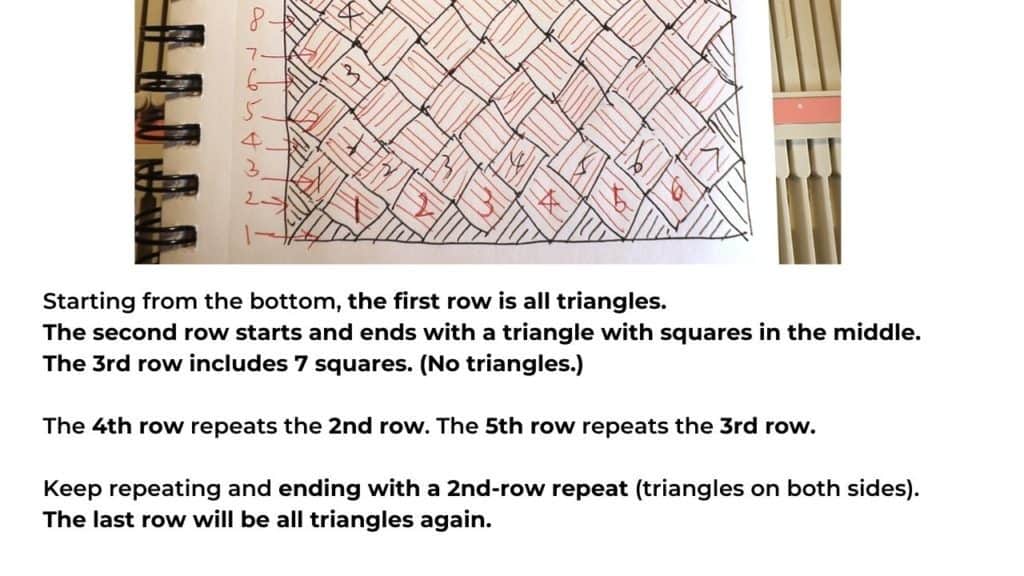
The first thing is to understand the construction and decide the size of the project you want to make. It is always nice to start with a small-sized sample.
Check out the sample Entrelac chart below. The left one is a small Entrelac for practice and the right one is a blanket size. It is about 40 inches wide after knitting up.
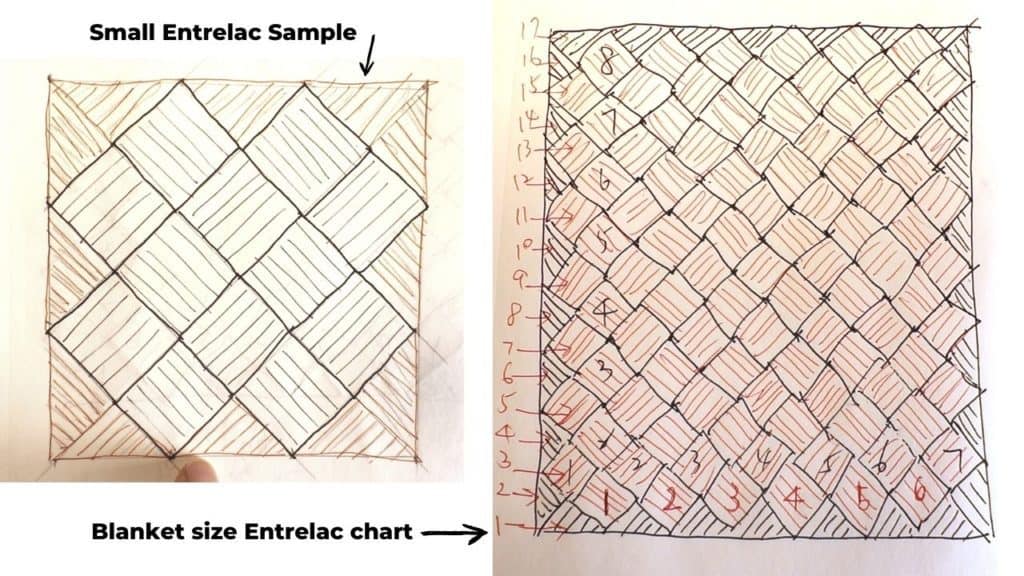
The square and triangle
There are actually only 2 shapes in this chart. All triangles are the same and all squares are the same.
For the triangle shape, the stitches can slant to the right or left. It is achieved by decreasing from the right or left side when knitting on a machine.
Row by row construction
The beginning and ending rows consist of triangles only.
The center includes the alternate of the 2 different rows:
Row 2, 4, 6… – Start and end with a triangle, with squares in the middle.
Row 3, 5, 7… – All squares.
Knitting the squares and triangles on an LK150 knitting machine
The Cast-on Rag + Ravel cord
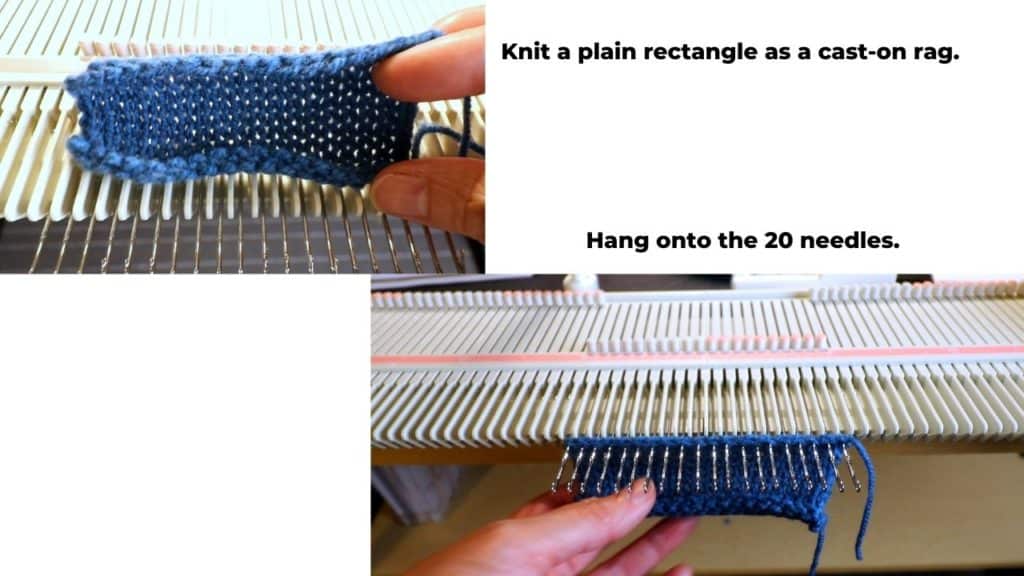
Since we have many pieces to knit, it is easier to have a cast-on rag to hang weights and make stitches even.
I knitted a basic rectangle of plain stockinette stitches that is wide enough for the stitches I want to cast on. Since I planned to cast on 20 stitches, I made the cast-on rag 20 stitches wide.
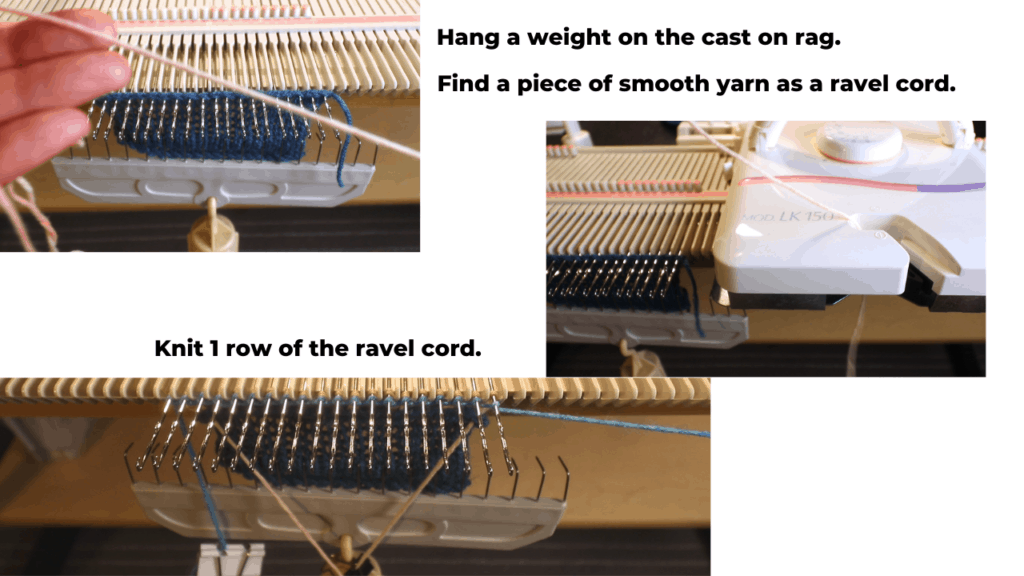
Hang the cast-on rag to the 20 needles with a transferring tool. Push the rag to the back and hang the proper weight.
Cut a piece of smooth yarn, preferably a thinner size, as a ravel cord. You can also buy a nylon cord that is specific for machine knitting.
I placed the ravel cord in the carriage and knit across. It is not necessary to thread the ravel cord through the mast because it is only one-row knitting.
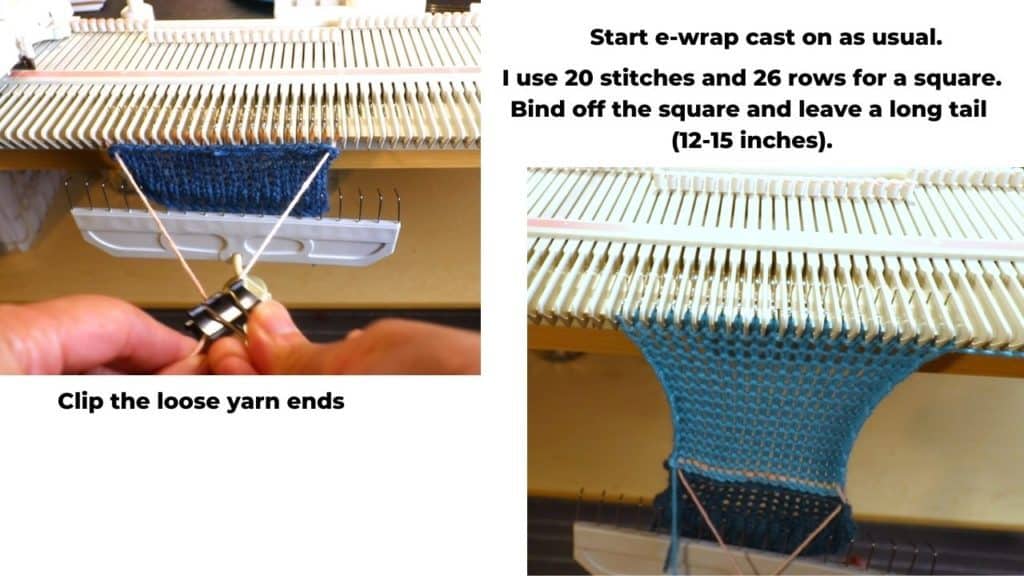
Now we are ready to start knitting with the main yarn. You can start with an e-wrap cast on and knit as usual.
The use of the cast on rag and ravel cord makes the casting on much easier, there is enough fabric to hang the weights, and the tension is more even.
The Squares
For the squares, I cast on 20 stitches and 26 rows. Then bind off, leaving a long yarn tail (12-15 inches) for sewing later.
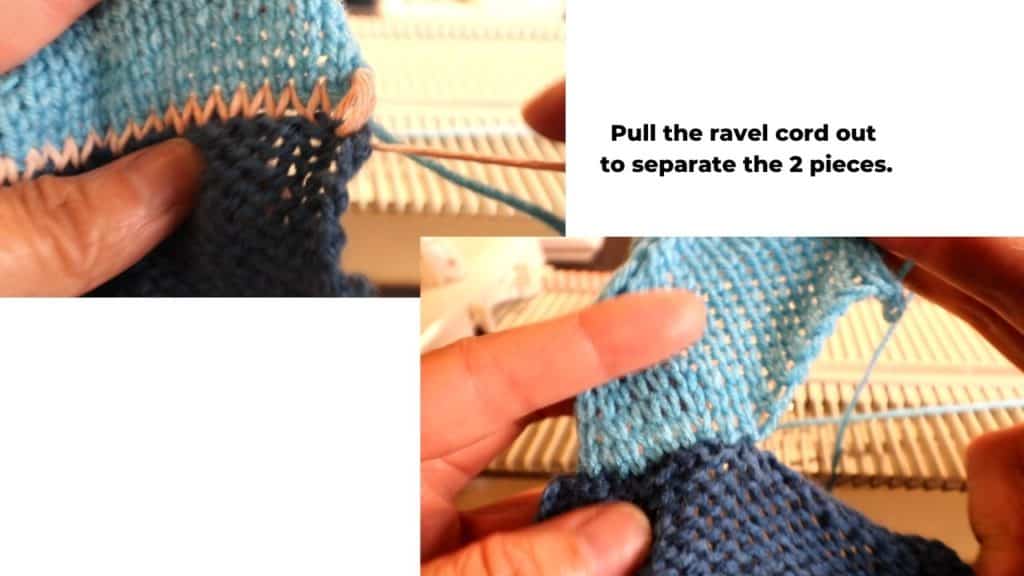
Pull out the ravel cord to easily separate the 2 pieces after knitting.
The triangles
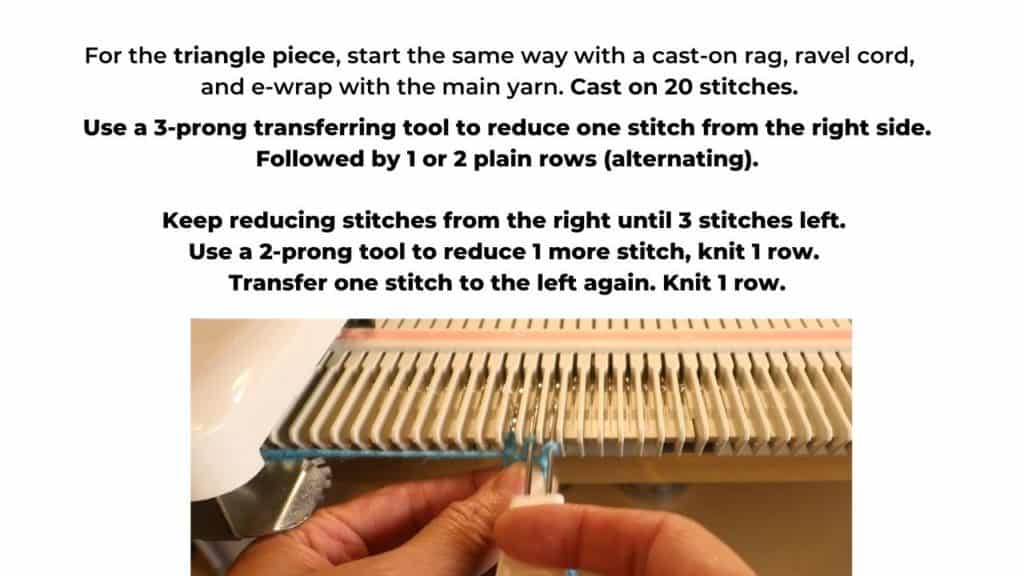
For triangles, I also cast on with 20 stitches. Knit 2 rows, and start decreasing.
You can start decreasing from the right or left side. It will create different slanting directions. I choose to decrease from the right side.
I use a 3-prong transferring tool to do a full fashioned decrease. This creates a sturdy edge.
I also alternate the row numbers between decreases.
After the first decrease, I knit 1 row of the plain stitch. Decrease again and knit 2 rows. Keep repeating these 2 steps until 3 stitches are left.
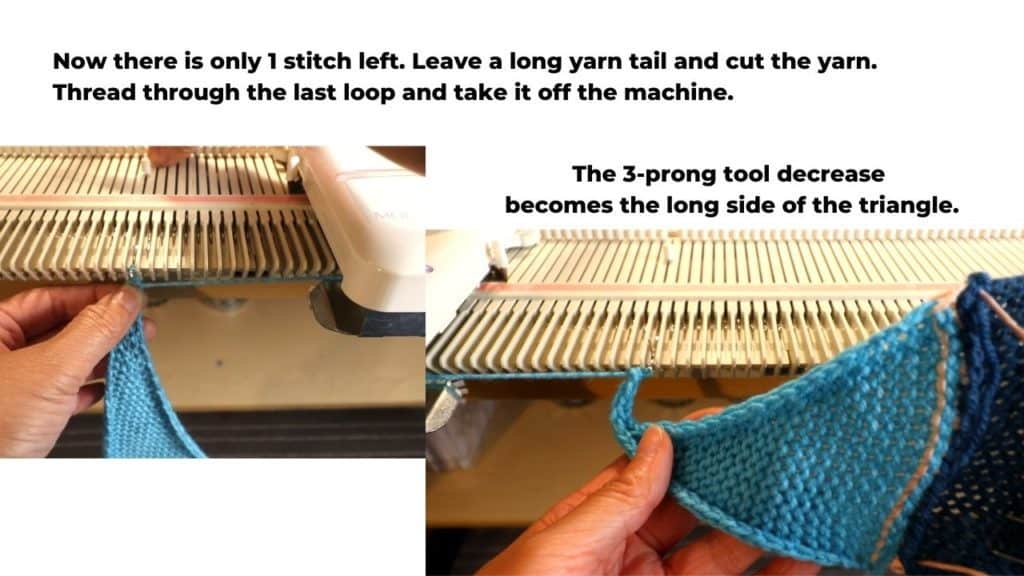
Then use a 2 prong transferring tool to decrease 1 stitch more, knit 1 row.
Now we have 2 stitches. Decrease one more stitch by transferring one stitch to the left. Knit 1 row.
Now there is only 1 stitch left. Cut the yarn leaving a long tail (12-15 inches). Thread the yarn tail through the final loop. Take it off the machine.
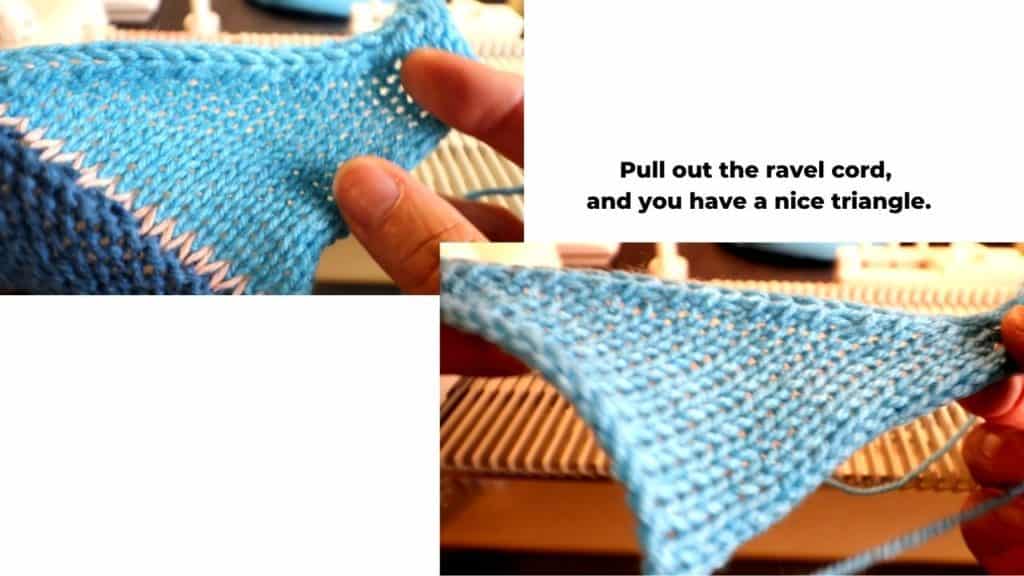
Remove the ravel cord as before.
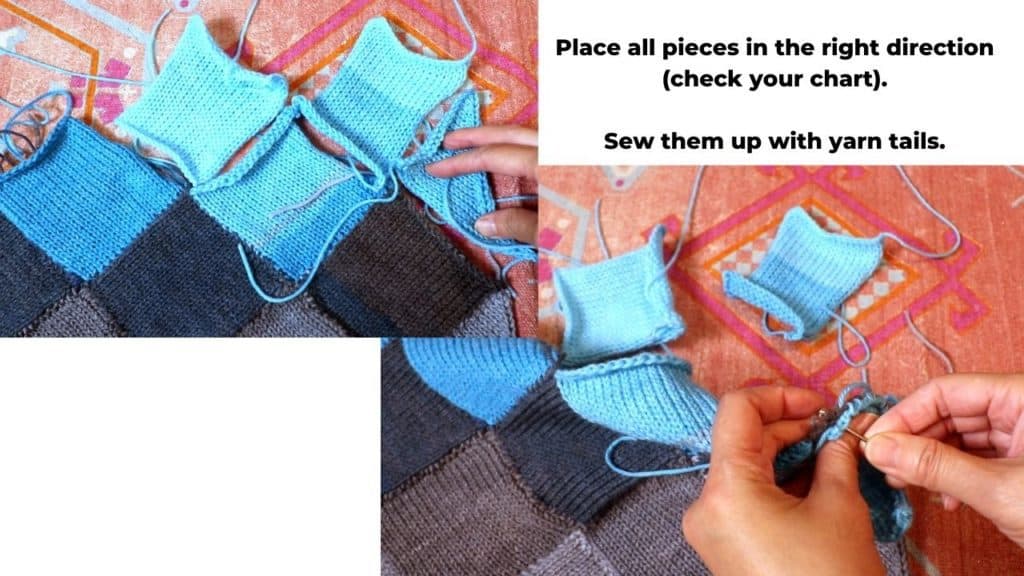
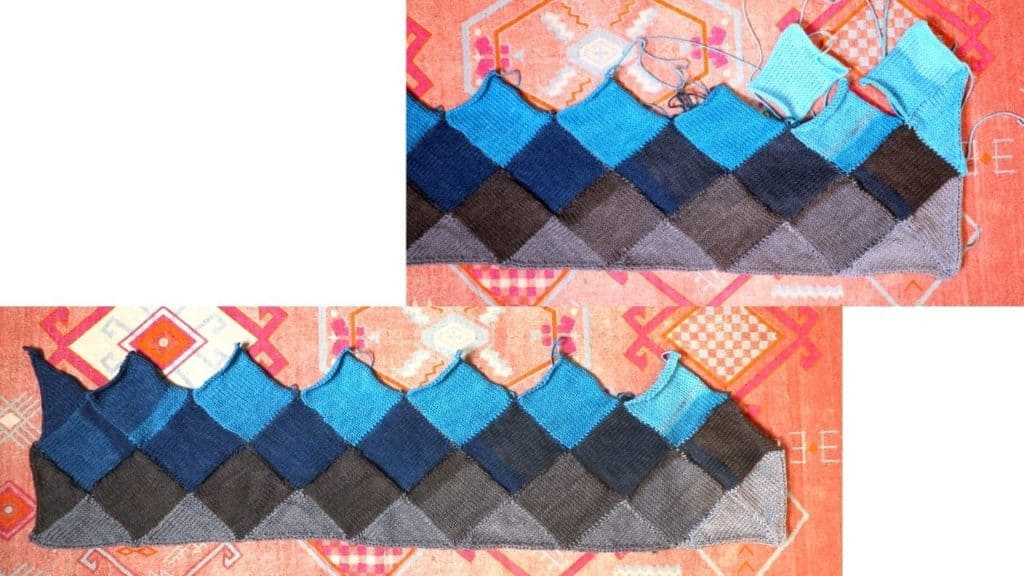
The assembly and seaming of the mock entrelac blanket
I try to knit one row first (based on your chart), then seam up the pieces before moving on, so it is not too overwhelming with all the loose pieces.
It is also important to knit in order if you have color-changing yarns, so the colors appear in the right sequence.
For sewing up, I just use the yarn tails and do a whip stitch.
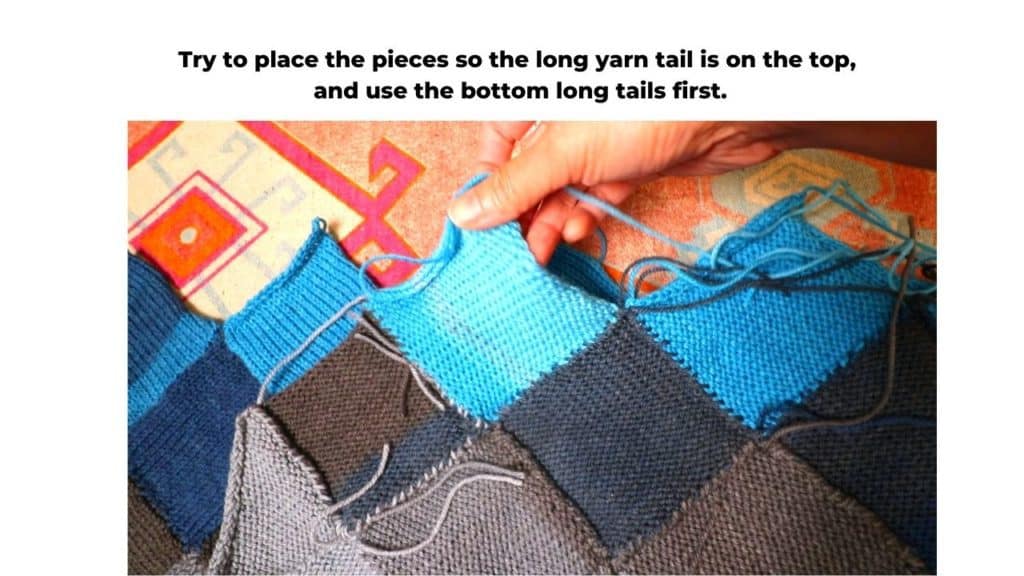
The 2 panels might not be exactly the same length. We just need to stretch a little and try to keep the stitches as even as possible. Use pins to keep them in place if needed.
I also try to keep the long yarn tail on the top and sew with the yarn tails on the bottom first. So we have enough yarn tails for sewing.
Final thoughts
This project is taking longer than I thought, even with machine knitting. It is truly a labor of love.
It also takes a lot of yarns. Each of the Lion Brand Mandala yarn balls is 5.3 oz/150g and 590 yard/540 m. I can only knit 4-5 rows with my blanket chart. So I will need at least 4 balls to complete this blanket.
Since there are a lot of yarn ends to weave in at the back, I am thinking of hand-sewing a cotton fabric to the back. It will be like a quilt and more wind-proof.
Next time, I will probably try a larger square to simplify the blanket. Instead of the 20 stitches, I might cast on 40 to double the size, and make seaming easier.
It is important to sketch up a chart first, so you know exactly what it will look like at the end. Then simply follow the chart.
The color-changing yarn turns out perfect for the blanket. The color is just right for a little boy.
Check out the link to the Lion Brand Mandala yarn (affiliated) if you are interested in knitting a similar project.
Recent Posts


You May Also Like
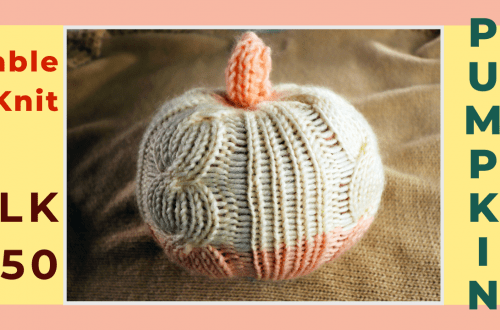
Machine knit a cable stitch pumpkin on the LK150 — Hand reformed stitches
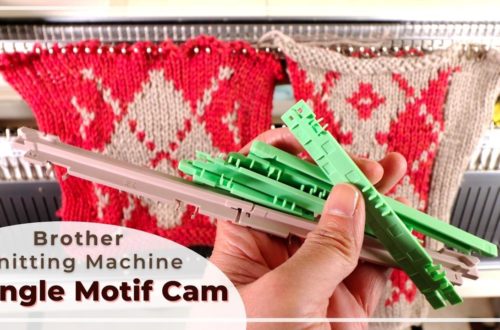
How to use a Single Motif Cam on a Brother knitting machine