
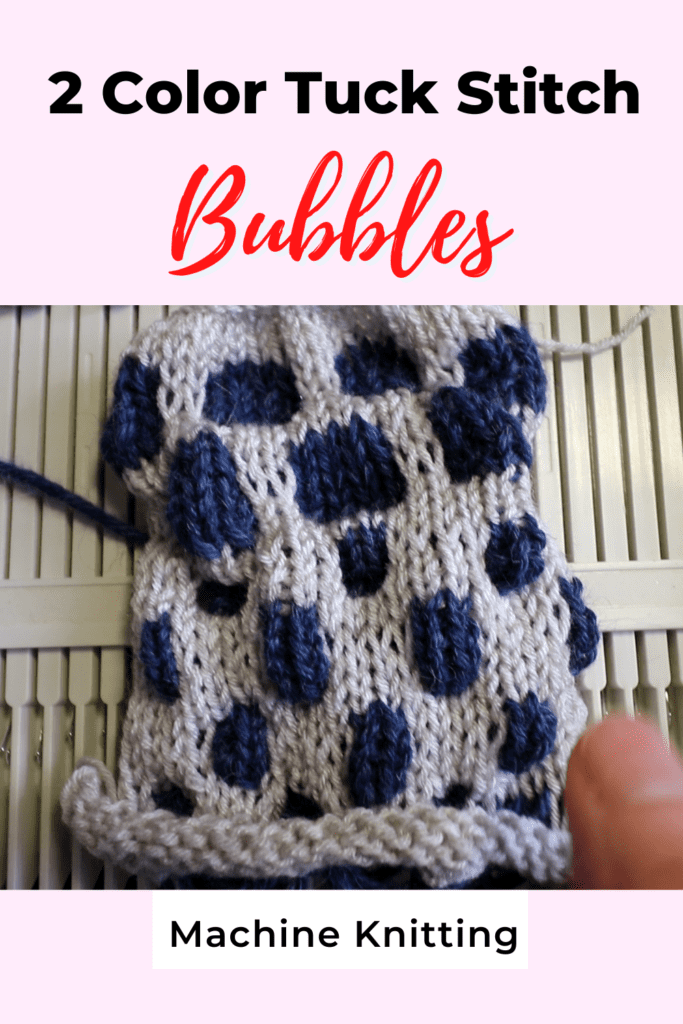
Bubble texture with 2 color tuck stitch
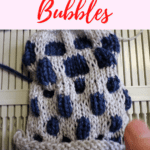
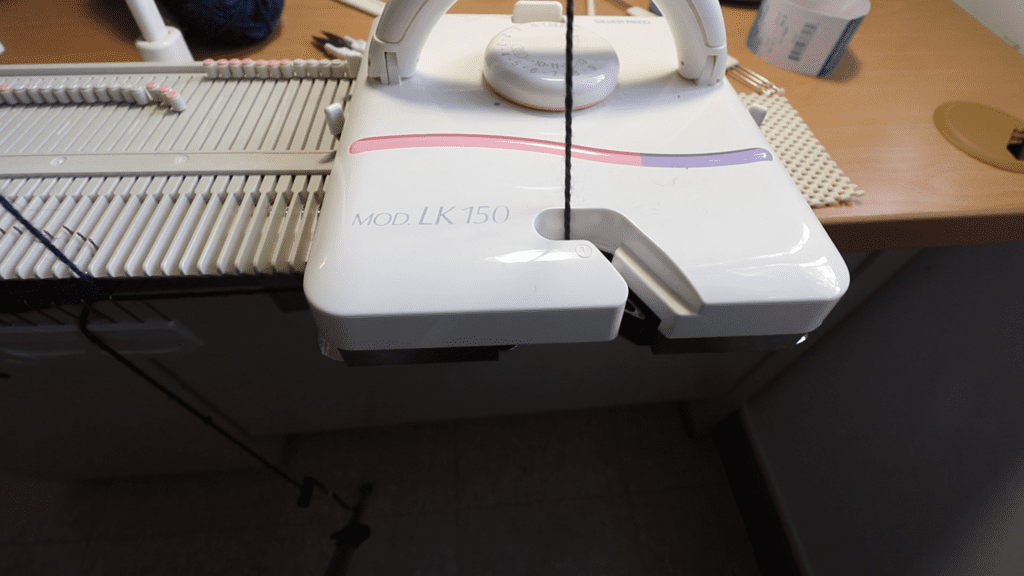
This bubble texture is machine knitted with 2 colored Tuck stitches. I use a basic LK150 knitting machine and 2 different colors of yarns. The size of the “bubble” can be adjusted easily by adding or subtracting stitch and row counts. Watch the video below for a simple tutorial.
Watch the 2 color Tuck stitch “bubble” texture on an LK150 knitting machine
Chart of the Tuck stitches locations
Below is a sample chart for the 2 color tuck stitches. The colored stitches become the bubble texture. You can make it wider with more rows if you prefer bigger bubbles.
There are basically 3 sections. We started with the first section (the lower part) with tuck stitches.
Then switch to background color yarn and knit a few rows of plain stitches (section 2).
The third section will be the tuck stitch again, but offset location from the first section of Tuck stitches.
Then we could knit a few rows of plain knitting and repeat sections 1, 2, and 3 again. Keep repeating the sections as long as you like.

The 2 color Tuck bubbles on the LK150 knitting machine
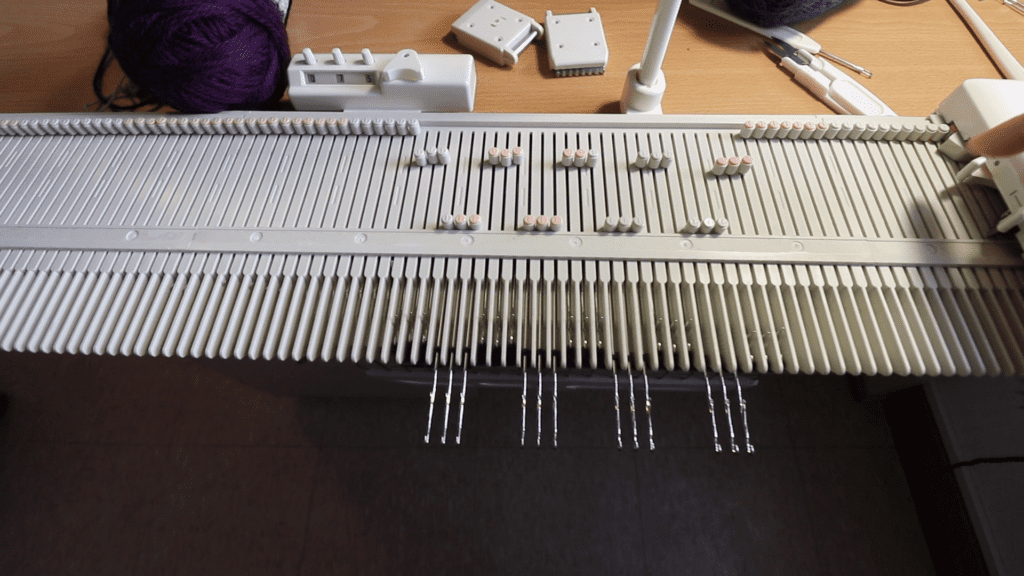
First, we started with a few rows of plain knitting. When ready to start the bubble, change the yarn color and set the carriage to Tuck: Flip the upper levers down on both sides of the carriage.

Knit the first section of the Tuck stitches. Pull out the needles as charted and knit one row. Then pull out the same needles again and knit one row. Repeat until the length of bubbles you like.
Plain knitting section
Switch to the background color yarn. You can hang the old yarn somewhere below the desk to avoid cutting the yarn because we will use it again soon.
Set the levers back to the top for plain stockinette stitches and knit a few rows.
Section 3 tuck stitches
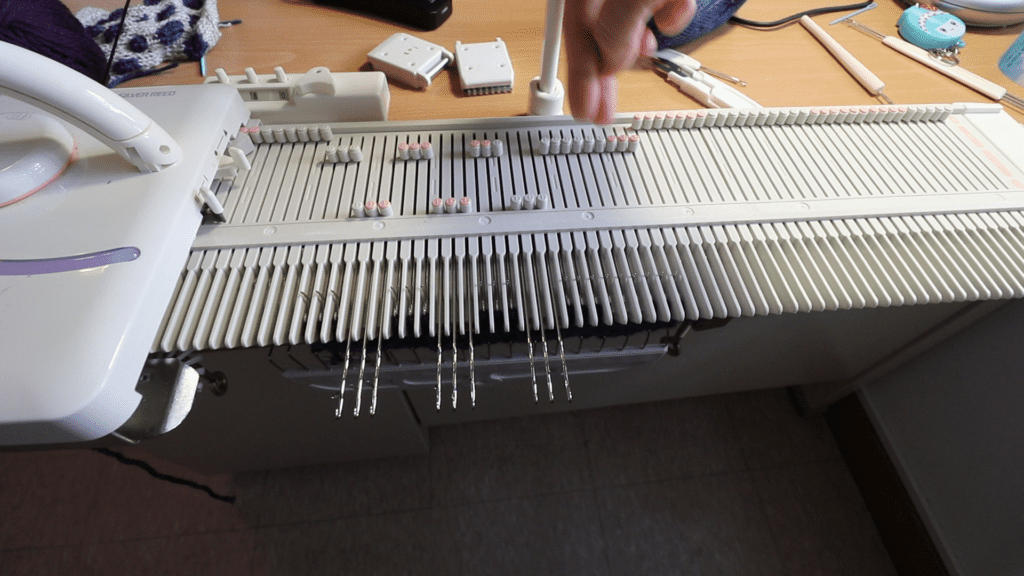
Now it is time for the off-set Tuck stitches.
Switch the yarn again. Set the levers to Tuck. And start pulling out the needles that are offset from the first section. Knit the same way as the first section.
You do not need to offset the location of the third section Tuck stitches, but this makes a more interesting layout.
Now keep repeating the plain sections and Tuck sections and you will see the bubble textures.

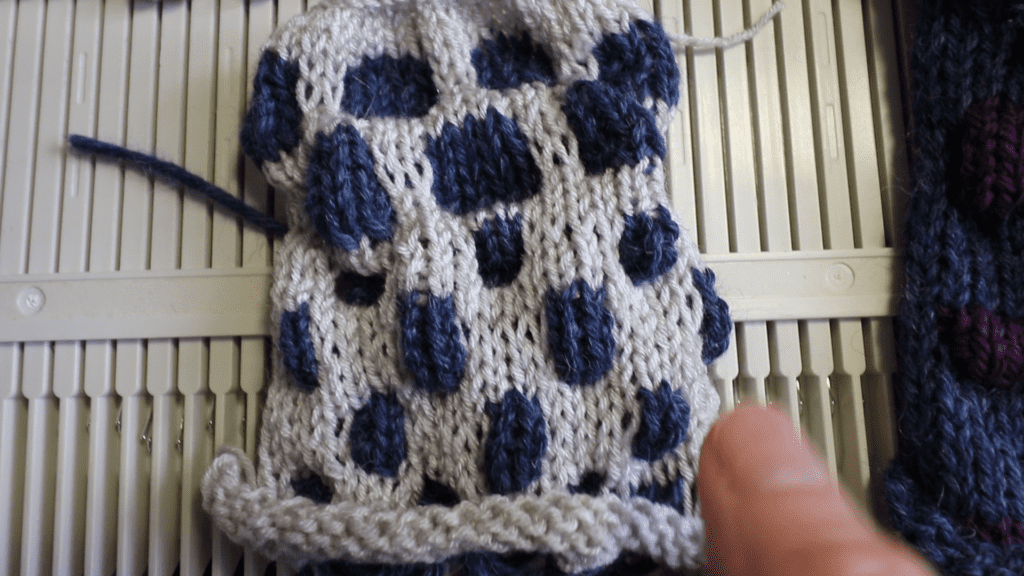
Here is the backside of the 2-color Tuck bubbles with a lot of floats.

Front side
You can even push the bubbles in, so they are concave.
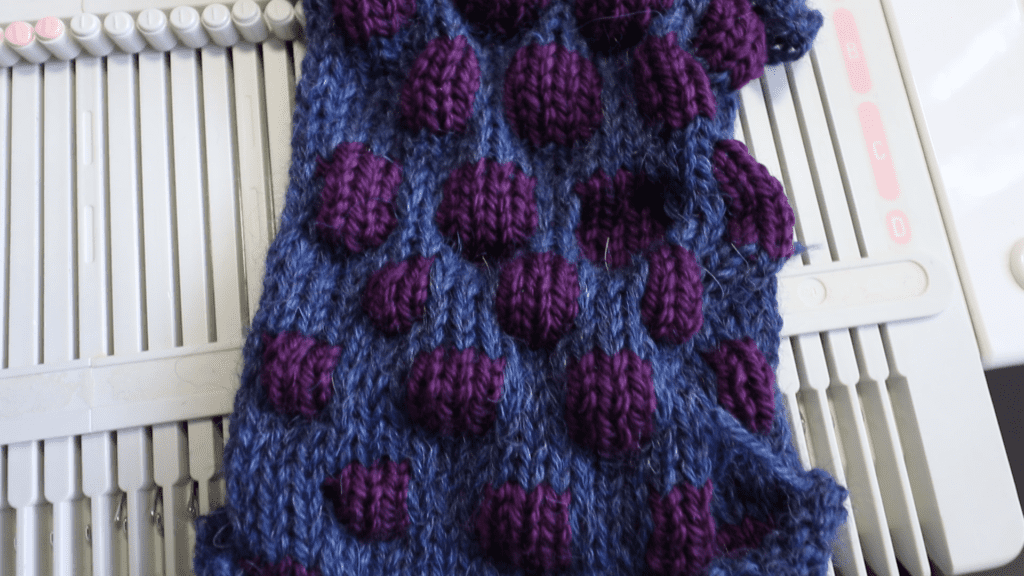
Playing with different sizes and colors of bubbles.


You May Also Like
Mock Entrelac Machine Knitting (or hand-knit) – color changing blanket
My favorite yarn winder and yarn swift
