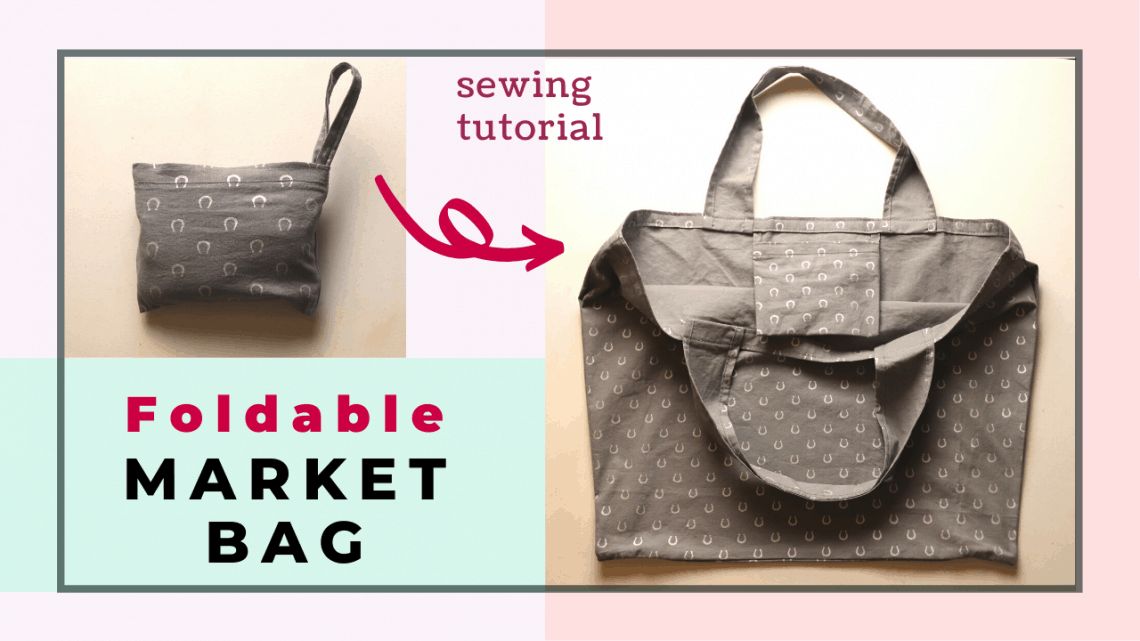
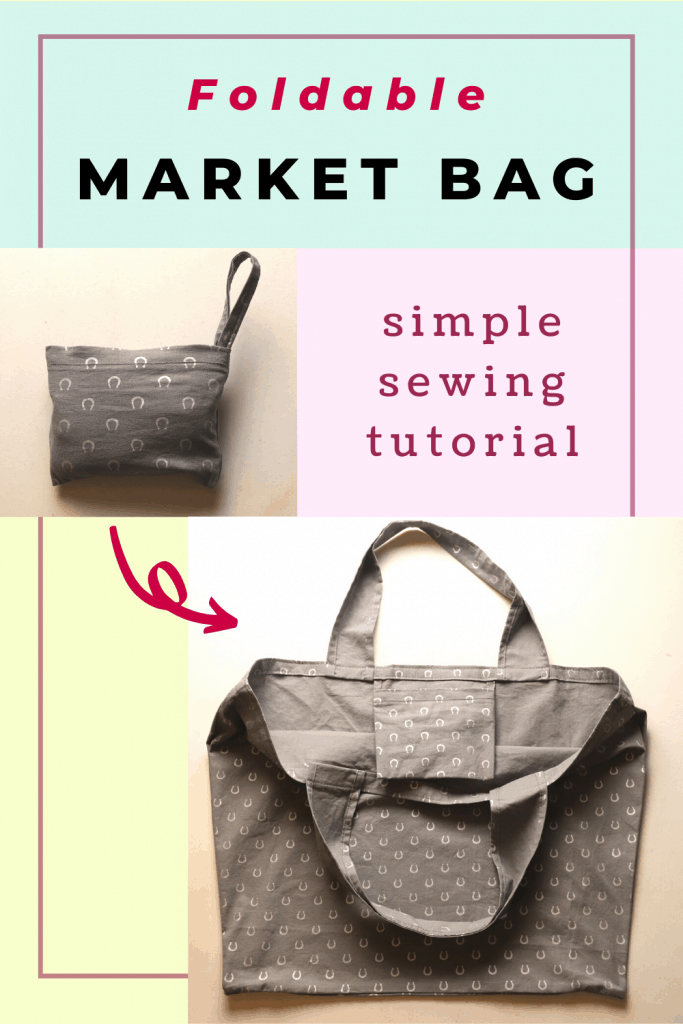
Foldable market bag or shopping bag sewing tutorial
The New York State (where we live) has just banned the use of plastic bags not long ago. Instead of getting 20+ flimsy plastic bags every grocery trip (They like to double bag everything), we have to buy paper bags or bring our own shopping bags now. Plastic bags are convenient but we all know the negative effect on the Earth. Now is a good time to sew up our own reusable, eco-friendly market bags and have extras around.
My favorite reusable shopping bags have the following several features.
- Large size to hold a lot,
- Machine washable,
- Waterproof or water-repelling so any liquid does not leak out,
- It can be folded down to a small size for easy carrying,
- Sturdy enough and not falling apart easily,
- Visually pleasing and not too childish.
The following market bag design matches all the above points if you use a water-repelling fabric. Cotton is not waterproof but still machine washable and light-weighted.
Don’t forget the pdf pattern download for reference. It is not the full scale but you can draw these rectangles easily with a ruler. The YouTube video link is at the bottom of the article.
Materials
Light-weighted water-resisting material will be great such as some shower curtain (IKEA shower curtain works well) or recycling fabric from a large umbrella. Basic cotton or linen will work fine, as well as light-weighted denim or canvas. Etsy.com has a lot of imported fabric if you want to go fancy.
Wash and dry them first because cotton and linen shrink a lot.
Pattern
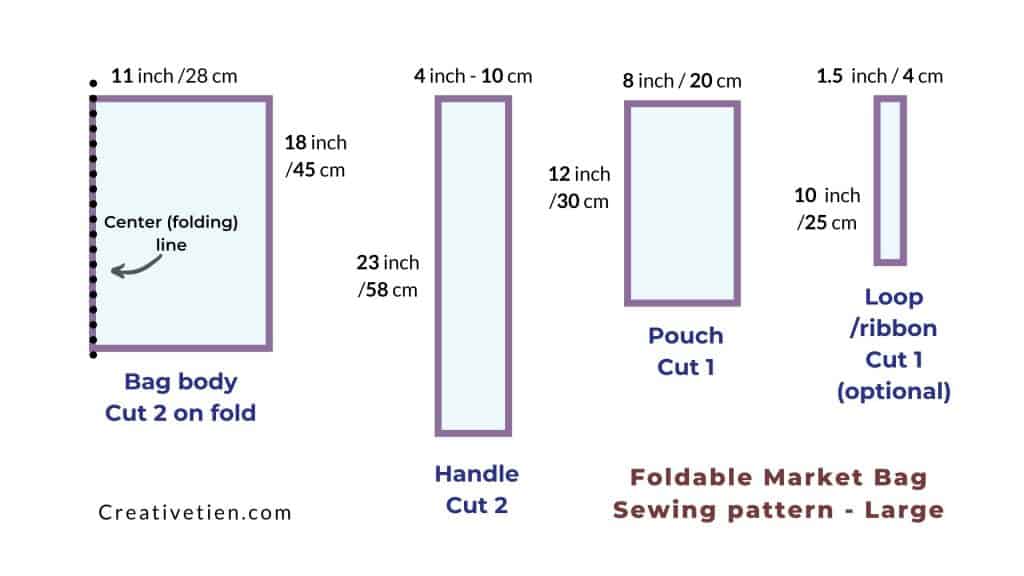
Cut the fabric according to the pattern above (seam allowance is included). You will have 2 large pieces for the front and back of the bag (remember to cut on the fold, final should be 18 x 22″ for each piece), 2 handles, 1 pocket/pouch, and optional ribbon/loop.
Download the free pdf pattern (1 page) by clicking HERE.
Sewing steps
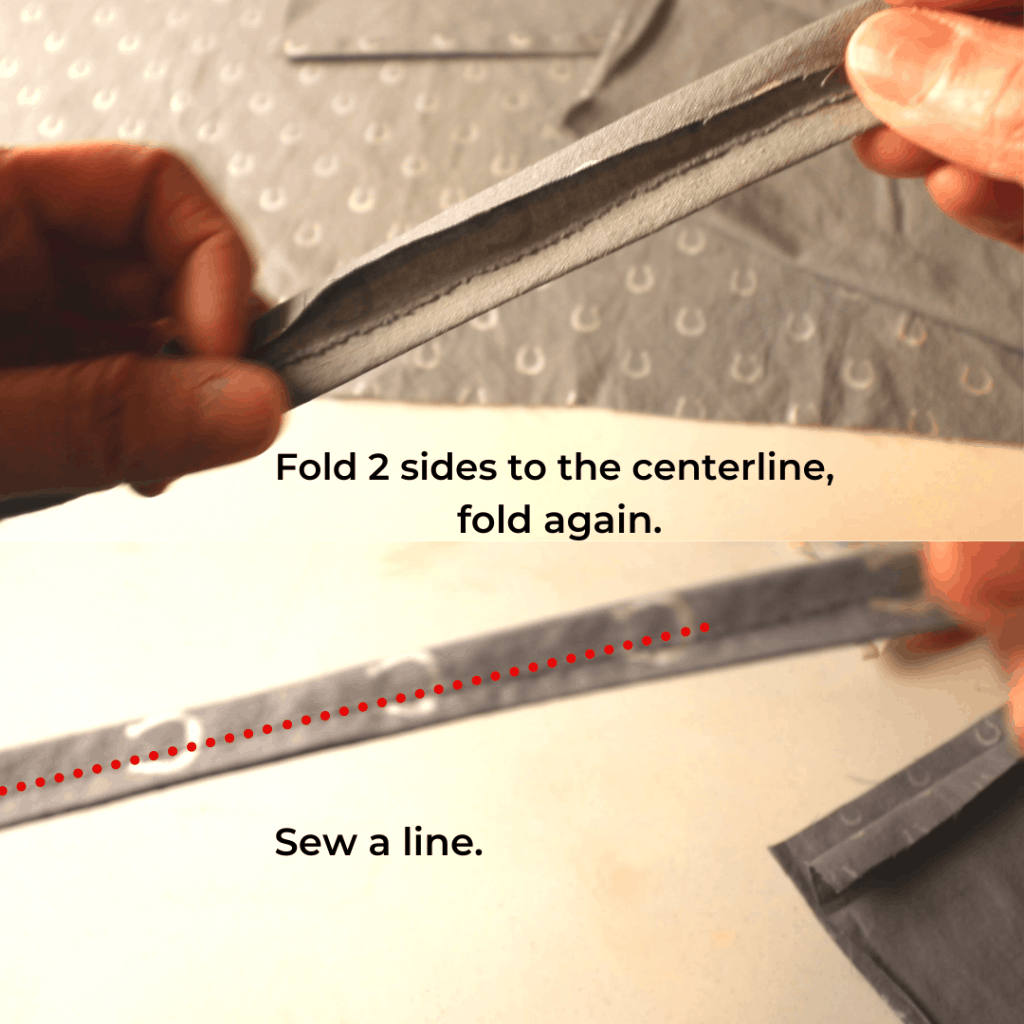
Ribbon/Loop
Sew up the ribbon/loop piece by folding the 2 long sides to the centerline, and fold again to enclose the raw edges. Sew a line on the top.
Pocket/pouch
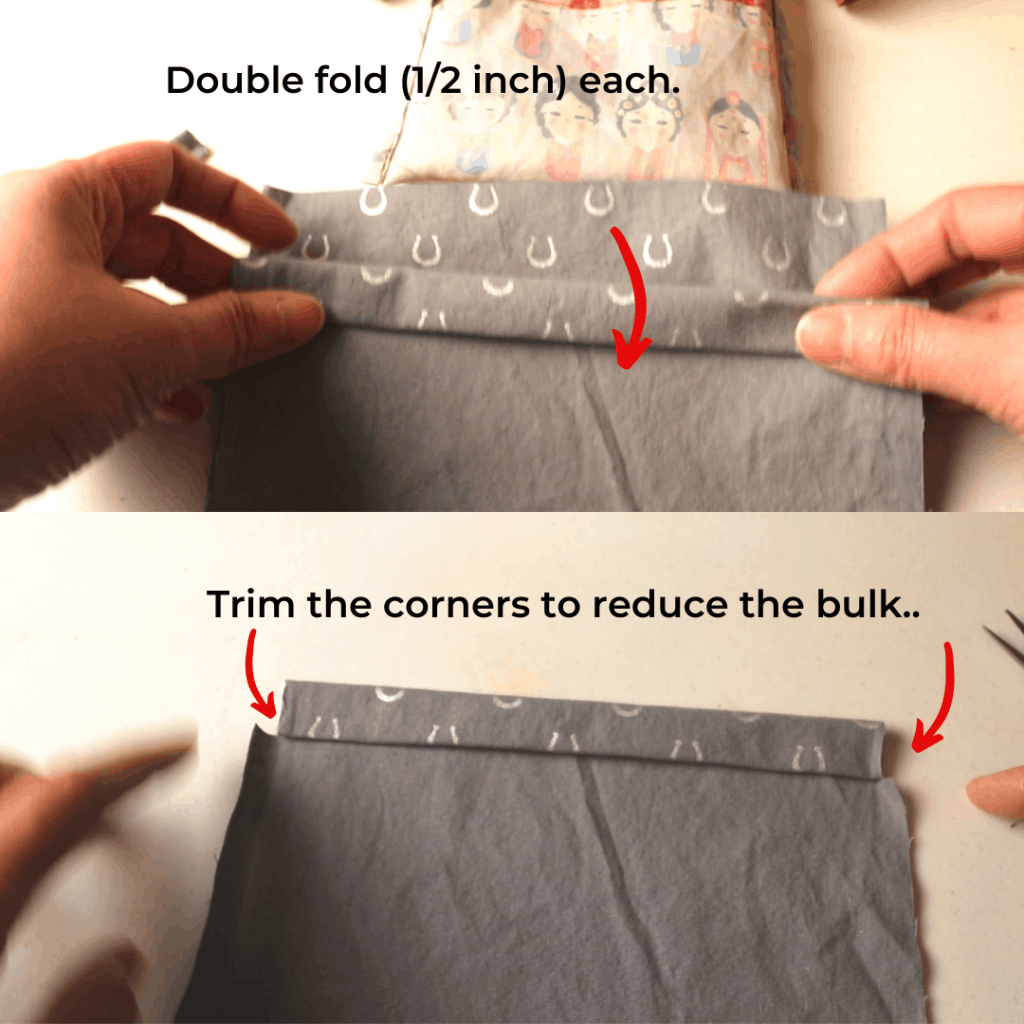
Fold-down 1/2 inch twice (double fold) on one short side (to the wrong side) to enclose the raw edge. Sew a line.
Fold the rectangle in half leaving about 1.5 inches on the top
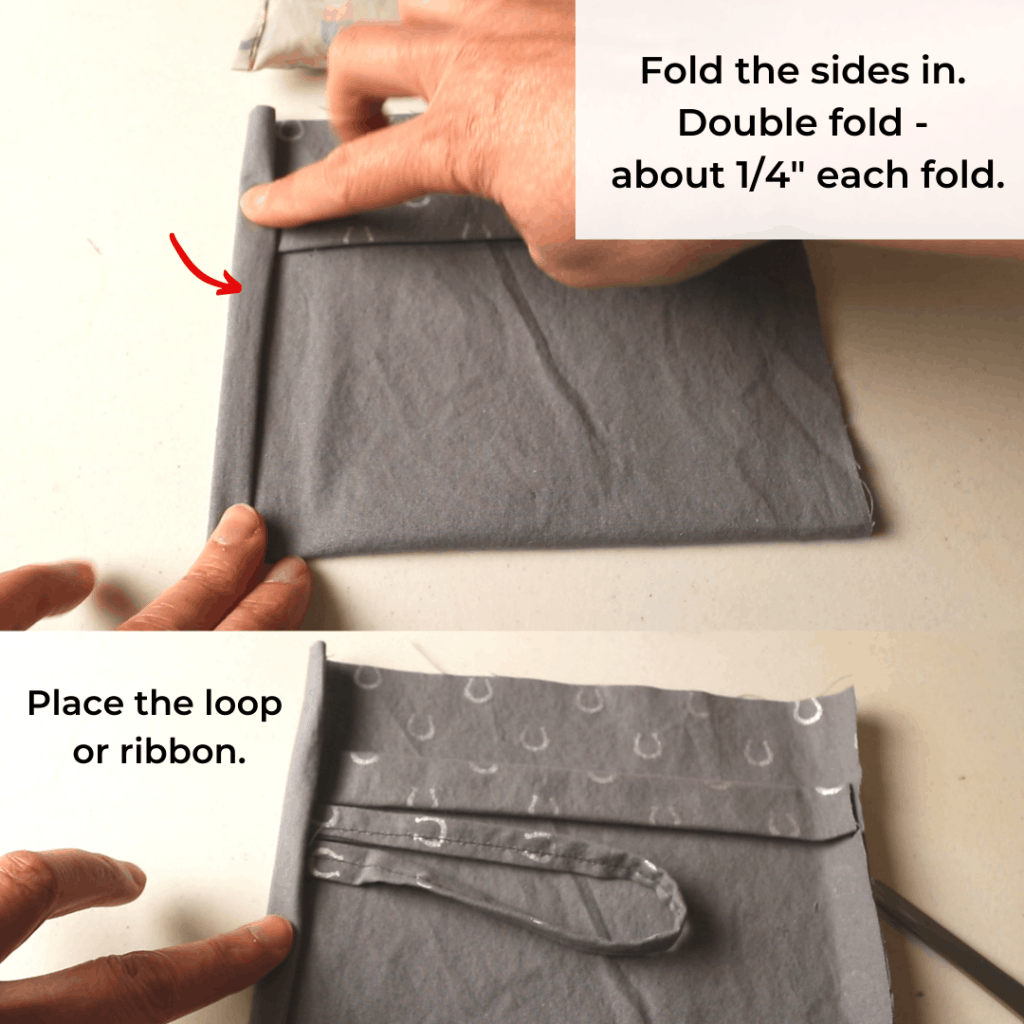
Fold the 2 sides in about 1/4 inch twice (double fold). Trim the 1/2 inch bulky area when meeting the double fold.
Place the loop/ribbon we just made near the corner under the side fold (not too close to the top edge).
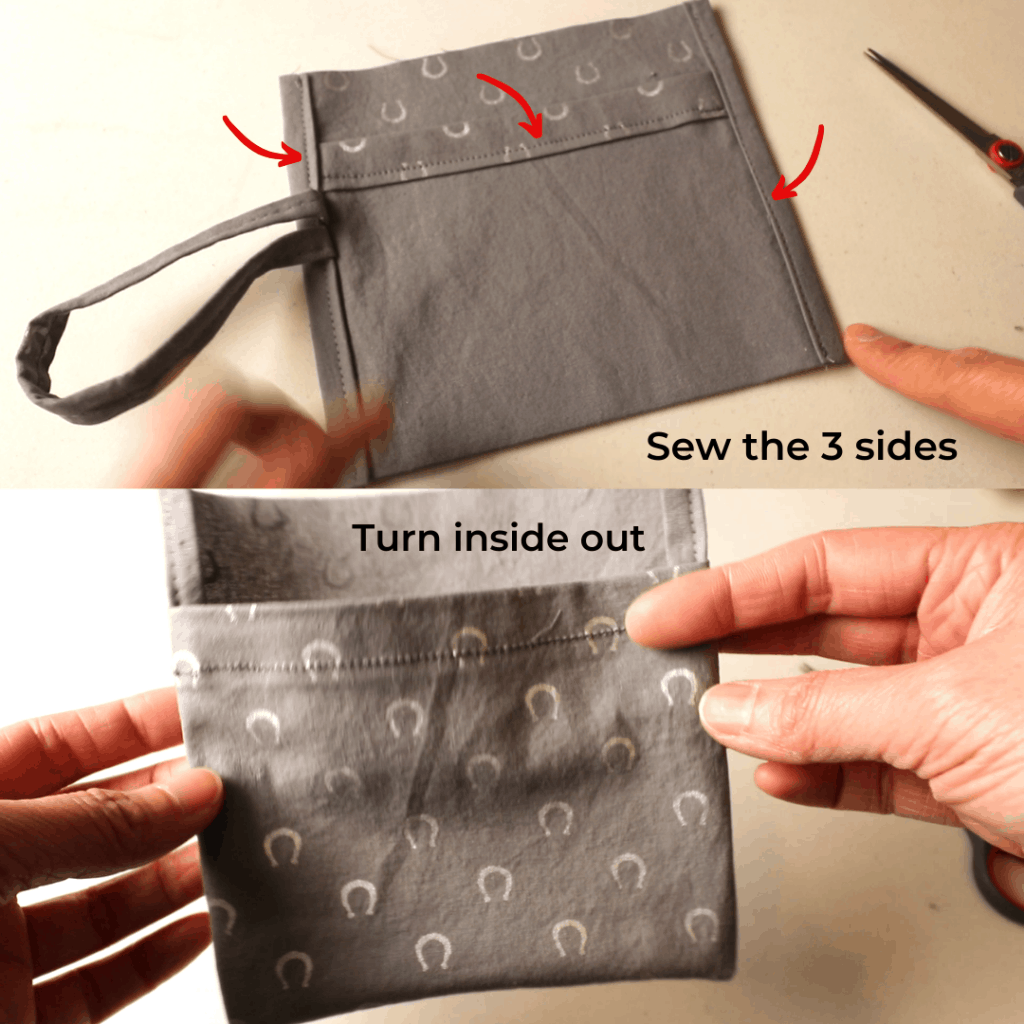
Sew a line over the double-folded sides. Now the raw edges are enclosed, loop placed, and the pocket is done.
Handles
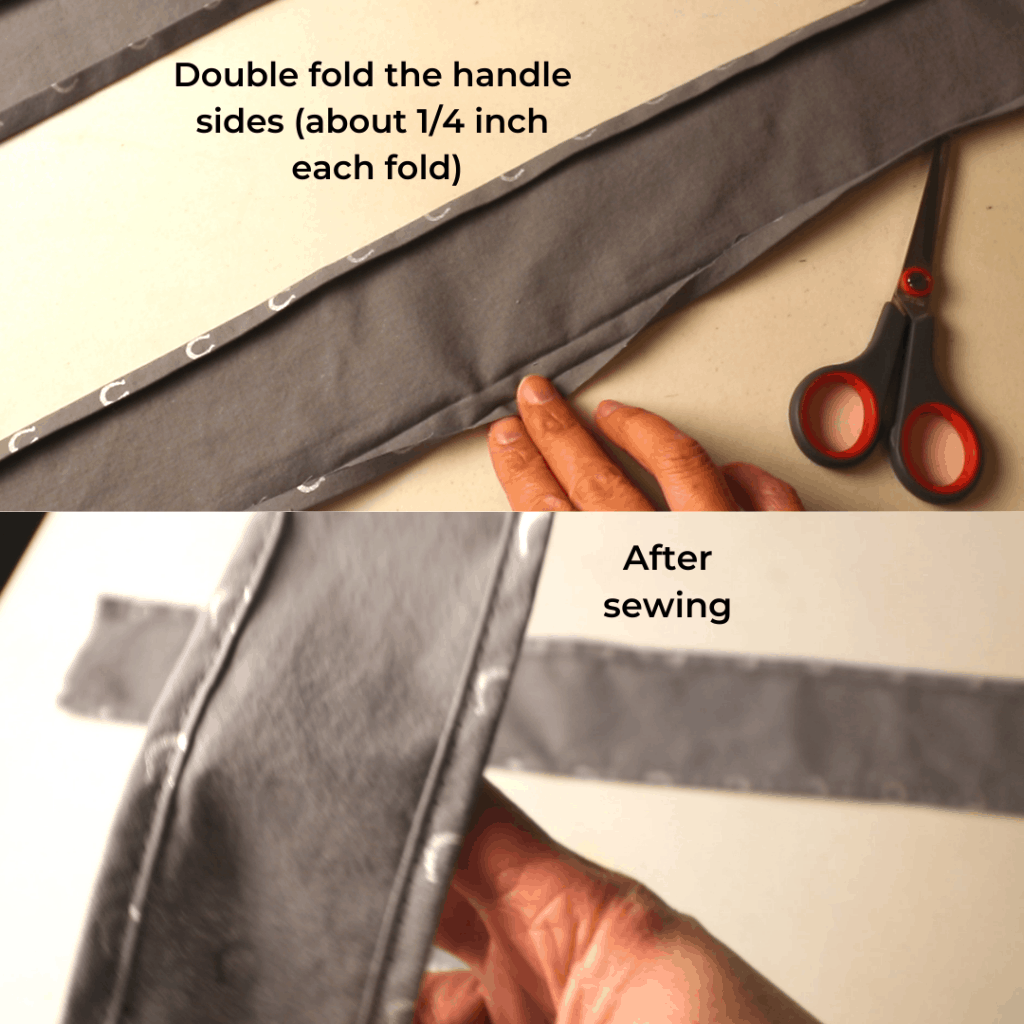
Fold in the handle sides about 1/4 inch seam twice (double fold). Iron and sew a line on the top.
Now the raw edges are enclosed. Set them aside for later.
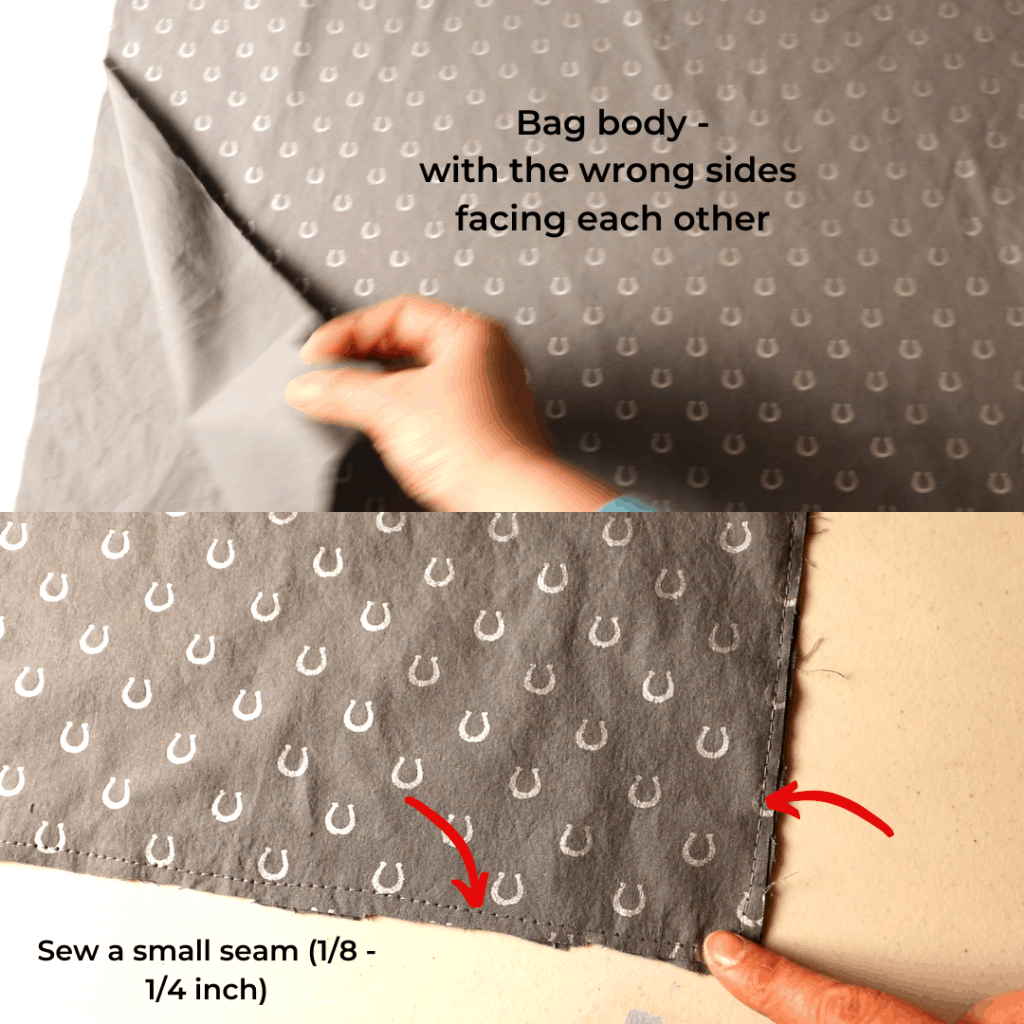
Bag body
With the wrong side facing each other (right side facing you), sew a small line about 1/8 to 1/4 inch (or 1/2 cm) on the 2 sides and bottom.
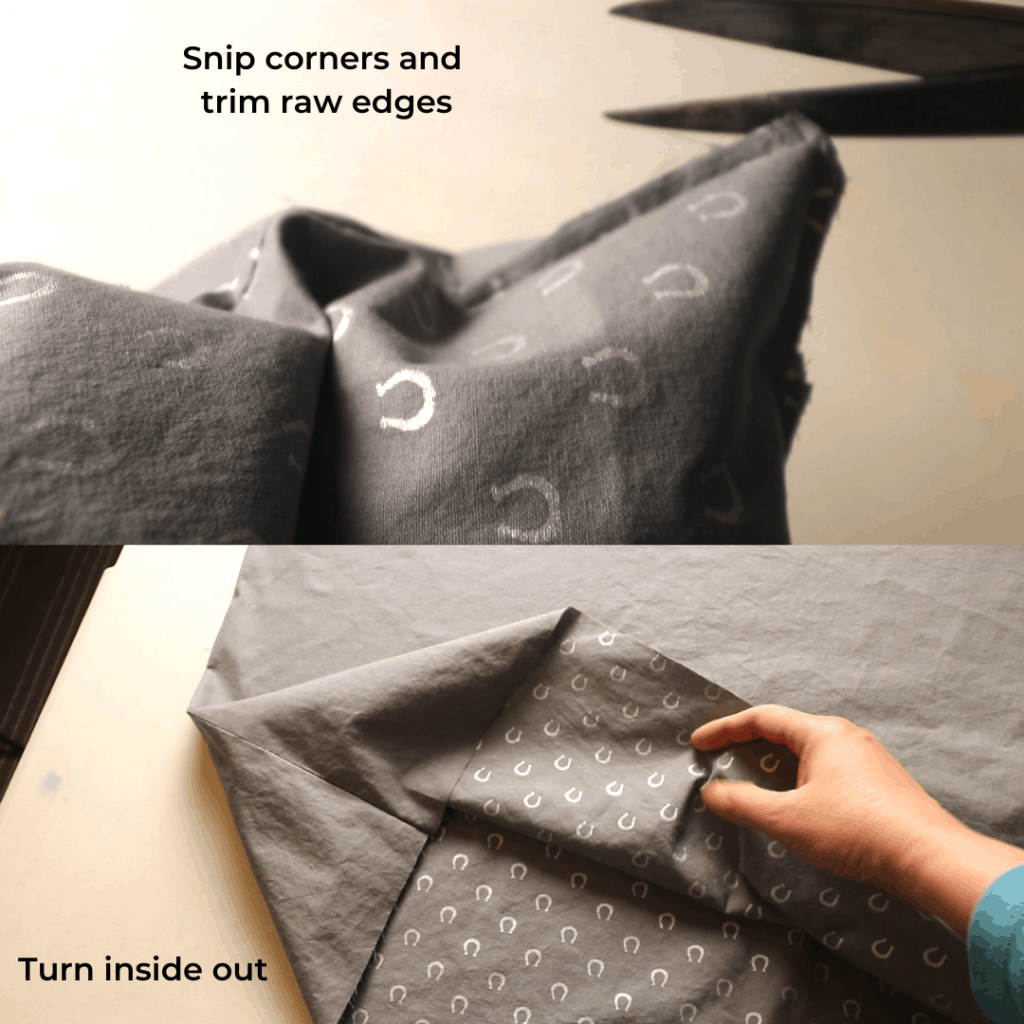
Trim to even out the edge and carefully clip the corner to reduce the bulk.
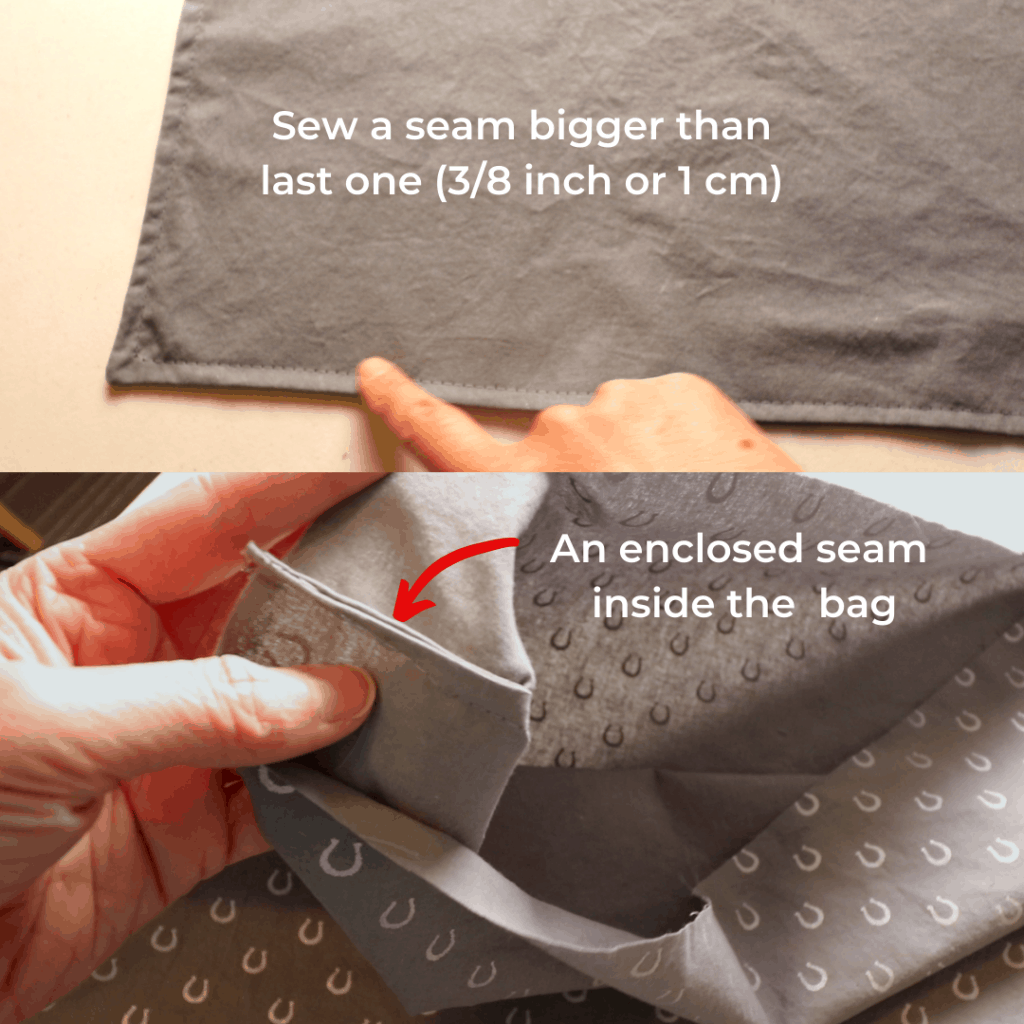
Turn the bag inside out so now the wrong side is facing you. Sew the 3 sides again with a bigger seam (around 3/8 inch or 1cm) to enclose the previous seam.
Iron and fold the inside out again. Now the right side is facing out and all the seams are enclosed properly.
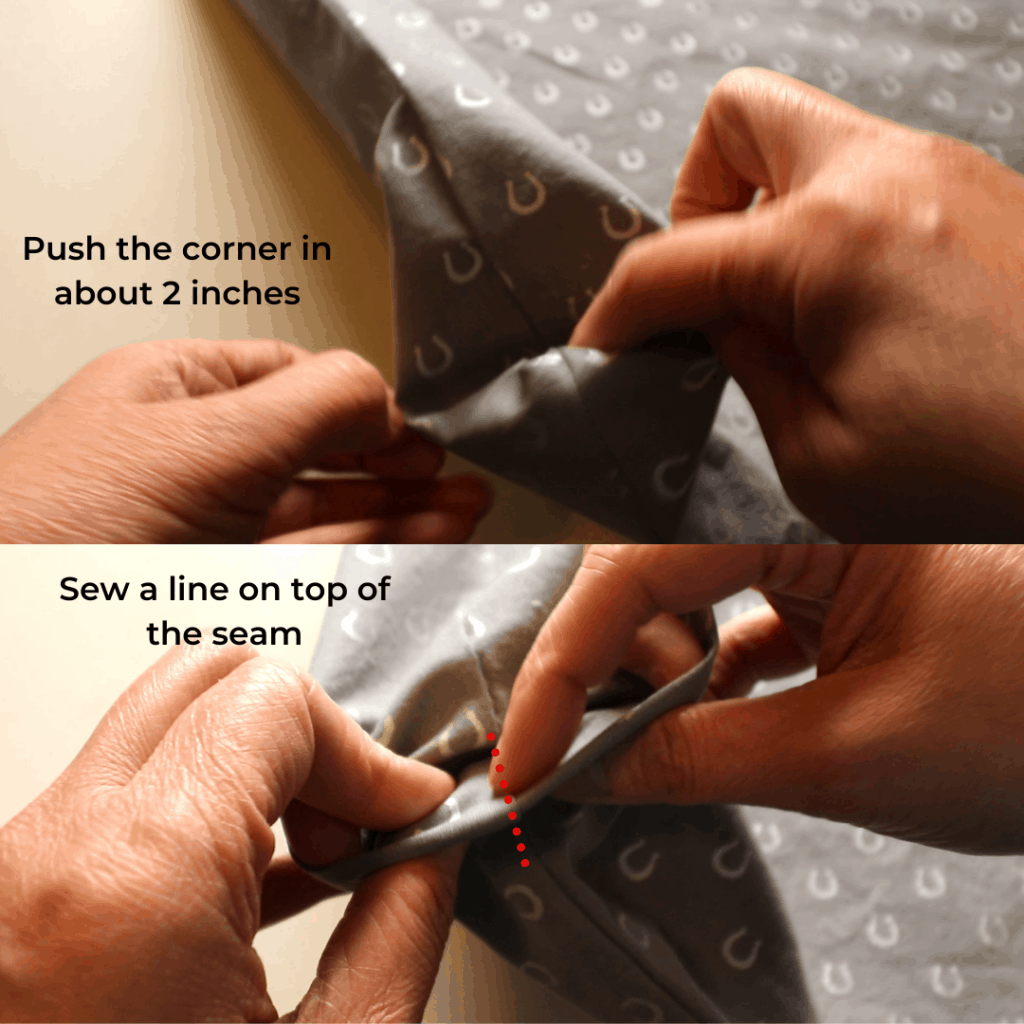
Bottom corner
To make the bottom more 3-dimensional. We can fold in the bottom corners. There are many ways of doing this. For this project, I just poke the bottom corners inward from the sides for about 2 inches and sew a line over the existing seam, or sew 2 lines next to the existing seam. See the pictures below.
Assemble the handle, pocket, and top of the bag
Top of the bag
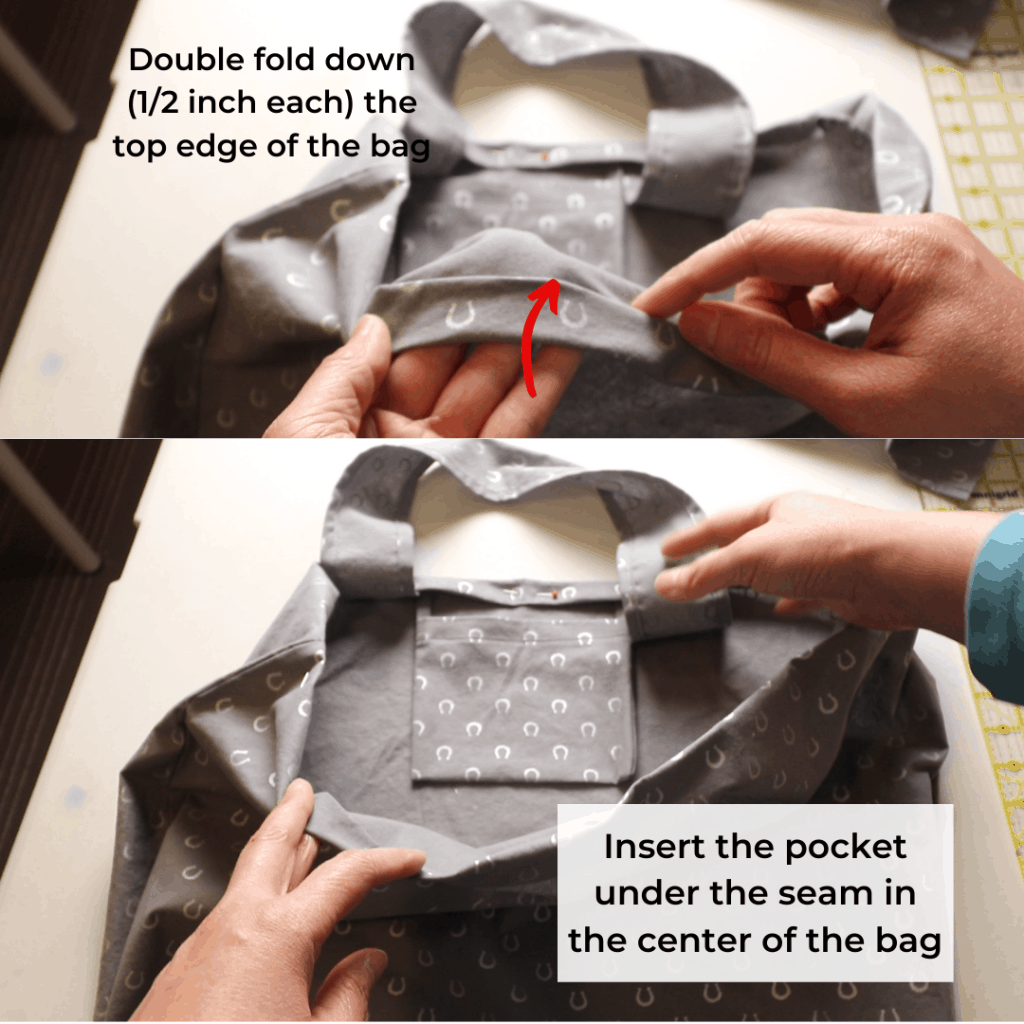
We are doing the double fold for the top edge of the bag. Fold in once about 1/2 inch and one more time to enclose the raw edge. Iron to keep the fold lines.
Place handles and the pocket/pouch
Find the centerline of the bag by folding in half. Mark the center with a pin or disappearing ink marker. Find the center of the small pocket we made earlier and place under the double-folded seam, matching the center point of the bag. Pin in place.
Handles
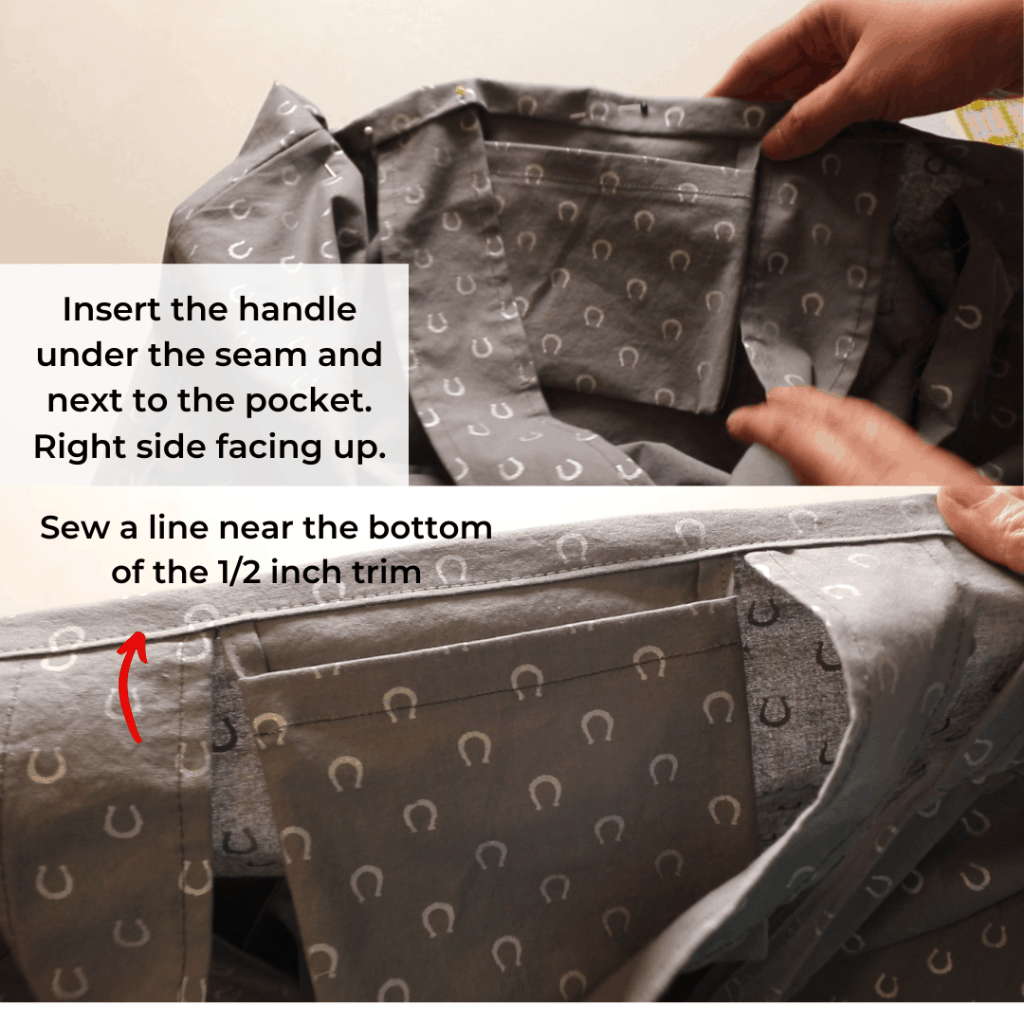
Decide the location of the handles. The pocket is about 6 inches wide so I just place the handle next to the pocket. The other side is the same, place the handle leaving 6 inches in the center.
The right side of the handle should be facing up when you insert below the double-folded edge. Be careful not to twist the handle.
After pinning the pocket and handles, we can start sewing. Sew a straight line near the bottom of the 1/2 inch double-folded seam.
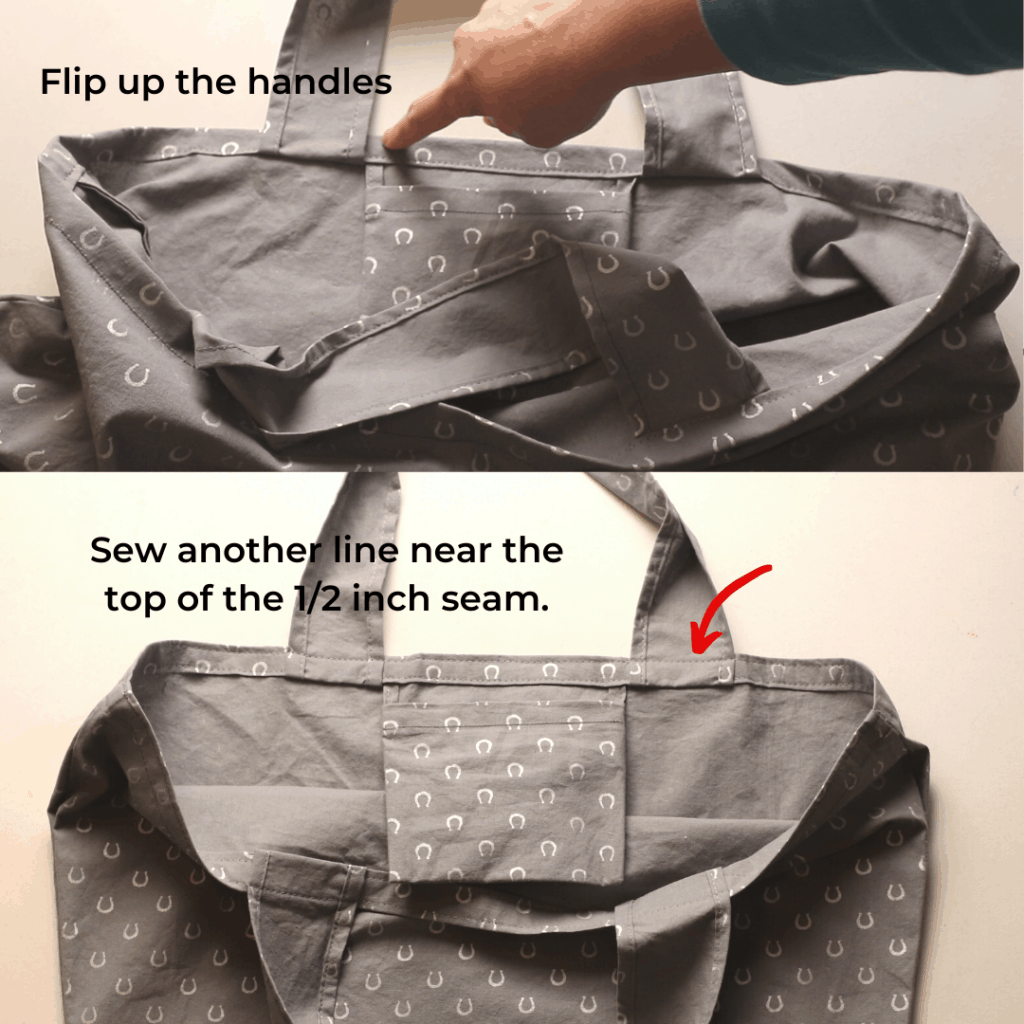
Then, lift the handles up so the right side is facing outside of the bag. Sew another line near the top of the 1/2 inch double-folded seam. This also strengthens the handle.
Sewing the middle of the handles
Next, we can sew the middle section of the handle to make it more comfortable to carry.
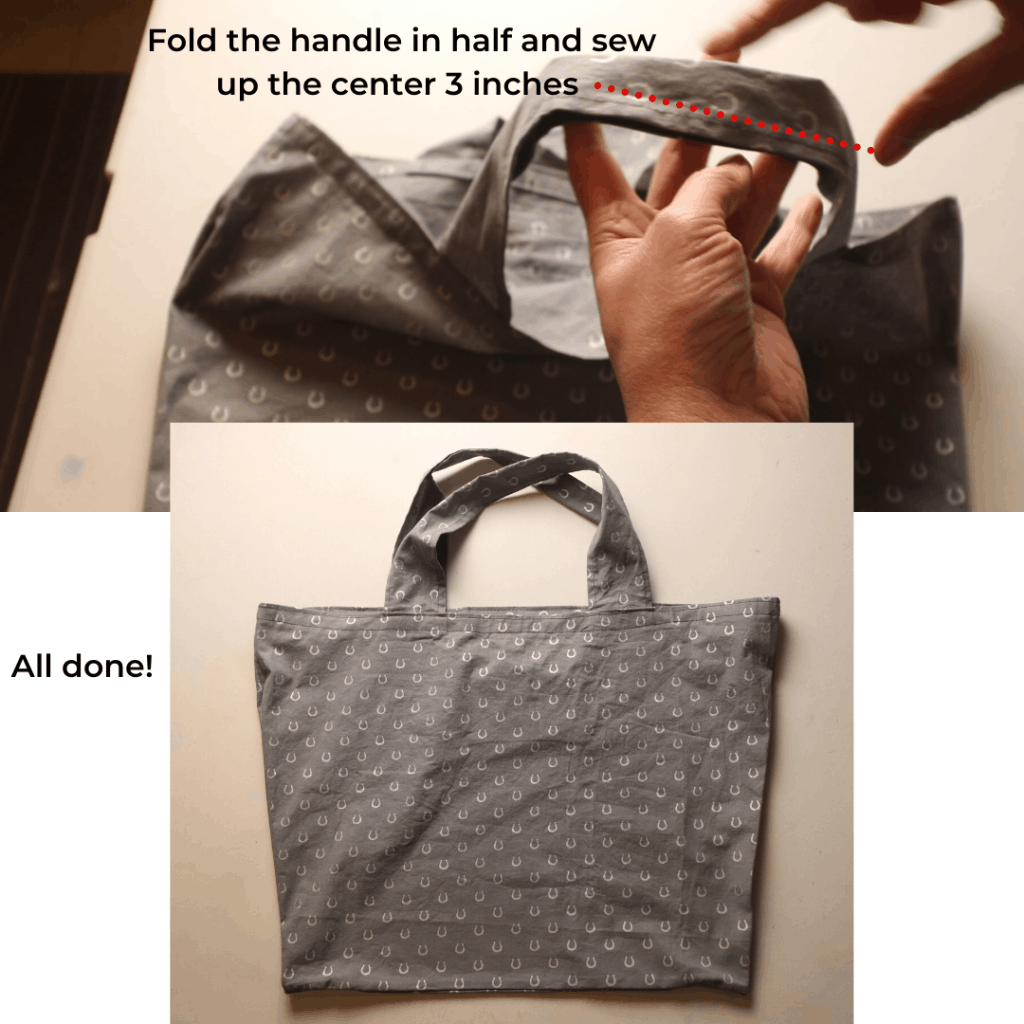
Fold the handle in half lengthwise. Sew about 3 inches in the halfway section to make the handles double-layer easier to grab. That is all. We just made a shopping bag.
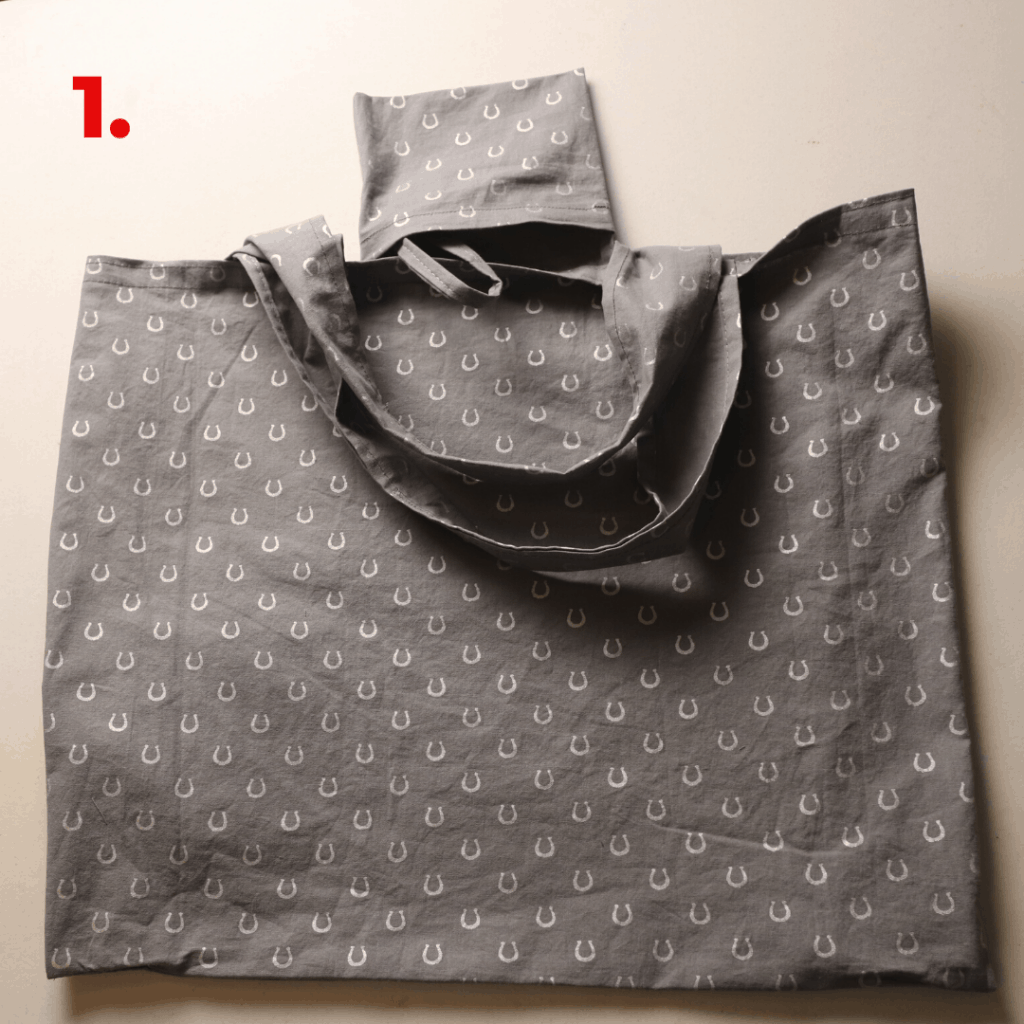
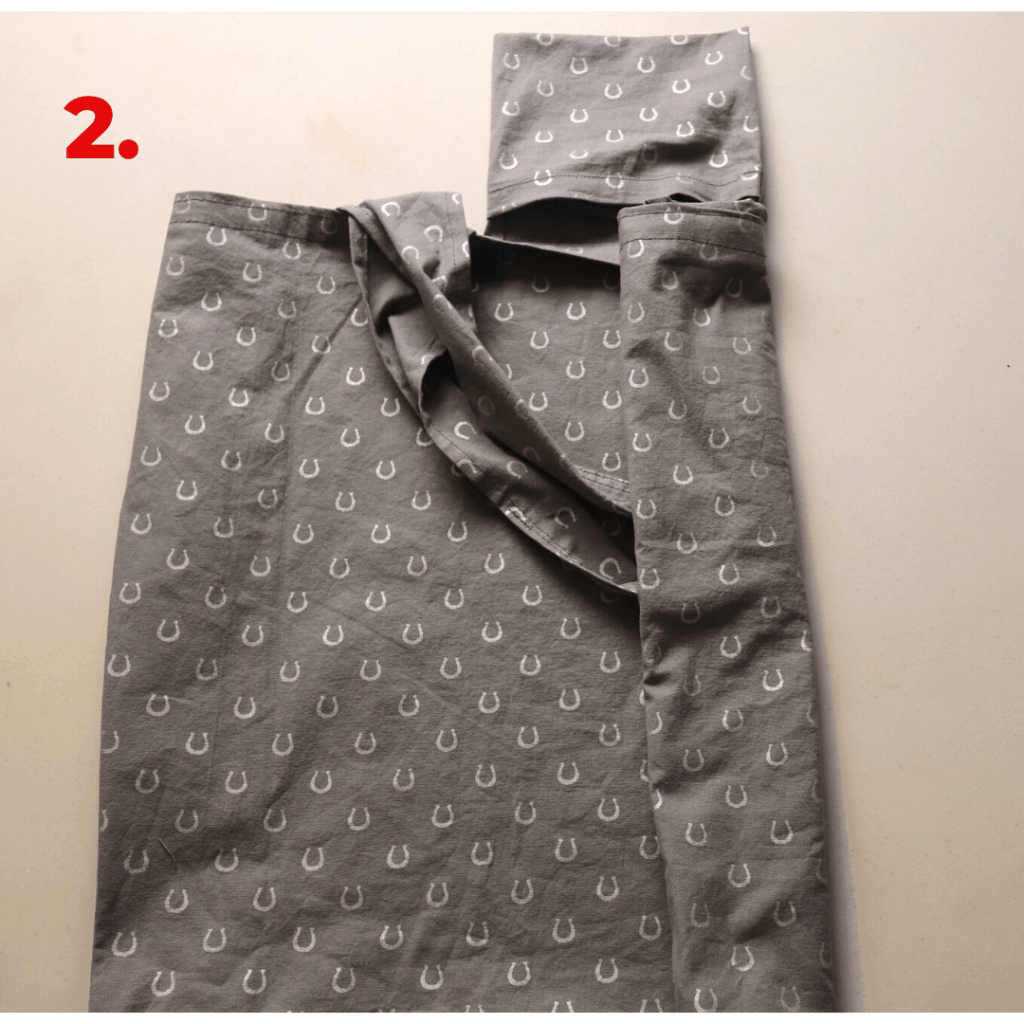
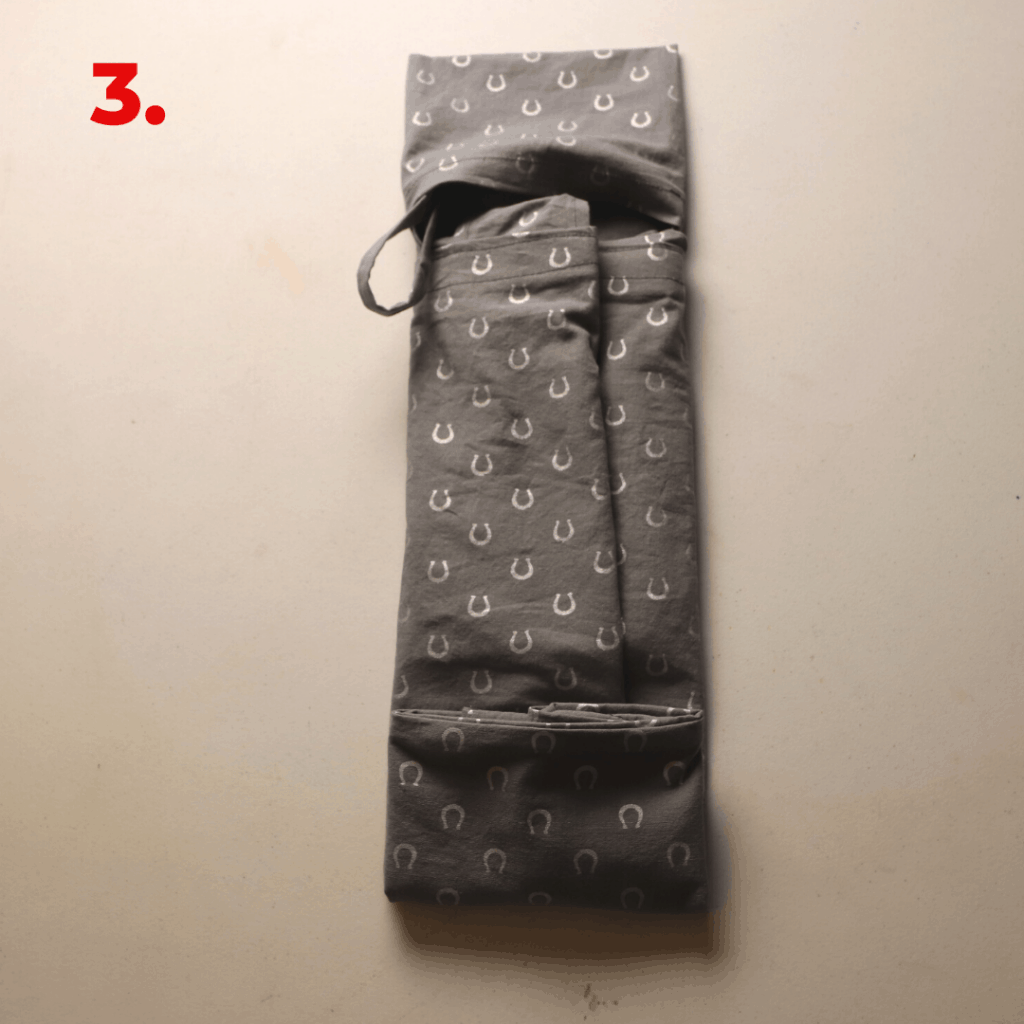
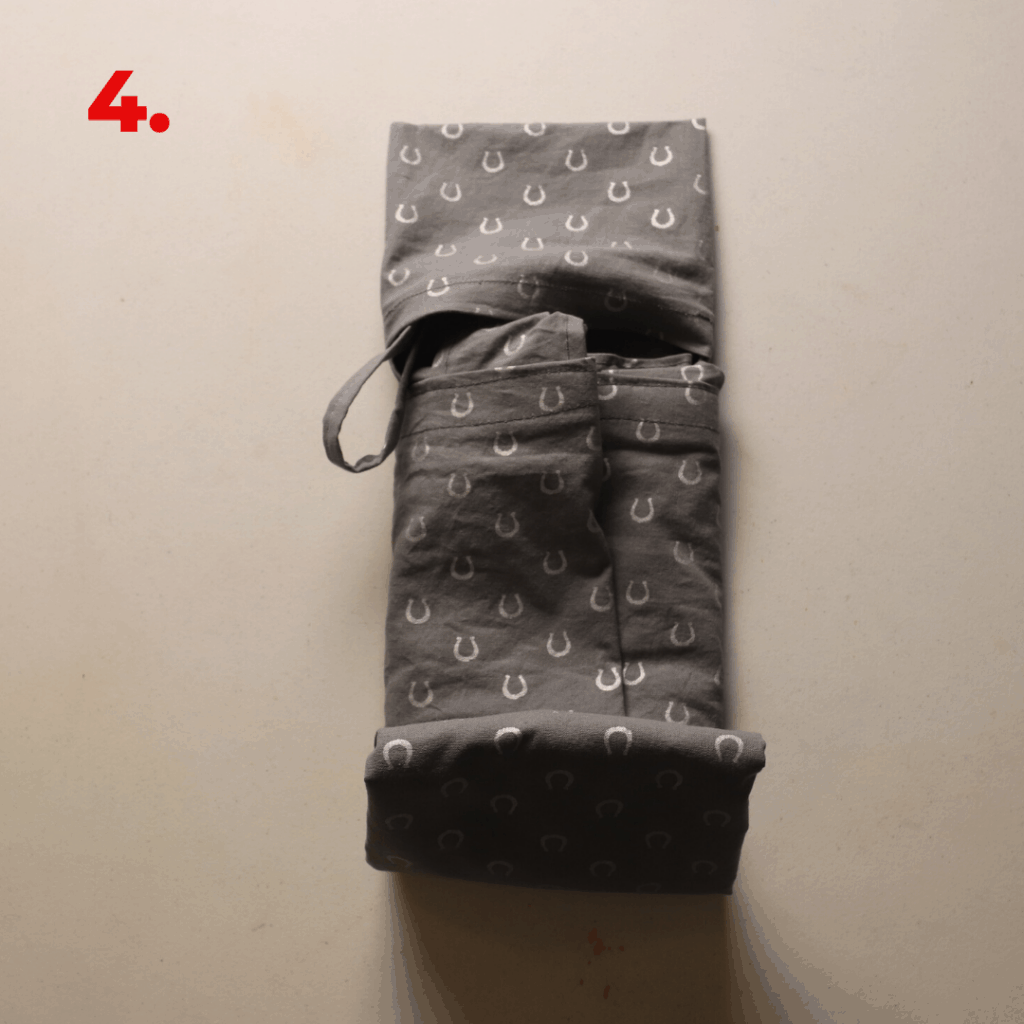
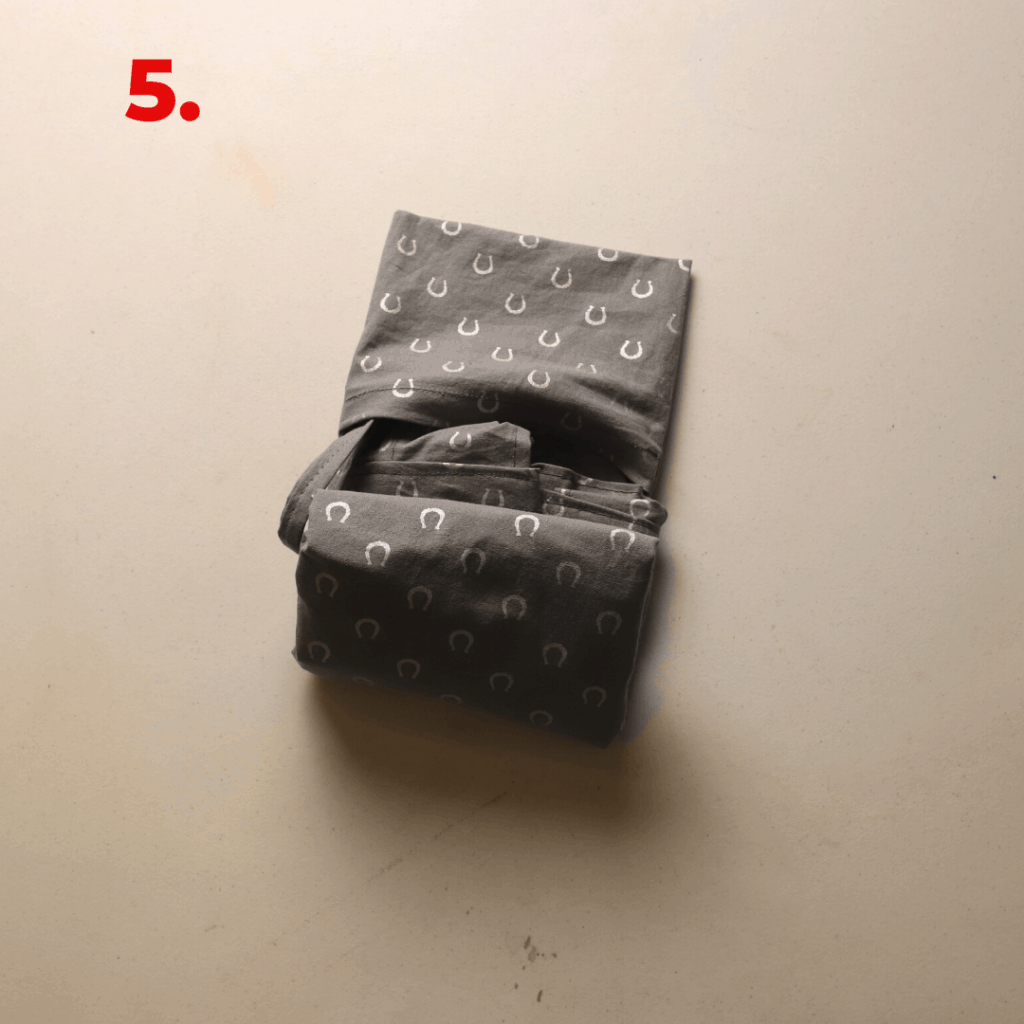
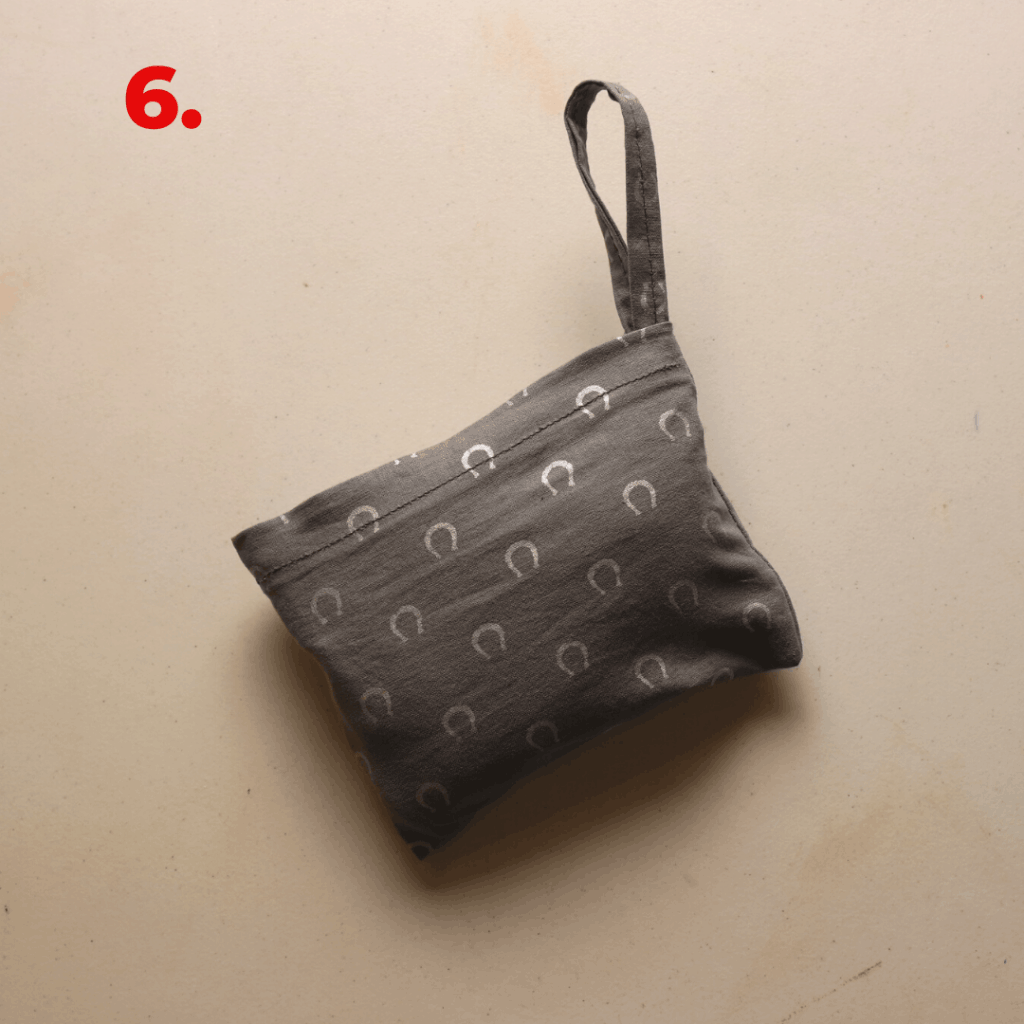
Folding into the small pocket
To fold the bag into the pocket, flip out the little pocket and attached loop first.
Fold both sides of the bag toward the center so it is narrower than the pocket, then fold up from the bottom several times to fit into the pocket. You can fold this any method you like as long as it gets small enough to fit inside the pocket.
I hope you enjoy sewing this bag. Check out the video tutorial below.
Foldable market bag sewing tutorial


One Comment
3M 9502V
Good job writing them in this blog post
Best regards,
Dinesen Raahauge