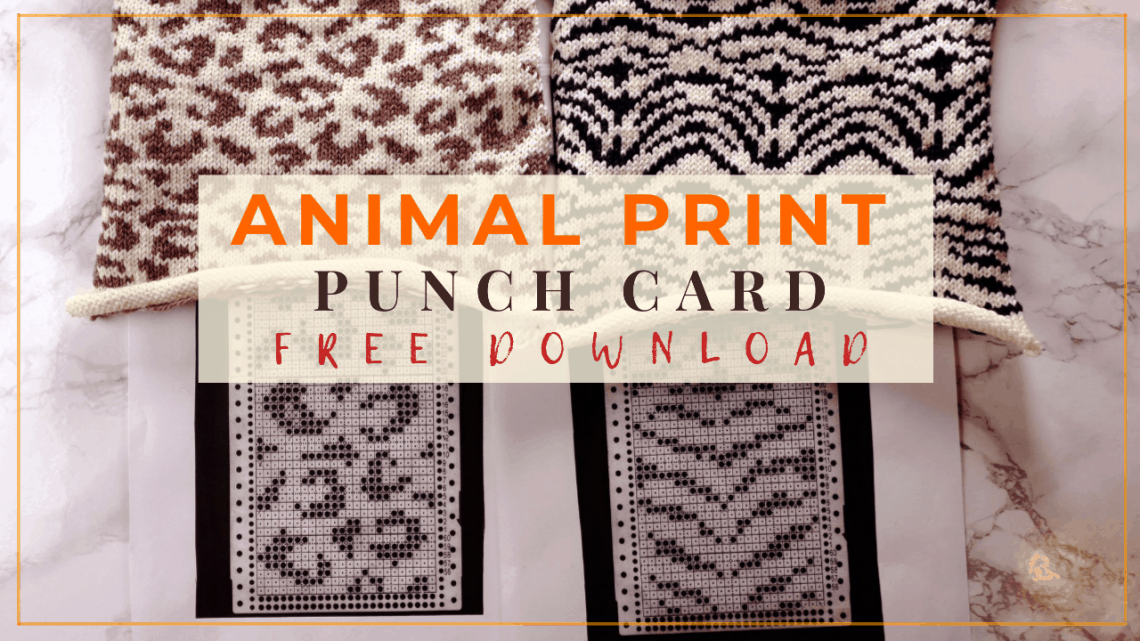
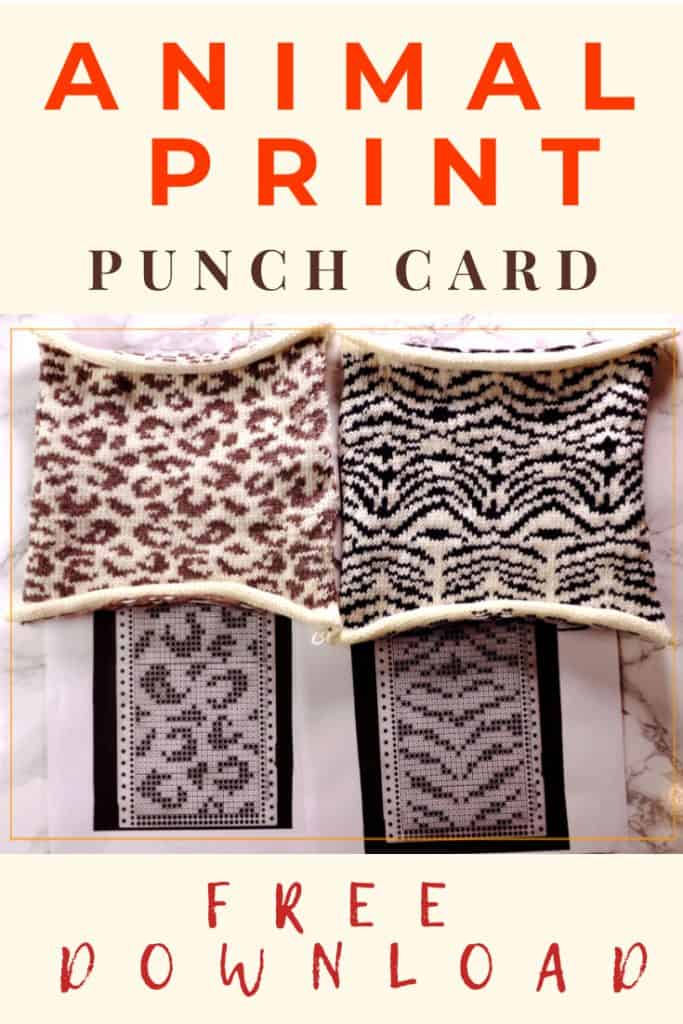
Animal print punch card design and free download for machine knitters
One of the best qualities of machine knitting is speed. You can knit a large fabric in a very short time. If you have a punch card machine or other electric patterning devices, you can knit patterns very quickly. One popular technique is Fair Isle. It is just 2 color knitting. I will show you how I design the standard punch card and how to knit it on a Brother knitting machine.
Free punch card pattern download — animal prints
Free animal PDF pattern download: Click Here.
You can use this chart for hand knitting, or punch your own card with these patterns. This will fit the Brother standard and bulky punch card knitting machine, and the other 24 stitches wide punch card knitting machines such as a Singer.
Watch our YouTube video for the animal print punch card
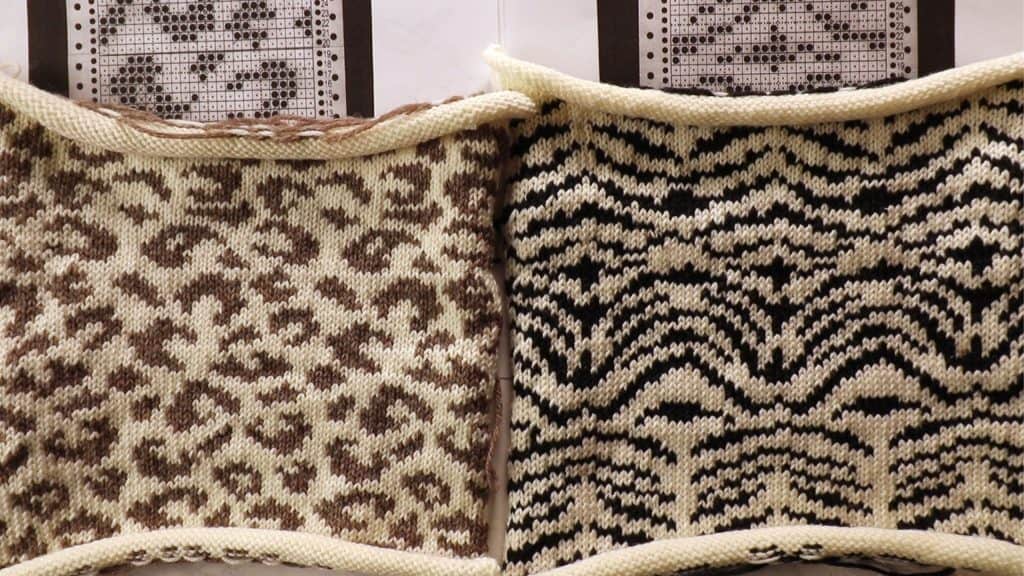
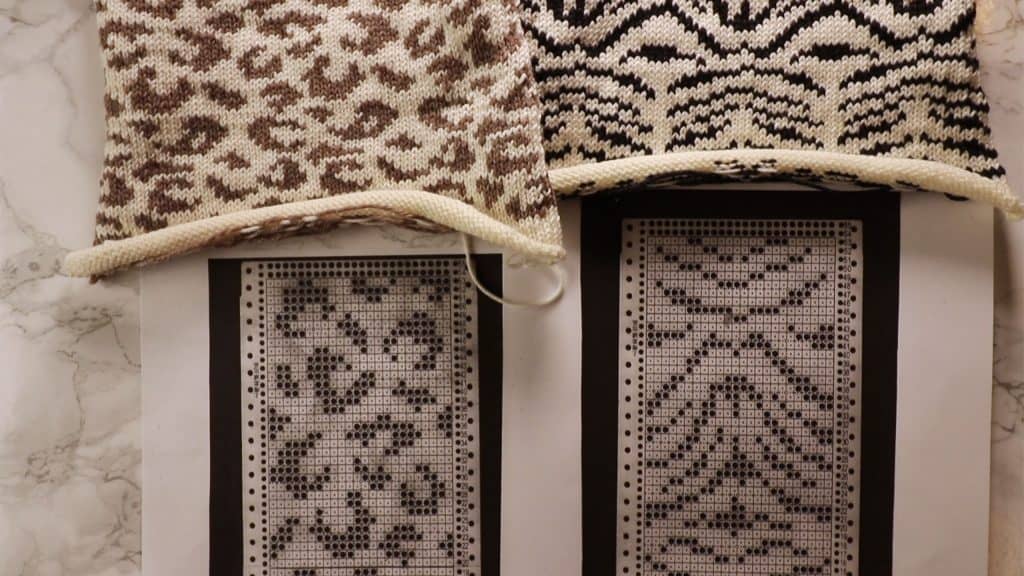
Punch card pattern design for machine knitting- Leopard and Zebra
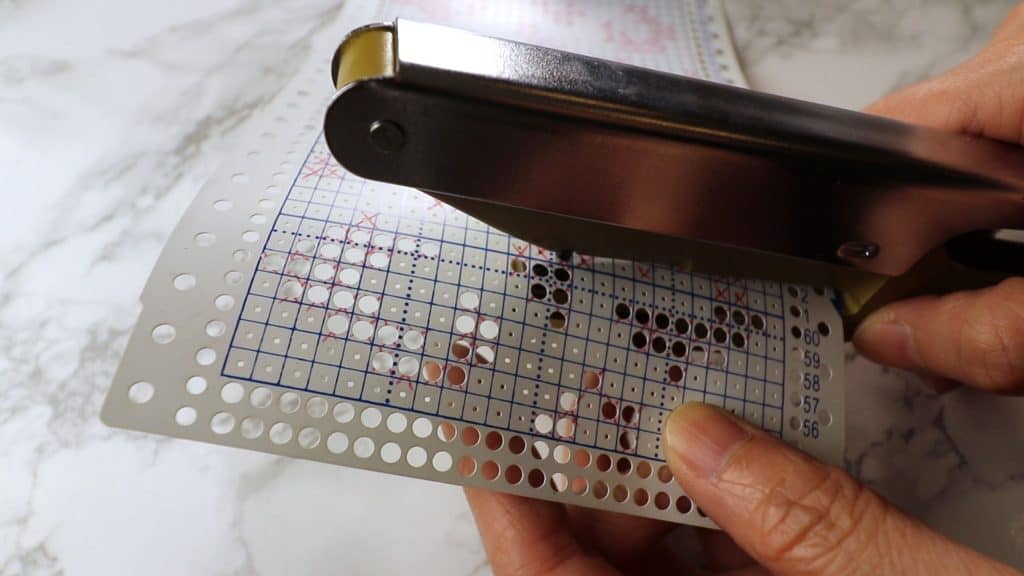
You can get some blank punch cards, second-hand punch (I use “handy punch”), and the connectors (small plastic pieces to connect the beginning and ending rows) from eBay.
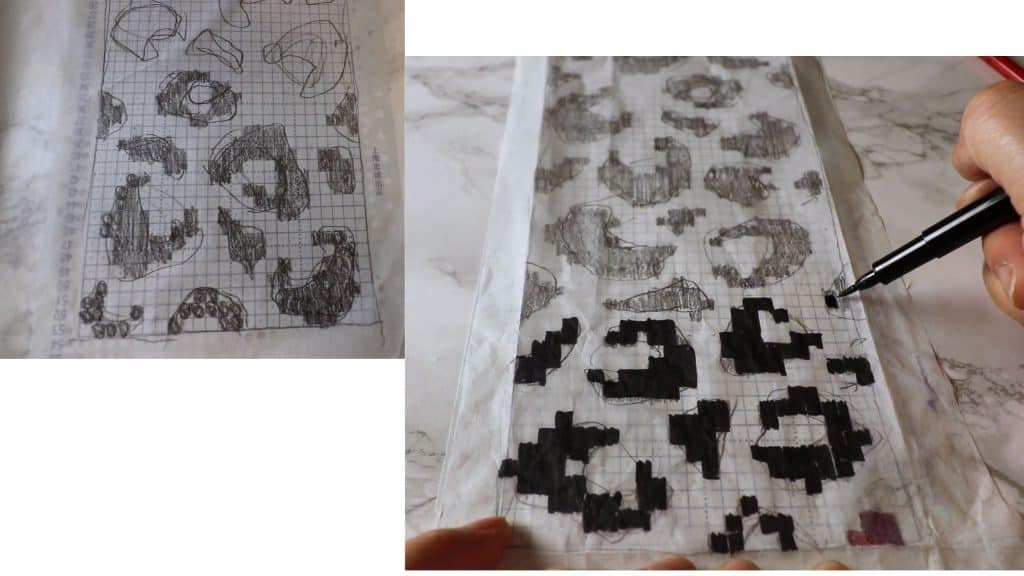
My first process is to look around the internet to find some inspirations. Overlay a piece of tracing paper on top of the blank punch card and start some pencil sketches.
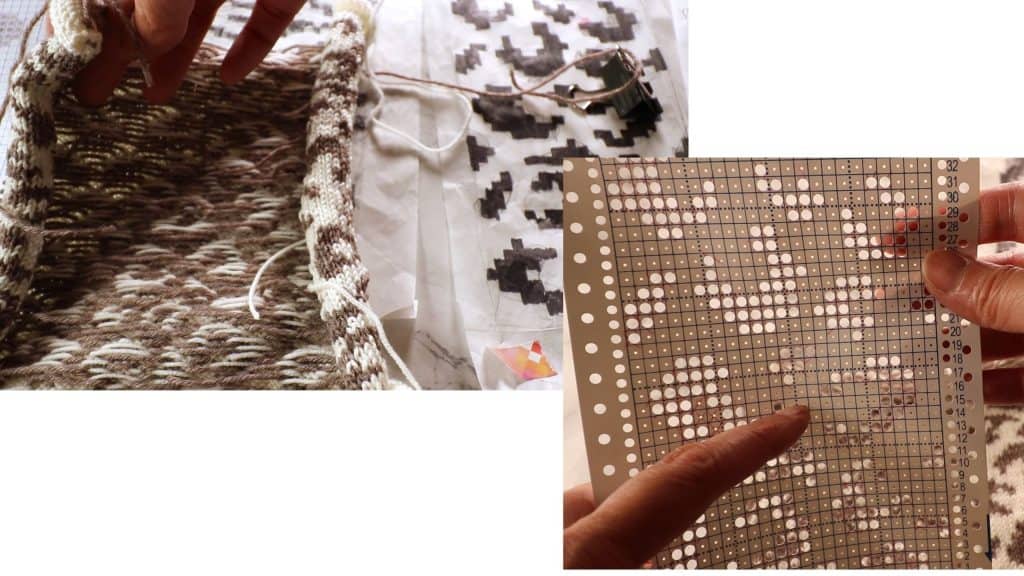
I use standard 24 stitch wide punch cards. It has 60 rows. You don’t need to use all 60 rows. Just cut off the extra rows, and punch the last 2 rows so the beginning and the ending rows will match.
After sketching, I color it black so it is easier to see the design.
To make sure the pattern will be continuous, I roll up the punch card both ways so the pattern will match at the beginning and the ending rows, and left matches right columns.
The point is to design the pattern so the top pattern is continuous of the bottom and the left is continuous of the right. If you are designing a single motif and not care about the continuous pattern, you don’t have to worry about this step.
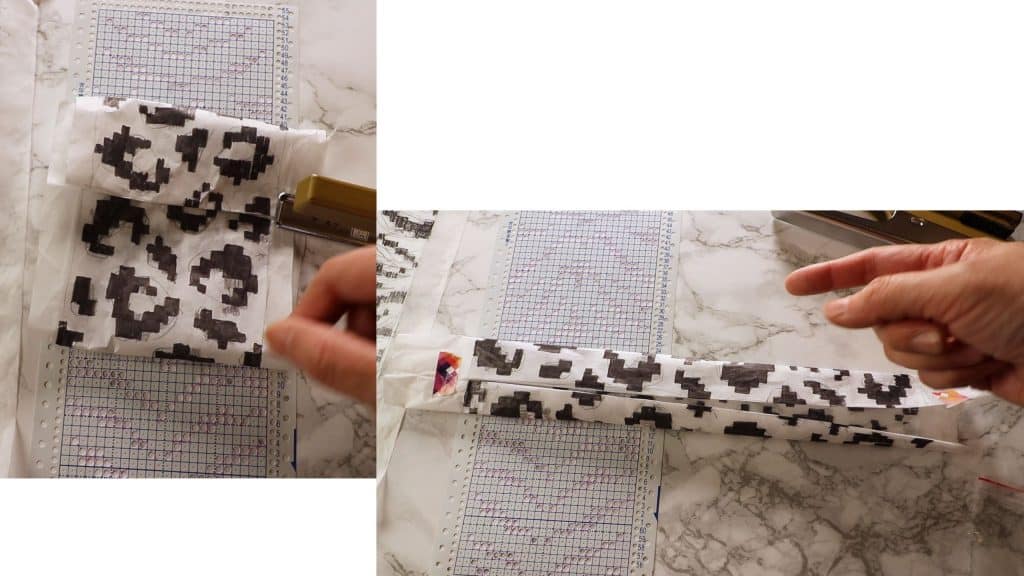
Place the sketched tracing paper below the punch card and hold it against the light source, you will see the pattern location. Just mark the pattern with a color pencil or pencil.

Punch holes with your handy punch. There are several types of punches you can buy. Even the cheap one works well.
How to knit a Fair Isle pattern with a punch card on a Brother knitting machine
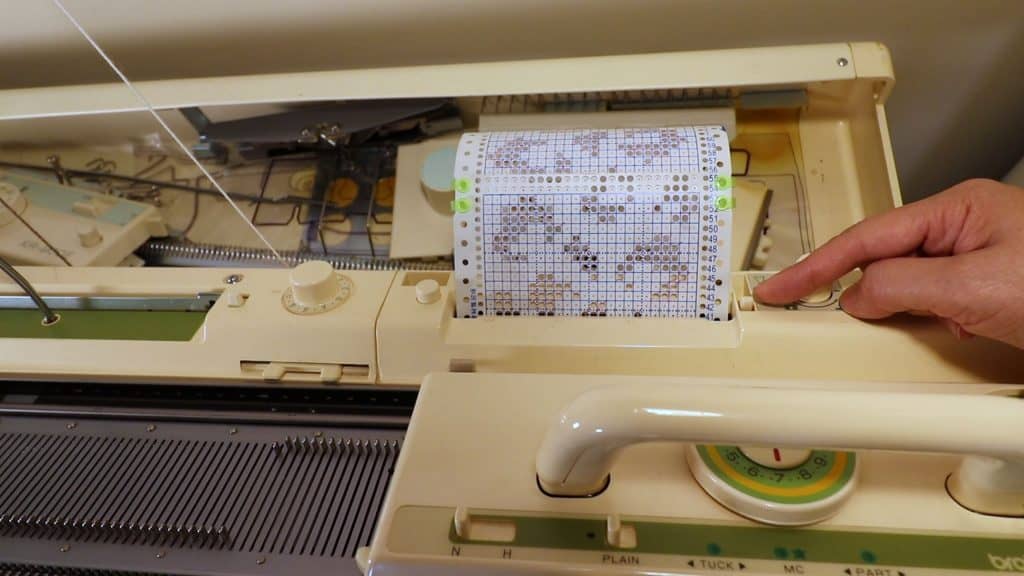
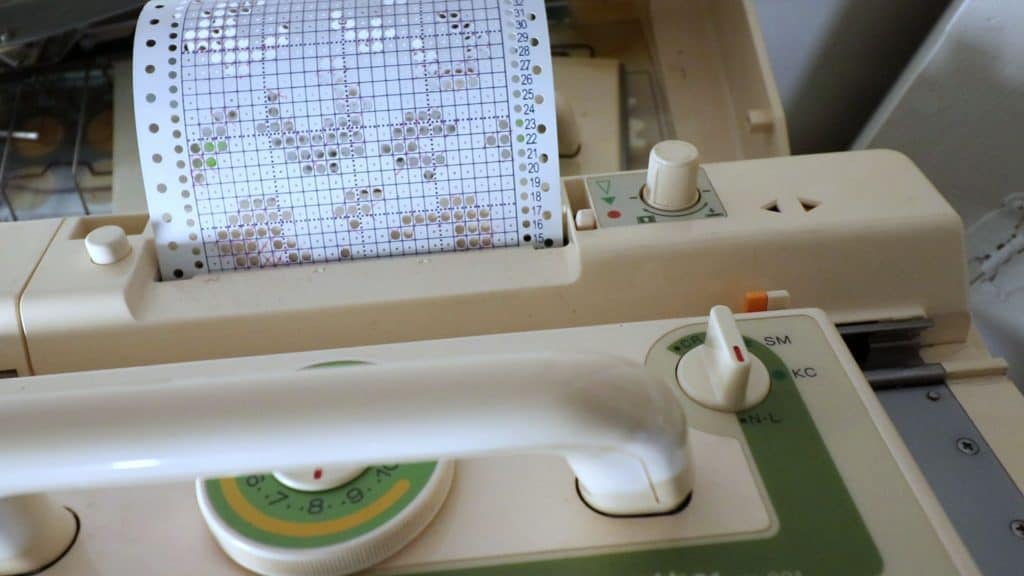
First, we have to insert the punch card to the device by turning the dial on the right side.
Connect the beginning and ending 2 rows together with a connector on each side. Now it creates a continuous pattern.
Move the lever to the lowest: red dot for pausing the punch card advance.
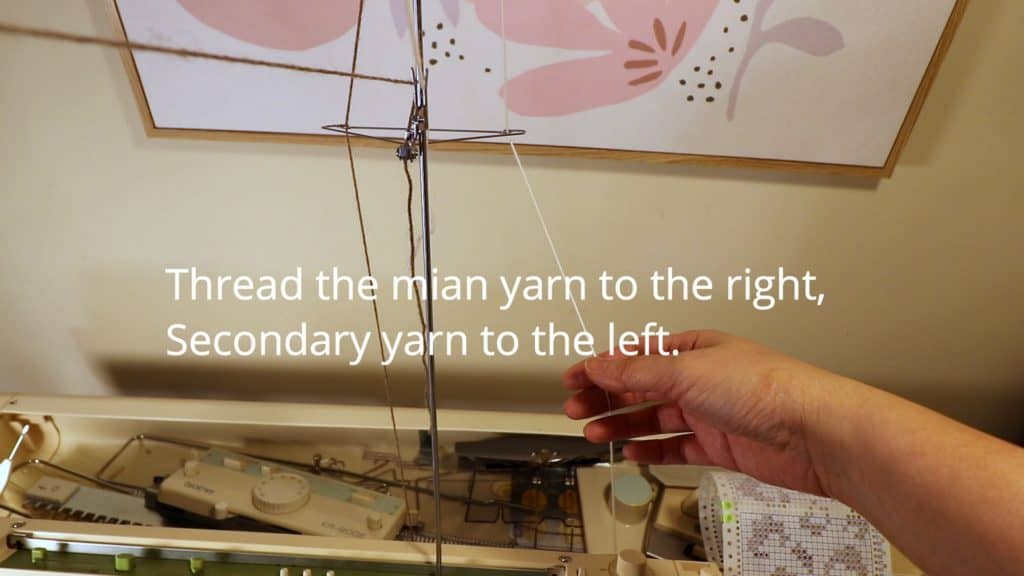
Thread the main yarn (background) to the right side of the mast, and the secondary yarn (pattern) to the left side of the mast. Clip the secondary yarn to the mast first. We do not need it yet.
Pull out as many needles as you like. I pulled out from L36 to R36, so I have 3 repeats of the 24 stitch pattern.
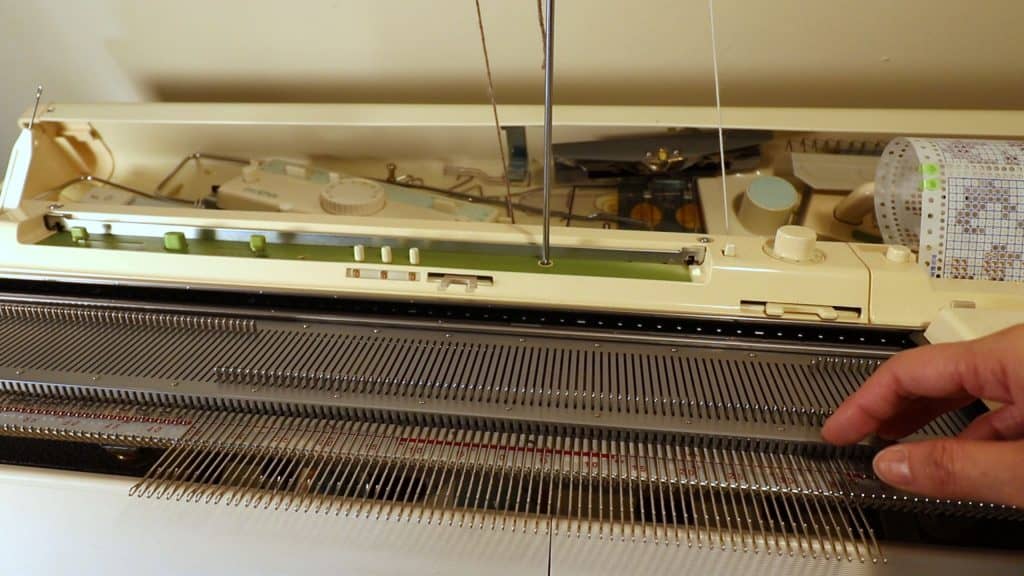
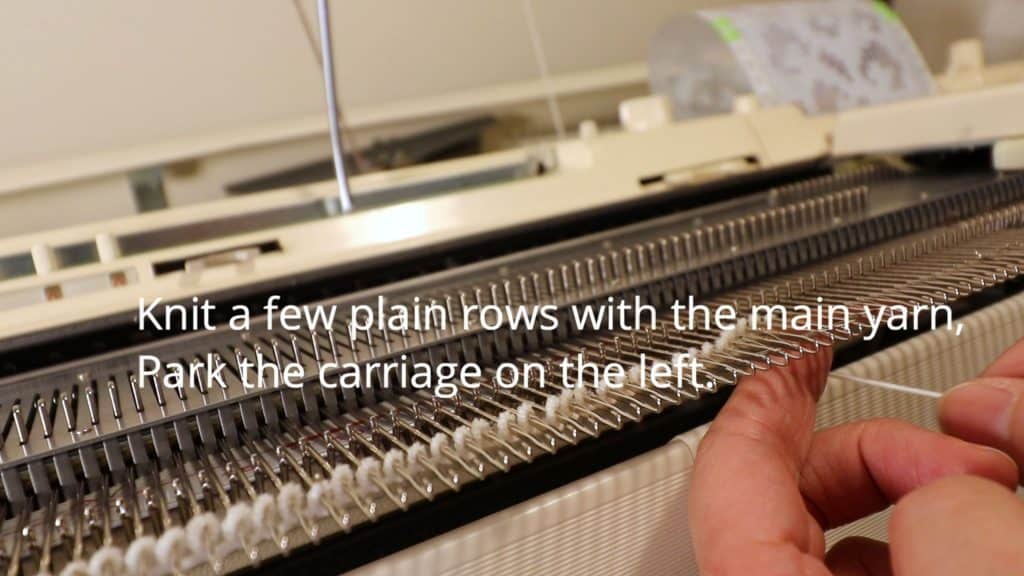
Cast on any way you like (I use e-wrap), and knit a few rows of plain stitches.
Park your carriage to the left side.
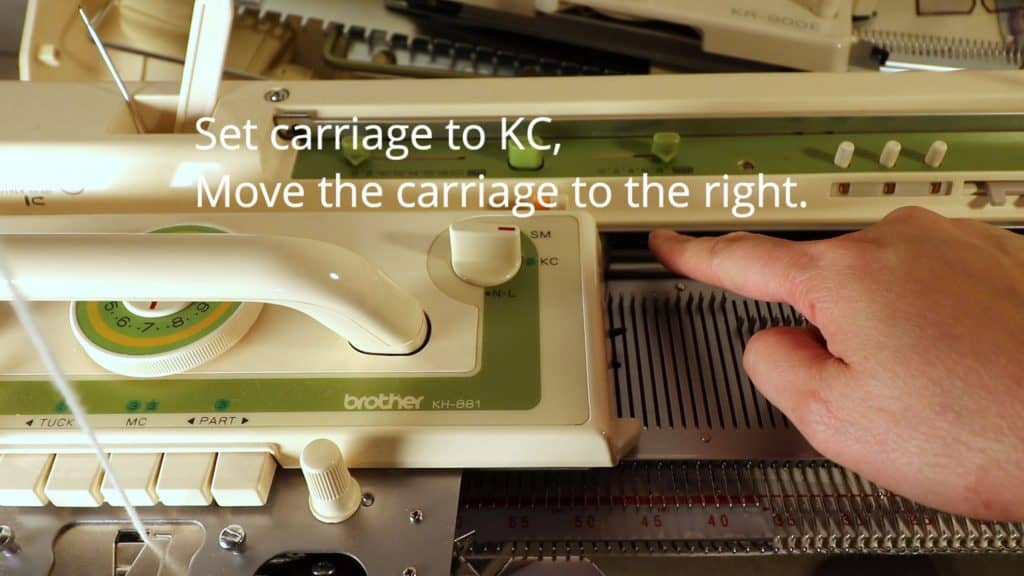
Set the carriage to KC (engaging the patterning belt), and move the carriage to the right. Needles are selected.
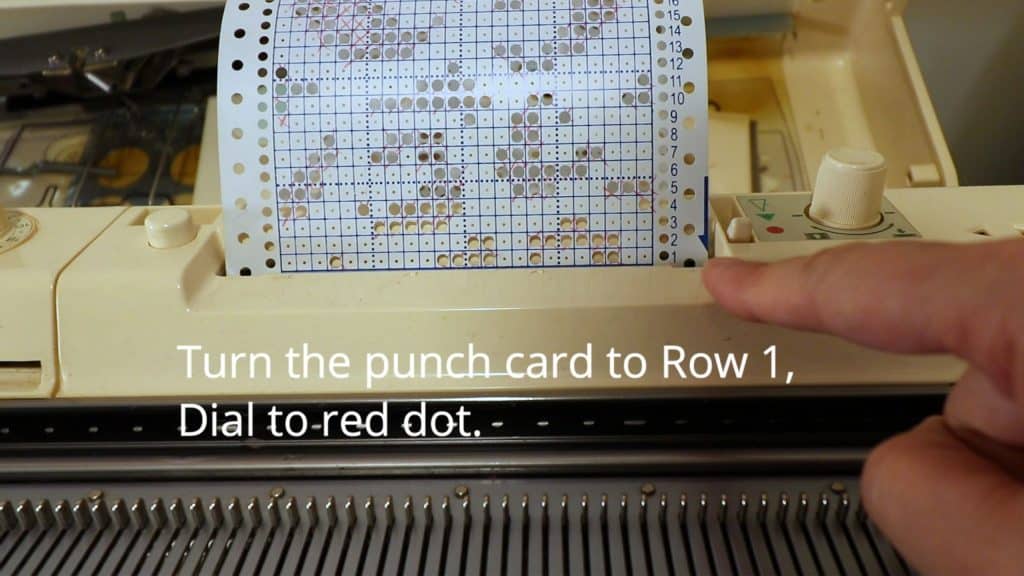
Turn the dial so the punch card starts with row 1.
The lever stays in the red dot (Not advancing the punch card).
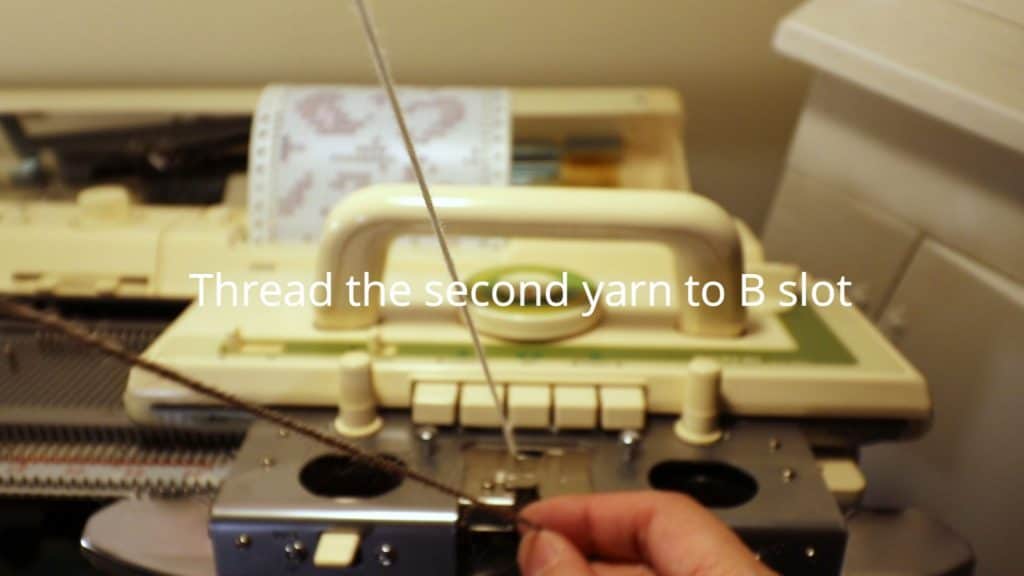
Thread the second yarn to the B slot in the carriage. (Slot A is for the main color yarn).
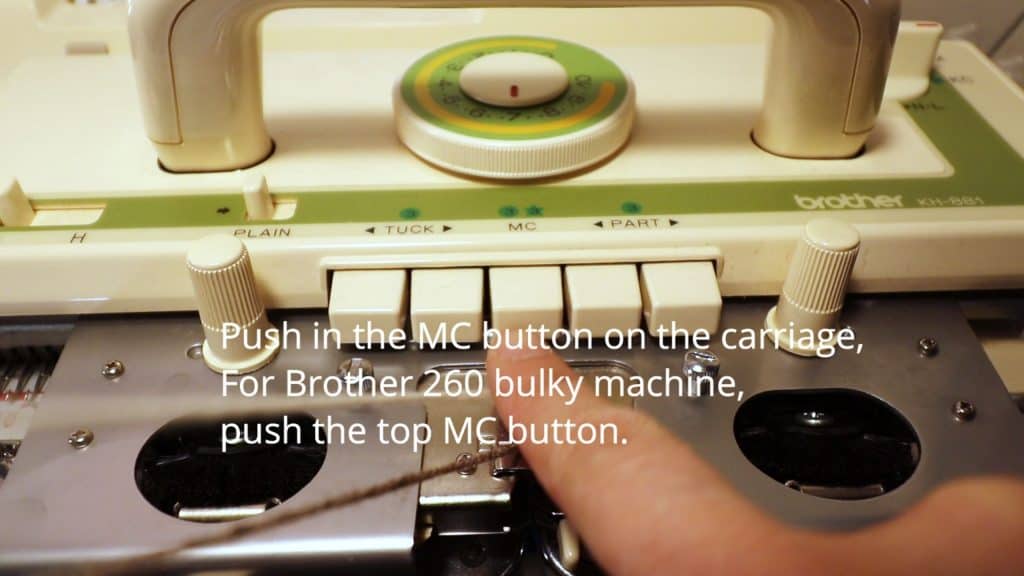
Push the MC button on the carriage for standard gauge Brother machine. For Brother bulky machine (KH260), push the upper MC button.
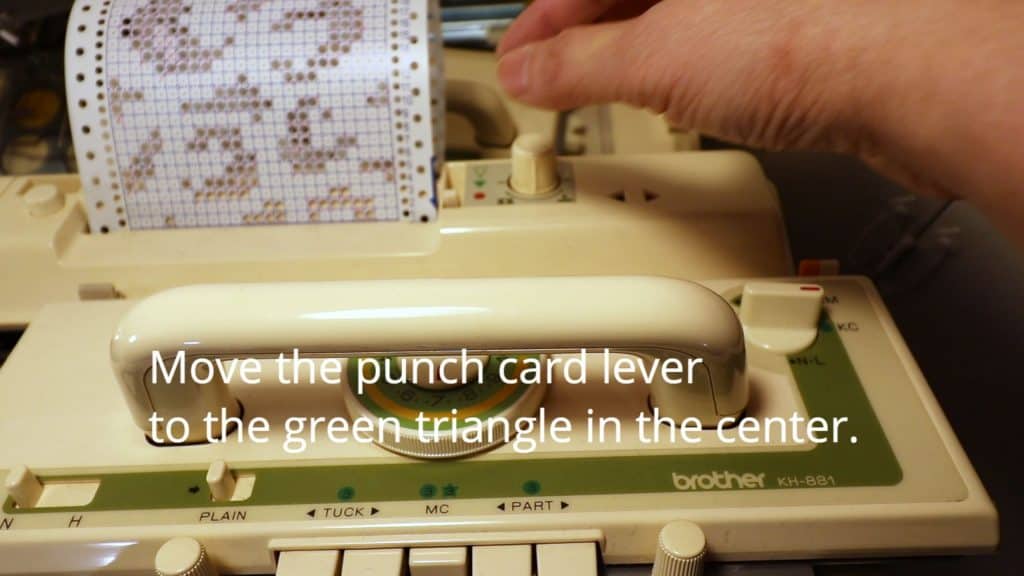
Now move the lever from the red dot to the green triangle in the middle.
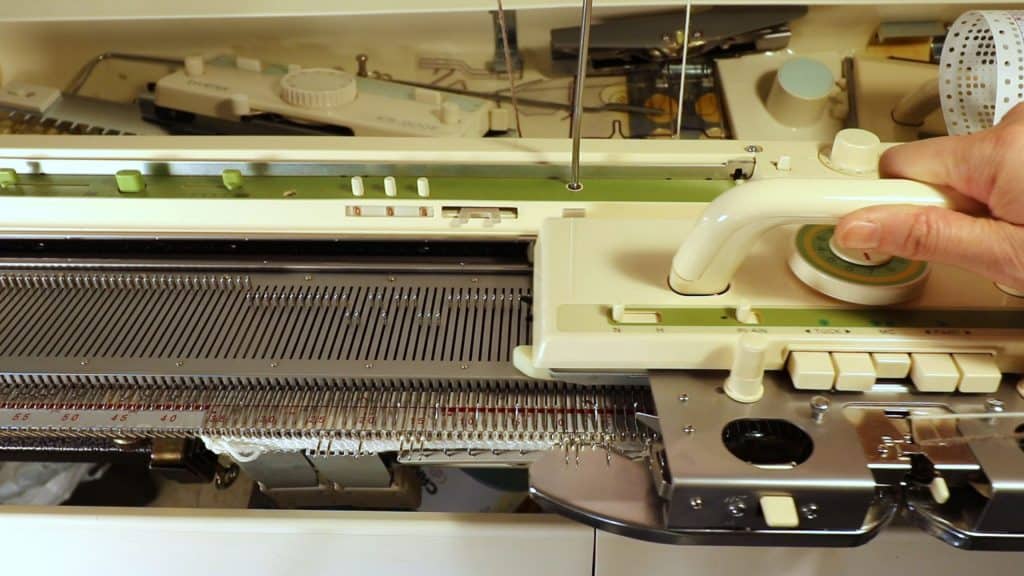
Now, we can knit back and forth until the length you like.
Don’t forget to add weights, and move the weights up as needed.
You will start to see the pattern forming. Remember this is the back side of the fabric.

Binding off
When you are ready to bind off, cut and remove the second color yarn first.
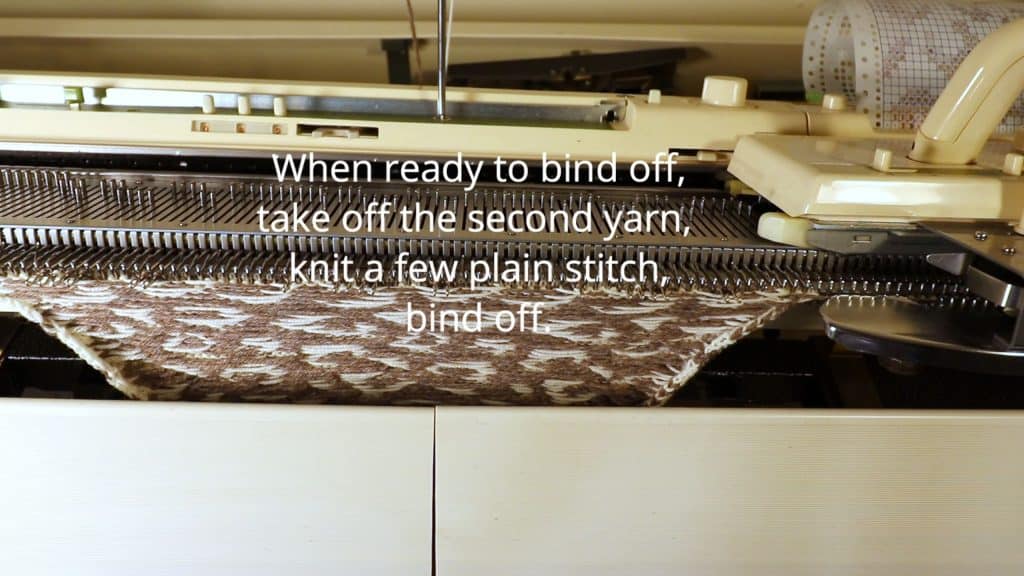
Change the carriage dial from KC to NL in the bottom for plain knitting.
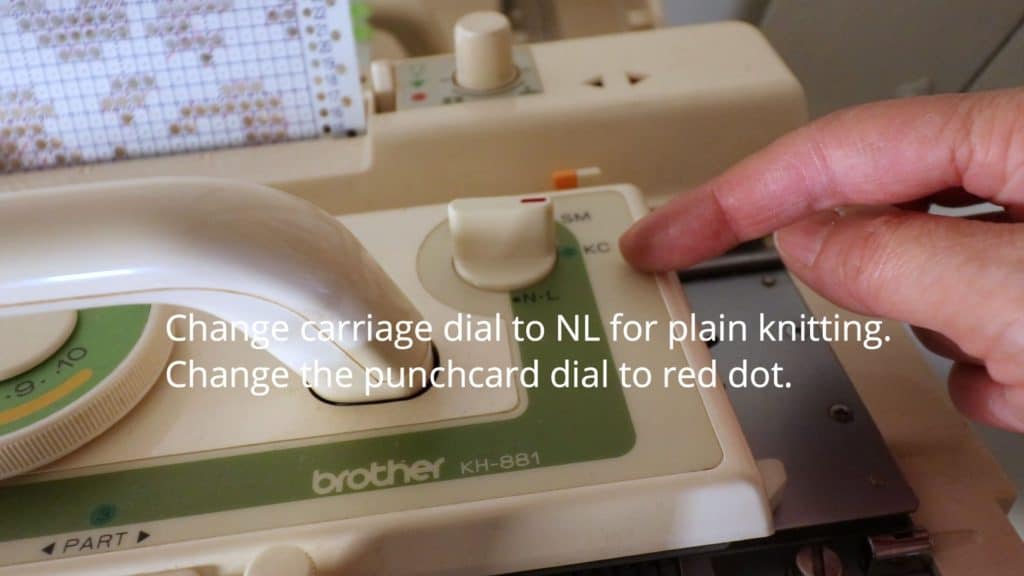
Punch card lever is back to the red dot.
Knit a few rows of plain knitting and bind off any way you like. Or knit a few rows of waste yarn and take off the machine.
The backside will have floats. To minimize the length of floats, you can punch more holes in the middle of the blank squares.
Final leopard animal print knitting sample off the machine.

Don’t forget your free PDF download by Clicking Here. Even if you do not machine knit, you can use the chart for hand knitting or cross-stitch.
Happy knitting!


You May Also Like
Lighter masks for summer with free pattern download (3 sizes)
Cardboard house making for guinea pigs or other pets
